A Grandma's spin on crafts, games, recipes & lifestyle

Month: October 2020

Pappy Got Boo-Booed! 🤣

One of my favorite annual Halloween memories is our house getting “Booed.”  The doorbell rings…the kids run to see who it is…instead of a person they find delicious Halloween treats festively displayed on the doorstep.  Quickly, everyone darts outside to see if they can catch a glimpse of who has left this Boo-tiful gift for them.  Sadly, those years have faded into the past for us.  But wait….we may be getting older but that doesn’t mean we can’t still take part in this Halloween fun!   So this year…Pappy got Boo-Booed!

You’ve Been Booed!

If you are not familiar with this FUN Halloween tradition, below are images of the 2 documents needed to carry out the plan:


There are a lot of fun images you can find on the internet but many you have to pay for.  I created these images and have included the link to download for free:

Once you read the page labeled You’ve Been Boo-ed, you will understand what all you need to do.  Basically, you need to print out 2 copies of each of these pages, put 2 goody baskets together and choose who your phantom will visit!  It’s that easy.  When you get visited by the phantom, then you need to put your copy of the We’ve been Boo-ed! page in your front window.

Now, you are probably wondering why this is titled Pappy got boo-booed!  As stated earlier, our days of enjoying this activity with our kids is long gone.  Enter our grandchildren!  I must say that I had not initially thought of doing this for Addi and Max until our daughter, Lauren, asked us to do so.  Our other daughter, Karleigh and I were the phantoms last year.  This year I asked Pappy to help out!

We made a grand plan of how to deliver the goodies to our grandchildren without getting caught.  Let me tell you, if you have seen their house, you understand this is no easy feat.  It’s guarded like Fort Knox, hard to get in and out of and windows galore.  Need I remind you that we are now 50+!!!  But we are old athletes.  We can do this!  Right????

Pappy Got Boo-Booed!

So, we park far away and decide to tackle this feat on foot.  We trek to the front porch, crawl under the windows, ease up to the door, place the goodies on the step, knock and run!!!  WELL, Pappy steps in some mud and sprawls face first onto the sidewalk.  Amid concern (well, a little anyway) and much laughter, he rolls like the young quarterback he once was and hightails it out of there!  We made it safely to our hiding place.

Did I mention our son-in-law got home while all this was going on.  I wish you could have seen the confused look on his face.  We wait for what we believe is a good amount of time to trek back to our truck and head home.  Both winded and standing by our get away vehicle, Brad looks over at me sheepishly and states, “I don’t have my keys!”

Seriously?  We have to go back to the scene and retrieve said keys from somewhere in the mud!  Yes, our son-in-law is still sitting in his truck as Brad creeps back by and searches for the lost set of keys.  Do you wonder what he is thinking about his in-laws???

We finally escaped, unseen by the grandkids I might add!  However, as you guessed, Pappy did not remain unscathed by this little incident.  YES, he got a Boo Boo!

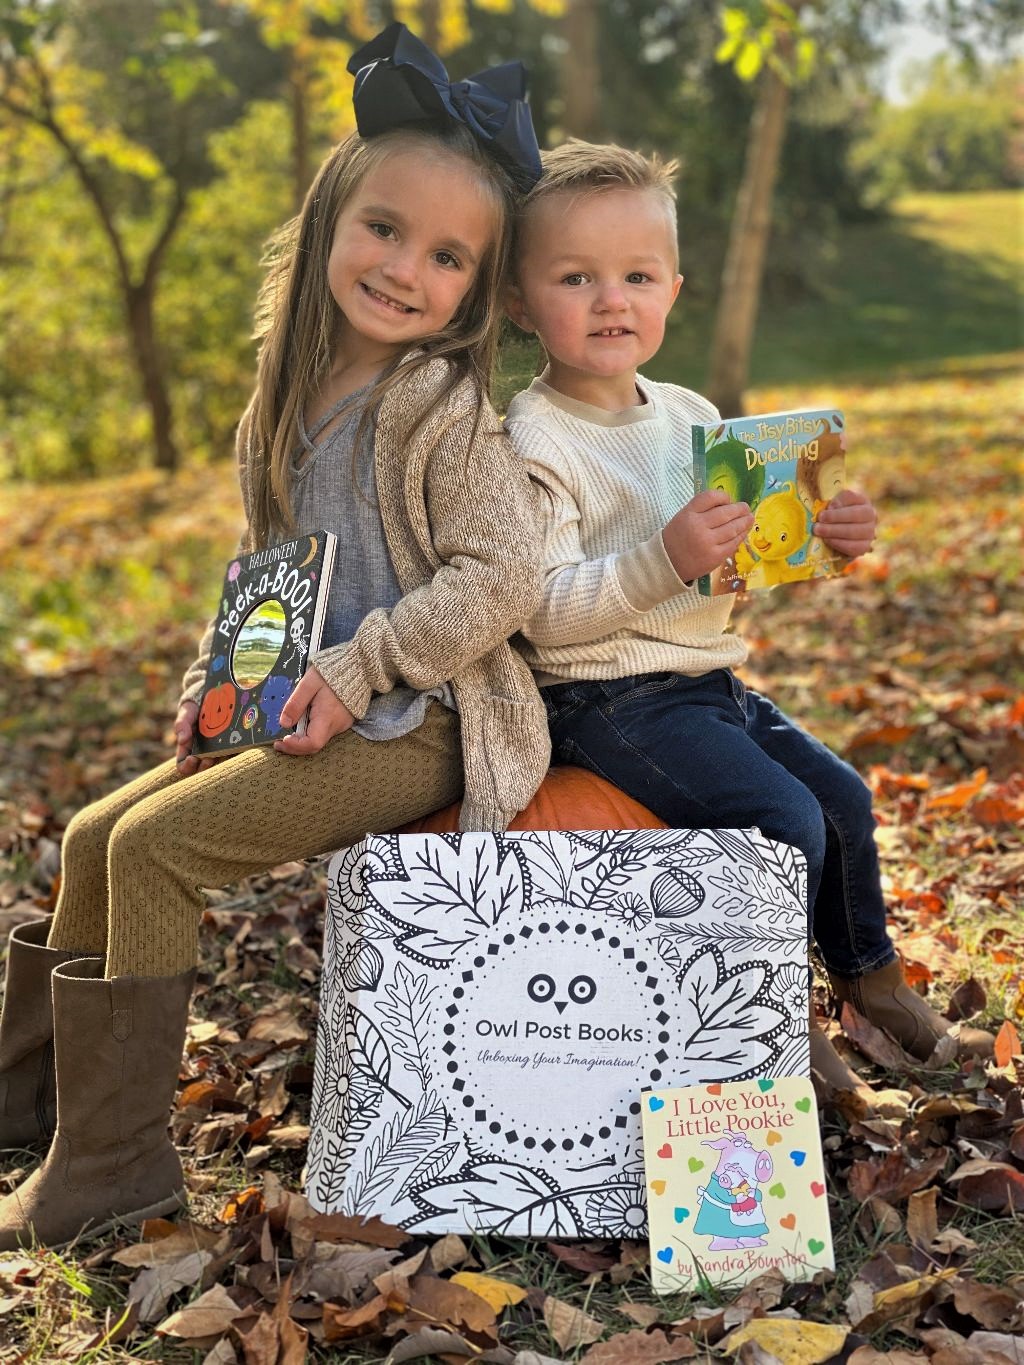
Suffice it to say, we are adding new “You’ve Been Boo-ed” memories to our family photo albums.  I just wish I had taken my camera on this little escapade to capture Mimi and Pappy to add to the photo album along with these cuties!

It is now late in October, but if you have never done this before, please remember this for next year and add it to your Halloween family traditions.  Hopefully, you like the fun images I created and will use those next time!

Happy Halloween!


Spooky Stuffed Pepper Pumpkins

Have you planned your Halloween night family dinner?  I mean, you still have a couple of days to figure it out, right?  Well, if you are still searching, I have a great idea for you.  Spooky stuffed pepper pumpkins were on our menu last night and wow!  Seriously, the whole family loved them!  And, if that sounds good, let me fill you in on the rest of the kid-friendly Halloween menu!

Kid’s In The Kitchen ~


What I love most about this menu is that the kids were able to get involved.  Aprons were thrown on (I think this is pretty important for these recipes I’m about to share) and the fun began!  I should mention, however, that a little prep was done before the kids arrived.  We were packing a lot of stuff into one night so that was a huge help!

Stuffed Pepper Recipe ~

FOLLOW THIS LINK TO PRINTABLE VERSION OF STUFFED PEPPER RECIPE!

As mentioned earlier, some steps were done before the kids arrived.  It is important to get some of the cooking done ahead to make it easier for them to participate!  Otherwise, they will quickly lose  interest.  Here is what I did earlier in the day:

EARLY PREPARATIONS ~
  • Slice tops off of bell peppers
  • Cut jack-o-lantern faces in the peppers
  • Boil peppers
  • Cook meat mixture

The kids were very excited to stuff the peppers, add the cheese on top and find the right bell pepper top to fit on each one.  Finding the tops were somewhat like a puzzle which makes it even more fun!  I then placed them in the oven to start cooking and make room for the snake breadsticks!

SNAKE BREADSTICKS ~

We followed a festive breadstick recipe that we found on Pinterest from Flawlessfood.co.uk.  They give very detailed instructions to make this delightful Halloween side dish.  It is a perfect accompaniment to the spooky stuffed pepper pumpkins.  Follow this link for Snake Breadsticks from Flawless Food!

Our breadsticks did not turn out as professional as the ones  from Flawless Food, however, the kids had a blast making them.  If you prefer a deeper color, please follow their directions and paint the wash on for the last 5 minutes of baking.    This being said, I wanted the kids to be able to complete this step, so to keep any burns from occurring, I had them paint the breadsticks before baking.  They still turned out adorable and the kids were delighted when they came out of the oven.

OREO TRUFFLE BATS ~

Many of us have already discovered this sinful dessert of Oreo truffles.  What is even more amazing is while they are always such a HUGE hit, they are truly so EASY to make.  We went a step further for our Halloween themed dinner and made them into bats.  This was achieved with a little help from One Sweet Appetite.  YOU ARE DEFINITELY GOING TO WANT TO PIN THIS BAT OREO TRUFFLE RECIPE FROM ONE SWEET APPETITE!!

Below you see Addi’s  Oreo truffle bats!  *We have officially lost Max’s attention at this point!  😂 Please note that if you are making these for something other than a Hallowhttps://mimiblog.org/aob6een family dinner, you may want to do these on your own. 😁

She truly had so much fun with every step of this recipe, from crushing the oreos and rolling the dough into balls to adding the finishing touches.  We had bats with different eyes, bats with 1 eye, and bats with 3 eyes.  Much laughter was heard while creating these masterpieces.  Since we had such a packed evening, we tried to concoct our own method of attaching the bat wings.  Next time I will definitely follow the instructions from One Sweet Appetite.

Addi was so perplexed on how we were going to make the bat wings.  I pulled out the wax paper and she started laughing.  “Mimi, we can’t eat paper!”  I then drew bat wings on the wax paper.  My little princess was understandably still confused.  It was when I taught her how to cover the bat wing stencils with melted chocolate that it started to make sense.   She was amazed that we could create our own chocolate images this way.  Once again, follow the link above for more detailed instructions on this fun step!

Needless to say, we had a VERY busy night filled with festive Halloween recipes!  We topped it off with the annual pumpkin carving.  The kids went home with full bellies and carved jack-o-lanterns.  More importantly, we created another fantastic evening of wonderful family memories!

Happy Halloween!


Making Halloween Gingerbread Houses With Kids

Gingerbread house making and decorating has found its way into the month of October.  What a fun Halloween craft idea to do with kids!   Whether you choose to make everything from scratch or select from the fun Halloween gingerbread house kits in stores, it will be spooky fun!  You really can’t go wrong either way.  A fun day is ahead when you plan on making Halloween gingerbread houses with kids!!!

The Basics of Gingerbread Houses ~

You must first decide if you are going to make gingerbread cookies from scratch or use an alternative ingredient, such as graham crackers.  Either way you choose to go is great and may be dictated by what your family likes.  Obviously, if you are making gingerbread cookies, you will need to do that ahead of time.   Here is a GREAT gingerbread cookie recipe for you to print out!   Create some extra family fun by having the kids throw on their aprons and do the baking with you!

What You Will Need ~

Plan ahead on what toppings you want to have available.  You may already have some great ideas on what will be included, but if help is needed, here are some festive ideas:

  • gumdrops
  • candy corn
  • pumpkins or jelly pumpkins
  • candy eyeballs
  • baking chips in several flavors (chocolate, white chocolate, butterscotch)
  • M & M’s (holiday ones are a plus!)
  • chocolate kisses
  • candy skeleton bones
  • various colors of icing in tubes or plastic bags
  • candy buttons

Here are some handy links to some of the items that are a bit harder to find in the stores:

The “Glue” ~

Next, you need to decide what you want to use for the “glue.”  Probably the most popular option is icing.  You can make your own or use store bought.  Be careful to not use a super creamy icing, as it is harder to make things stick!  Another option is burnt sugar.  I love Mel’s Kitchen Cafe’s post on this, which includes the directions for burnt sugar.    Check out Mel’s Kitchen Cafe post on haunted houses using burnt sugar!  *Might I suggest you save this recipe from her post as well.

Plan Ahead for Making Gingerbread Houses ~

Plan ahead and have all of your ingredients set out in bowls for everyone to easily reach.  It also helps the kids get their creative juices flowing when they can see all of the items they have to work with out in front of them.  Of course, it makes it even more fun if you serve a fun Halloween drink in a festive cup to enjoy while they are building.

Remember, the idea is not perfection when you are making these works of art with your kids.  The fun is in letting them make decisions and then you all get to enjoy it together!  Just have FUN making Halloween gingerbread houses with your kids!

Halloween Zombie Carrot Cake

Wickedly delicious “zombies” are heading your way….and just in time for Halloween!  Creepy food ideas are running rampant right now so I got the creative juices flowing to try my hand at something new.  The wonderful thing about this recipe is that it is simple to make and yet still festive enough to share with company.  Most people love carrot cake….so they have to love Halloween Zombie Carrot Cake too then, right???

This idea unfolded when I received a wonderful delivery of Edible Beach Chocolate Rock Candy from A Southern Girl’s Needs.  They sent these wonderful chocolates to me to sample in return for a review of their product.  Well, let me tell you…I love them!  There was such care in the packaging and shipping that I was immediately impressed.  What a surprise I had after opening the box to find these cute little confections.  This is definitely a small business that cares about their customers.

These perfect little chocolates  look exactly like rocks.  There is a nice variety of color tones which gives them a very realistic look.  We all loved the nice crunchy outer shell filled with delicious chocolate yumminess.   I, of course, had to make these “beach” chocolate rock candies into “graveside” rocks to create a fun Halloween cake.  I shopped for a couple of extra toppings to help create a fun grave site effect.

Making the Halloween Zombie Carrot Cake~

This step was easy as I purchased a carrot cake mix and followed the directions on the box.  After mixing the cake mix, I divided the batter into 2 prepared 9″ round cake pans and baked according to the directions.

Cream Cheese Icing~

We prefer homemade icing…and a lot of it!  I used the following recipe, and increased all of the measurements by 1/2.  Many times I double recipes, but I felt a little less than double would suffice for this cake.  It turned out that I had a little left over.  I put the leftover icing in a large zip lock baggie to use for my next small project.

Ingredients:

1 stick butter – softened

8 oz cream cheese – softened

1 tsp vanilla extract

1/4 tsp. salt

4 cups powdered sugar

*Reminder, I increased all ingredients by 1/2.  If you do not like a lot of icing, then the original amounts are sufficient!

Instructions:

  1. Mix softened butter and cream cheese in a bowl until creamy.
  2. Add vanilla extract and salt…continue to mix.
  3. Gradually add powdered sugar until completely combined

*If you need it to be a bit thicker you can add a small amount (tsp. or less) of cornstarch.

Assembling the Halloween Zombie Carrot Cake~

Once your cakes have finished baking, let them cool completely.  Carefully remove first cake from round cake pan and place on your desired serving dish.  I turn the cake “upside down” on the cake platter to have the smooth portion on top (which is the bottom of the cake).

Completely ice the sides and top of the first cake.  Repeat with the second cake…carefully placing it on top of the first layer.

You are now ready to decorate.

Other Ideas for the Edible Beach Chocolate Rock Candy~

  • Ice Cream Toppings
  • Displayed in Candy Dish as Graveyard Gravel Candy
  • Added in a Festive Fall Snack Mix
  • Packaged with a Gift and a label, such as “My Dad Rocks!”
  • Pudding Cup Dessert Topping such as Dirt Pudding
  • Dirt Topping for Flowerpot Cakes Made in Terra Cotta Pots
  • Gingerbread Houses
  • Bag of Coal Treat

Check out A Southern Girl’s Needs Website Here….

We still have plenty of time to enjoy this wonderful month of Halloween.  Get in that kitchen and create some spooky family delights!


Children’s Book Club Subscription

What is not to love about a monthly subscription box?  I remember as a kid my mom would order different monthly magazines for me.  Excitement was high on the days those magazines hit the mailbox.  Memories of running into the house with my coveted treasure still makes me smile.  I would head straight to my bedroom to explore what this month’s book had in store for me.  Fast forward to the 21st century.  NOW, we have BOXES!  Boxes filled with all sorts of treasures and surprises!  Oh, how I have fallen in love with the children’s book club subscription from Owl Post Books!!!

Let’s face it…we love to spoil our children and grandchildren.  Nothing makes me happier than to see the faces of my grandchildren with a smile plastered across their eager faces.  They jump around and ask, “Can we open it now, Mimi?”   I truly love it as much as they do!  Not only do they love the books, but they have already become accustomed to the idea that a craft is included as well.  Th  Everything is all right there in one cute little box without having to prepare a special activity.

October Books ~

This month’s books included:

  • I Love You Little Pookie ~ This is a delightful book that teaches love.  It offers many opportunities for kids to hear the words “I love you.”
  • The Itsy Bitsy Duckling ~ I love singing this book to the tune of Itsy Bitsy Spider – the kids love this.
  • Halloween Peek-A-Boo ~ This was our favorite this month.  Each page has a “spooky” Halloween character.  They challenge the child to mimic their “frightening” look in the provided mirror.  Many belly laughs were shared while each child tried this!

Continue reading

Rare Halloween Blue Moon

As if 2020 hasn’t been crazy enough….October 31, 2020 will showcase a rare blue moon!  What is a blue moon?  When a second full moon illuminates the sky in the same month, it is referred to as a blue moon.  It’s not actually blue in color…it is just so uncommon that it was given this special name.  I’m sure you have heard the saying, “Once in a blue moon.”  That saying is obviously used when things are rare!  We brought October 1, 2020 in with the Harvest Moon and will be saying goodbye to October on October 31 with a rare Halloween blue moon.

There are many different thoughts regarding this phenomenon occurring in 2020.  I like to think of it as Halloween is going to be a little different for us this year, so we are being given this extra little treat!  Instead of trying to blur our thoughts with another weird happening…let’s celebrate this unusual experience.

Enjoy a Cocktail ~

Gather up your festive drinkware and make a batch of Blue Moons.  Cocktailsandshots.com has a festive recipe for the Blue Moon here!   Of course, you can also stock up on the Blue Moon Belgian White!

For a festive non-alcoholic drink to mix up for the family, try this link:  Blue Moon Frozen Punch Recipe by Momskoop.com

Make Some Snacks ~

There are so many different treats that you can buy that are already blue in color.  But let’s get crazy and make some fun “blue” snacks for the family.  They don’t have to be “moon” themed, but it will be extra fun if you create some recipes that still have the spooky Halloween flair to them while still being blue:

Poison Halloween Apples that are blue-purplish in color….perfect!!!  Follow this link for awesome blue/black candied apples by wannabite.com.  Wanna Bite has done a fantastic job with this wicked recipe:

Blue Monster Popcorn is another fun idea!  Check out the Blue Monster Popcorn by Smart Party Planning!  The whole family will be sure to love  this monster popcorn recipe by Smart Party Planning:

Continue reading

Fun Halloween Dinner Ideas

It’s very important fill those bellies of your little ghosts and goblins before they head out trick or treating.  However, those kiddos are usually so excited about filling those goodie bags that they would prefer to skip the healthy meal part.  Parents can alleviate this issue  by preparing a spooky dinner to entice them.  Make Halloween fun before the haunting begins by making some of these fun Halloween dinner ideas!

Feet Loaf ~

Do you have a favorite meatloaf recipe your family already loves?  You can still follow that recipe, however, once your ingredients are all mixed up, you will shape the meat into feet.

Shaping the feet:

Shape the feet, bringing the back up to form the top of the ankle.  Then snip small sections to create toes and spread them out a bit to keep them separated while baking.  Hollow out the top of the ankle and place half of an onion in the hollowed area to keep ankle formed.  This also adds extra flavor from the juices of the onion as well.  Cut 10 small sections of onion to create toenails and place one on each toe.  Drizzle some ketchup around the ankle where you have placed the onion.

Bake at 350 for about an hour or until cooked through and browned.

Frankenstein Corn Dogs ~

This simple recipe uses frozen corn dogs.  Make a simple egg wash of 1 egg and 2 Tablespoons of water.  Mix in green food coloring until you get a nice dark green  color.  Cover the entire corn dog with the green egg wash and bake as normal.  Lightly coat the top of the corn dog in honey and then roll in crushed black tortilla chips to create the hair.  Push pretzel pieces in the sides of corndog for arms.  Use candy eyeballs and either black olives or more black tortilla chips to create the mouths.

Make an easy side dish of green beans and corn.  Top with a couple of plastic eyeballs for a spooky finish.

   ⬅Don’t have plastic eyeballs???  These are so realistic and eerie!

Breadstick Spider Bowl ~

Use a loaf of frozen bread dough for this eerie delight.  Follow directions on package to thaw out dough.  Divide the dough into 8 smaller balls, 1 medium sized ball and 1 larger ball.

Roll out the 8 smaller sections of the dough into long breadstick shapes.  Then fold in half to form the legs and place on greased baking sheet.  Let rise according to directions on package.  If you desire, season with garlic powder, grated parmesan cheese, seasoned salt and red paprika.  Bake at 350 for 8-10 minutes or until a light golden brown.

Using the remaining dough, form 2 balls, one larger one for the body and a smaller one for the head.  Let rise according to directions on package.  If you desire, season as stated above.  Bake according to package directions until they are a light golden brown.

Let legs and body cool.  Place 2 black olives in the head for eyes.  Cut 8 small incisions along the side of the body to anchor the legs.  Cut out a small circle in the body make room for bowl of nacho cheese sauce.

Monsterghetti ~

Make spaghetti as you normally would, with the exception of dying the noodles to the color of your choosing for noodles to soak in.  Once noodles are prepared, place a heaping spoonful on plate, top with meaty spaghetti sauce and 2 olives for the eyes and voila, you have monsterghetti!!!

Festive Halloween Serving Ware ~

Of course, you have to finish off your fun Halloween dinner ideas with a cool serving platter.  There are so many to choose from, whether you want simple or fancy.  Here are some great deals below:

Make the rest of this month fun celebrating Halloween in every way you can.  Make these fun Halloween dinner ideas leading up to Halloween as well as Halloween night!  Make memories with your ghosts and goblins!

Happy Haunting!


Positivity and Pumpkins!

I am absolutely positive I love pumpkins!  How about you????  Do you love fall and pumpkins?  We are on the downslide of 2020 and everyone is ecstatic to close out this crazy year of 2020!  While I cannot agree more, I am also very excited about these next three months and all of the fun with family and friends….whether it has to be with masks or not!  Right now I just want to think about positivity and pumpkins….so let’s celebrate the good times ahead in the months to come!

Look at these faces⬆⬆⬆….they are living life to the fullest!!!  That’s what we all need to try to focus on…trying to find the positive and fun in every situation!  I mean, even the jack-o-lanterns have a constant smile, right?  How can you not smile when you look at those toothy (or lack of thereof) grins of the jack-o-lantern?

Positivity Challenge ~

Who’s with me???  I am challenging each of you to print out the attached Pumpkin Positivity Challenge and complete the task listed for each day!  It’s only for one week!!!  Let’s do this together and see how much better we feel.  It’s amazing how small things can make a big impact…on you as well as on others you interact with!

Positivity Jar ~

You can take it a step further and cut the pumpkins out to place in a jar.  (Of course, ignore the Daily # titles).  Tie a cute little ribbon around the top of the jar.  Voila…you have a colorful and festive fall decoration on your desk.  Pull a pumpkin out each day and follow the challenge listed.

Whichever way you choose to join the challenge, just click the green link below to get your printable copy.

Print Your One Week Pumpkin Positivity Challenge!

The image above  is a sample of what you will be printing when you click the green link above!

I know we all just want to make some good memories in 2020 before this year comes to an end.  Let’s get started doing that!  Have a super weekend and remember….smile…it’s contagious!

%d bloggers like this: