A Grandma's spin on crafts, games, recipes & lifestyle

Category: Family Recipes

One Pot Sausage, White Beans & Arugula

This aromatic dish fills the house with warmth!  The arugula turns brighter green as it cooks and creates a dish that is both beautiful and incredibly delicious.  One pot sausage, white beans & arugula will definitely have your family requesting seconds….so be sure to make enough!

If there are any leftovers, it is one of those amazing recipes that tastes even better the second day…bonus!

One Pot Sausage, White Beans & Arugula ~

Ingredients:

  • 2 Tbsp. olive oil
  • 1 medium onion, sliced or diced
  • 2 lb. kielbasa, sliced
  • 1 bunch green onions, diced
  • 2-3 cloves garlic, minced
  • 2 15-ounce cans white kidney beans
  • 32 ounce chicken broth
  • 3-4 tsp. Italian seasoning
  • 3 cups arugula

Instructions:

  1. Heat olive oil in pan over medium-low heat.  Add sliced onions and let simmer for 2 to 3 minutes.  Add minced garlic cloves and cook through.
  2. Toss sliced kielbasa in pan with onions and garlic.  Cook, stirring occasionally until kielbasa is browned.
  3. Add both cans of white kidney beans.
  4. Season with Italian seasoning.
  5. Add 2 cups chicken broth and bring to boil.
  6. *Optional – lightly smash about 1/4 of the beans to give your dish a bit of a thicker consistency.
  7. Reduce heat to medium-low.
  8. Mix in arugula.
  9. Cook through until arugula starts to wilt.
  10. If needed, add more chicken broth to keep a somewhat “soupy” consistency.

Notes:

Kale can be substituted for arugula…or any green that you wish if either of these are hard to find.  Both add nutritional value, however, arugula has a spicier flavor.

Many meats can be substituted for kielbasa.  I have fixed it with chunks of Italian sausage and it is very flavorful as well.  Substitute to your family’s liking.

While this is not a soup, it does have a slightly soupy consistency.  Bread is a great side dish to “sop” up the extra juices.

Adding 1/4 to 1/2 tsp. dried chile flakes gives it a very tasty spicier flavor.

Arugula ~

Arugula is a member of the bitter green flavor, thus does have a slightly bitter flavor.  However, if you were to compare it to collard greens, it is much milder.  It also has a spicier taste than most of the other greens.  It is widely used in salads, thus can be eaten raw or cooked.

Arugula is low in sugar, carbs and calories, making it a great choice to add to any menu.  It is high in Vitamins A, K & C, Potassium, Calcium and Folate.  It is always good to find a food that is so versatile, healthy and delicious!

Extra Recipes ~

One only has to search arugula recipes to find a plethura of great ideas!  Here are some I have either already made and loved or have on my “To Try” recipe list:

This Arugula Frittata by Theclevermeal.com  looks absolutely amazing.  Another wonderful thing about this one is it can be served for breakfast, brunch, lunch or even dinner (I just love having breakfast for dinner….don’t you?)  It also serves as a great vegetarian dish!

If you haven’t run across Sugar Maple Farmhouse, you really need to do so!  Wow!  Her blog is packed with some amazing recipes!  This Roasted Asparagus & Arugula Salad by Sugarmaplefarmhouse.com is a perfect example of what all she has to offer.  Be sure to check out this great recipe and more!

Meat & Veggies In One ~

I have always enjoyed meals that combine the meat and veggies in one dish.  We grew up eating a lot of casseroles when I was a kid.  However, my husband is not a fan of some of the old fashioned casseroles that I am so fond of.  Meals like this one pot sausage, white beans & arugula is basically the new way of doing a casserole in my mind.  Crazy thinking?  Maybe!  But I love it!

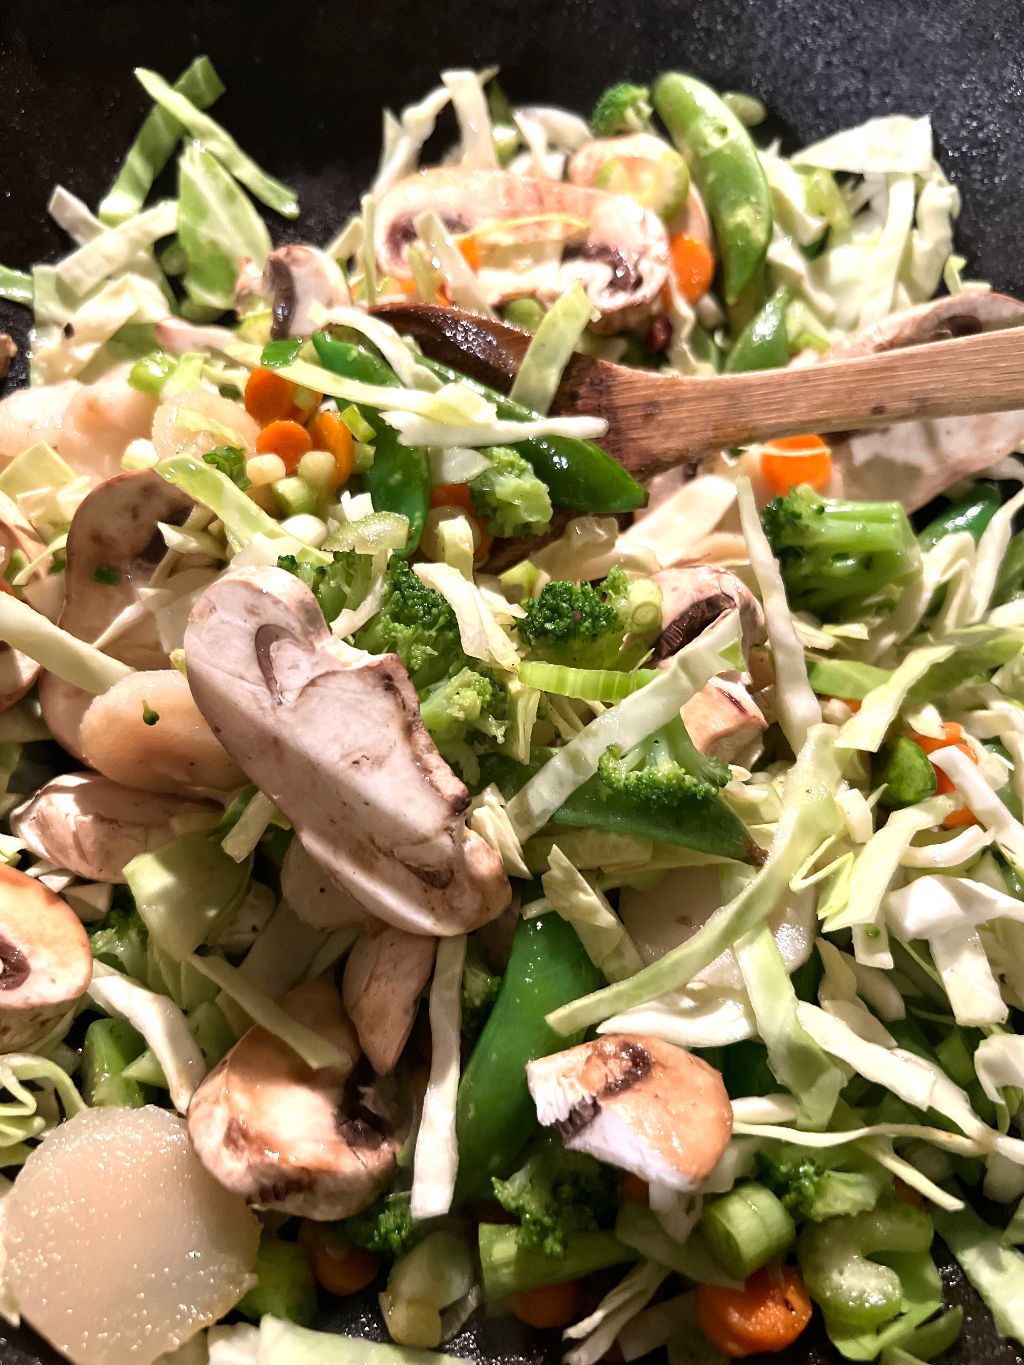
Maybe you saw one of my earlier posts on Veggie Filled Stuffed Peppers?  Another meal that combines all ingredients in one but not quite a casserole!  Be sure to check it out….it’s a little different take than the traditional stuffed peppers you may be thinking of.  Be sure to check out my Stir Fry Chicken & Veggies too!

Serving In Style ~

As always, I love to use fun dishware to serve up these fun recipes.  After all,  you put your love and time into creating wonderful foods….why not enjoy them in beautiful dishware as well?   I am a huge fan of Antique Farmhouse.  Have you checked out their website?  Everything I have purchased from them has been wonderful…big fan!   Here a few of their serving items:

I hope you give this delicious recipe a try and come back to let me know what you think!  If you make any changes, I would love to hear that as well!  Unti then…happy cooking my friends!
Mimi


Classic Broccoli Salad

As you search through salad ideas, many “specialty” salads are more seasonal.  Then you get lucky and find that one “specialty” salad that just seems to be good for all seasons and all holidays.  THIS is that salad!  Have you tried classic broccoli salad?  If not, let me tell you that this is one of the MOST requested salads at our friends and family get togethers.

This salad can be made ahead….BONUS!  I remember going to end of season sports banquets and I always looked forward to this side.  Yes, I have loved it for a very long time!  It is a delicious mixture of only a few ingredients that is topped with a creamy dressing that completes it perfectly.  I just described to you an easy salad that is also yummy…it’s perfect!

With the holidays right around the corner, it is the perfect addition to your Christmas Eve or Christmas Day menu.  As mentioned earlier, it can be made ahead and these are the best recipes when there is so many other things going on as well that makes it hard to spend all day in the kitchen.

Ingredients ~

For Salad ~

2 large bunches broccoli, cut into bite sized pieces

1/2 cup to 1 cup raisins (I go with the larger amount)

12-18 strips bacon, cooked crisp

1 small onion, diced

1 cup or more of sunflower seeds

For Dressing ~

1 cup mayonnaise

1/2 cup sugar

2 Tbsp. vinegar

* I double the dressing recipe because we like it covered in dressing.

* You can use white vinegar or apple cider vinegar…both work fine!

Instructions ~

Break or cut broccoli florets into bite-sized pieces.  You can chop stems and add them in as well.

Fry bacon until crisp.  Crumble when cooled.  *You can buy the premade bacon and toss in microwave for 1 to 2 minutes for a quick prep on the bacon.

Mix broccoli, raisins and finely-chopped onion and toss.

In separate bowl, mix mayonnaise, sugar and vinegar together until well combined and sugar crystals have dissolved.  Pour over broccoli mixture and refrigerate.  It is best if it marinates at least 2 hours.

*** I add the bacon when serving.  This keeps the bacon from getting soft.  This is not a necessary step, it is just how we prefer it.

Occasions for Classic Broccoli Salad ~

As mentioned earlier, this is the perfect salad for Christmas.  The green color adds to the festive look on your table.  Also, since it can be made ahead, it makes meal prep that much easier for the busy Christmas season.

It’s a perfect salad for Valentine’s Day by switching up the raisins for dried cranberries.  I like to bring in the color of the holiday into foods that I serve for that extra fun touch.

Definitely a great dish for Easter…just because salads are always good with Easter ham and all the other yummy sides that go with your Easter meal.

For all of the summer holidays….again it is a big hit.  It is crowd approved and nice that you can make ahead, throw it in a cooler to keep it chilled and have it ready to serve!  Seriously, it is a PERFECT salad for any time of the year!  This Iced sald serving bowl is perfect for all of the occasions too!  The stainless steel serving bowl sits in a larger acrylic bowl that holds the ice and keeps your salad chilled for hours!

*WHEN YOU MAKE A PURCHASE THROUGH MY LINKS I MAY EARN COMMISSIONS FROM AMAZON OR OTHER RETAILERS.  YOU CAN LEARN MORE ABOUT MY EDITORIAL AND AFFILIATE POLICY HERE!  THANK YOU FOR SUPPORTING MY SMALL BUSINESS!

Do I Need to Blanch the Broccoli? ~

No!  Cut the broccoli pieces from fresh broccoli…no extra work needed here!  The broccoli will soften a bit on its own as it marinates in the dressing.  Of course, you can blanch it if you wish, but there is really no need.

Healthier Substitutions ~

You can substitute greek yogurt for mayonnaise to make the salad a bit healthier.  You can also use mayonnaise with olive oil in it to save a few calories without changing the creaminess of the dressing.

Using pre-cooked bacon has less fat and calories than pan-fried bacon.  As mentioned above, I use this a lot and it does not alter the tast.  DO NOT use the little bacon bits that you find in a jar….please!

As many salads go, this is one that is not necessarily high on the “healthy” list.  However, it is an easy way to get broccoli and raisins (or dried cranberries) in your diet for those more finicky!

Other Salad Recipes Using Same Dressing ~

This dressing is a common dressing for many of what I call the “old-time salad recipes.”  Another family favorite of ours is made by mixing bite-sized pieces of Longhorn Colby Cheese, bacon pieces, diced onion, broccoli florets, cauliflower pieces and diced green onion topped with this creamy dressing!  Give it a try too!

This Classic Pea Salad by Bellyfull.net is another delcious salad recipe that uses the same dressing.  As Amy from BellyFull states in her post linked here, it is another old fashioned recipe that receives great accolades every time she serves it!

Do you already make this salad and maybe have some variations?  I would love to hear about them!  If you haven’t made it, be sure to make it soon….your family will be thankful you did!

Year ‘Round Meals to Pair with Classic Broccoli Salad ~

Have you tried making the hamburger bowls yet?  If not, check out this fun way and unique way to serve hamburgers…Hamburger Bowls!

This salad would also complement these amazing Poor Man Smoked Burnt Ends!

Enjoy!

Happy Cooking ~

Mimi

Stir Fry Chicken & Veggies

Stir fry is such a versatile dish that you can easily cater to the tastebuds of whoever you are entertaining.  There are hardly any veggies or meat options that won’t pair well for this dish.  Chicken and beef seem to be the standard, however pork and seafood are both great options as well.  One of our favorites though is stir fry chicken & veggies.

The other awesome thing about stir fry is that you can make it as easy or intricate as you wish.  Easy would consist of frozen veggies and store bought sauces, which does indeed make a quick but wonderful meal.  However, this stir fry recipe is a little more on the time consuming side…and well worth the time put into it!

Prep Work ~

The prep is definitely what consumes most of your time when making this recipe.  However, you can do it in advance and store in the refrigerator if you wish.    The main thing you want to consider when prepping your veggies is that some vegetables cook through quicker than others.  Therefore, cut the thicker vegetables, such as carrots and celery a bit smaller.

I personally love that this recipe calls for sliced cabbage.  It is a vegetable that gets overlooked a lot (at least in our family) yet it is packed with so many wonderful nutrients.  In fact, we cook cabbage and potatoes every year as a New Year’s tradition and find ourselves saying, “I love cabbage, why don’t we cook it more throughout the year?”

Cooking Meat & Veggies Separately ~

Cooking the Chicken ~

It really does make a difference if you cook the meat separately from the veggies and add them together at the end.  Many recipes don’t call for this, but if you are taking the time to follow this recipe, don’t ignore this step!

I prefer to cook the meat first.  We prefer crispy edges on our meat, so you will see from the picture that it is cooked longer.  You can obviously cook it to your liking.  Obviously, the longer you cook it the crunchier it becomes.  If you prefer a chewier chicken, then cook less time making sure to cook it completely through.

While the meat is cooking you can prepare the delicious sauce.  Mix all the ingredients up in a small bowl and set aside for later!

Cooking the Veggies ~

Move the cooked chicken to a separate bowl and get ready for those vegetables!  I prefer to add the veggies that take a bit longer to cook in first.  Then just start layering all of the other veggies.  There is something about the beauty of a bunch of veggies all mixed together….doesn’t it make you feel healthy just looking at it?  Yum!  And let’s not forget about that wonderful aroma!

While those veggies are cooking, you need to cook your rice noodles in a separate pan.  Not all stir fry recipes call for noodles to be mixed in, but this is another reason I love this particular recipe so much!

Combining the Meat, Veggies, Noodles and Sauce ~

Once your veggies are cooked, you can add the meat back in and top them off with this yummy, yummy sauce.  Seriously, you are going to love this sauce!  In fact, we are typically very heavy seasoners, but only salt and pepper were used during the cooking process as the sauce brings out all the seasoning you will need.

Necessities for Good Stir Fry ~

*Some of the links below are affiliate links.  This means that as an Amazon affiliate, at zero cost to you, I will earn an affiliate commission if you click through the link and finalize your purchase.

First off,  you need a good wok to cook in.  We own a couple of different ones (because we love stir fry that much!), however, the cast iron is our favorite.  They just seem to cook very evenly and retain heat very well!

However, not everyone likes cooking with cast iron….mostly because the clean up is a little more involved.  Therefore, we love ones like this as well.  I love that this one comes with so many important utensils that are used when cooking in a wok.   Not to mention that beautiful wooden lid!  Be sure to pay attention to size as well… there is a range of sizes available for you to find what suits your family best.

You will find through other cooking posts of mine that I use generic brands when possible.  I find it important to save money where you can, however, sometimes you just need a specific name brand condiment or spice that is perfect for your recipe.  This Sambal Oelek Chili Paste is one of those times.  This little jar packs flavor and heat.  Not the super hot heat (as I am not a spicy flavor girl as most of my family is), but a good flavorful heat.

Summing It Up ~

As you can see, there are several steps to this recipe:

  • Prepping the chicken and veggies
  • Cooking the chicken
  • Making the sauce
  • Cooking the veggies
  • Preparing the noodles
  • Mixing it all together and warming through

As mentioned at the beginning of this post, it is a more intricate recipe.  Not a hard recipe…..just more time consuming….AND OH SO WORTH THE TIME SPENT!  (*Tip:  Wash your dishes as you go because this does utilize several different bowls and pans.)  This chicken & veggie stir fry is an absolutely delicious meal that everyone is sure to enjoy!

Happy Cooking ~

Mimi


Hearty Personal Breakfast Skillet

If you are anything like me, you are always searching for new and exciting recipes.  Sometimes, those recipes can be similar to ones you have already made, but you need only to change up the method in which you serve them!  Through the years I have heard people say, “Why do you worry about so many small details?”  My response is always…”Presentation is Key!”

This very topic is what helped me to discover personal-sized cast iron skillets.  I love cooking with the small skillets both for presentation and to have the ability to cater to each individual’s personal preferences in foods.  These Hearty Personal Breakfast Skillets are a big hit on Sunday mornings in our family.

Which Skillets to Use ~

There are so many wonderful skillets out there, however, we tend to lean toward the Lodge brand.  The benefits of this brand are as follows:

  • Retain heat well
  • Preseasoned
  • Can be used on stovetop, in oven, on grill or over an open fire
  • Lifetime warranty
  • Long-standing history of quality products
  • Can be used for everything from frying to sauteing, to broiling and everything in between
  • Have a large variety of sizes and different series
  • Easy to find locally and on-line

Size to Use for Hearty Personal Breakfast Skillet ~

We use the Lodge Pre-Seasoned 6-1/2 Inch Skillet for the breakfast skillet as well as many other individualized recipes.  It is a good idea to have 6 to 8 if you are planning on serving several people.  I use them many times for just Brad and I as well, so if you are empty nesters, it is fun to get 2 and have fun creating!  *Pay close attention to the size because many brands have an even smaller size that is not big enough for this savory dish!

What is even better about these is that you can create savory or sweet recipes in them.  Who doesn’t like digging into a steaming hot personal pan brownie or cookie topped with ice cream?  Yum!  These have quickly become known as pizookies!

Recipe ~

Ingredients for 6 Personal Skillets:
  • 14 Red potatoes, cubed small
  • 10 Sausage patties, crumbled
  • 6 Ham slices, cut into small squares
  • 1 Small Onion, diced
  • 2 Bell peppers, color(s) of choice, cubed
  • 2 Anaheim peppers, diced
  • 12 – 14 Eggs
  • 1/2 to 3/4 Cup Milk
  • Salt
  • Pepper
  • Montreal Steak Seasoning
  • Shredded cheddar cheese

*Please note, you can customize these ingredients to your liking.  Other topping ideas:

  • Mushrooms
  • Spinach
  • Mozzarella, Swiss, Gruyere, Fontina, Gouda or your favorite cheese of choice
  • Tomatoes
  • Bacon
  • Avocado
  • Black Olives
  • Jalapenos
  • Hash Browns
Directions for 6 Hearty Personal Breakfast Skillets ~
  1. Brown sausage.  I used patties because that is what I had on hand.  (You can, of course, use any type as you will be crumbling it after cooked.)
  2. While sausage is cooking, continue chopping the rest of the veggies and ham.
  3. Cook chopped potatoes, onions, and peppers until browned in a separate small skillet.                   
  4. Layer sausage and ham in prepared 6 1/2″ skillets.                                                                                         
  5. Follow with cooked potatoes and veggies.                                                                                               
  6. Season liberally with Montreal Steak Seasoning and then salt and pepper to taste.
  7. Beat eggs with milk until completely combined.
  8. Pour egg mixture over meat and veggies in each skillet.                                                               
  9. Top with desired amount of cheese.  (We love cheese so I completely cover the skillet.) 
  10. I placed each skillet on foil lined baking sheets to protect oven from spillage.
  11. Bake at 350 for 45 minutes or until browned.

*You can exclude necessary ingredients to create a Keto version.

Want To Top It With Gravy? ~

Let’s take it a step further and add gravy.  You can go the traditional route and make gravy from scratch or you can make it from a mix.  I use Pioneer Country Sausage Gravy Packets when not making gravy from scratch.  Season it up with salt and pepper and it becomes the perfect final topping for this delicious recipe!

Make Ahead ~

Holiday season is upon us.  Chop up all of your ingredients ahead of time for prep and put together early Christmas morning.  Put your coffee on and assemble these before the Christmas present frenzy begins.  While you are all opening presents, this delicious breakfast can be cooking and filling the room with scents of a cozy Christmas morning!

If you are in a pinch for time, put it all in one large skillet to scoop out individual servings when ready!

Serving Choices ~

As you can imagine, the skillets are extremely hot when taking out of oven. I love to serve these yummy dishes with quilted handle covers for functionality and to keep the presentation fun!  Basic Black Set of 3 Skillet Handle Covers are a good place to start for your collection!

Of course, these fun bandana ones are adorable for many occasions as well!  Are these not the cutest???

Bandana Hot Handle Holders by Lodge

Crafty Hands Primitive has a large assortment of colors to choose from to match any season/holiday/theme you wish.  Be sure to look at the beautiful patterns by CraftyHandsPrimitive on Etsy by clicking here!

Primitive Skillet Handle Pot Holder choose fabric image 2

Care of Iron Skillets ~

I had never cooked with an iron skillet until I got married.  Brad quickly taught me the beauty of using them, but even then I shied away from them because I was unsure how to care for them.   I soon realized that they truly are very easy to clean.  This is all you need to clean your cast iron skillet:

Stainless Steel Scrubber Set

What’s even better is that this fun idea has come to you just in time for Christmas.  Whether adding them to your Christmas wish list or surprising someone special, a set of single-serving sized iron skillets will be sure to bring a smile to anyone’s face!  Soon I will bringing you a cookbook featuring a variety of iron skillet recipes just like this delicious hearty breakfast skillet!

Happy Cooking ~

Mimi


Cheesy Scalloped Potatoes that are Ahhh…mazing!

You may already have a scalloped potato recipe that you love.  However, do yourself and your family a favor and give this recipe a try!  Then once you try it, please come back and let me know if it is the new family favorite.  This recipe has been handed down through my family for years, and I decided to be very nice and share.  These, my friends, are cheesy scalloped potatoes that are ahhh…mazing!

It’s been a family debate over whether we should share special recipes.  One common belief is that if you keep the recipe secret everyone looks forward to you  bringing that special dish to family gatherings, right?  While this is indeed true, I am here to attest that your are still thought of when someone else makes your recipes.  I can’t tell you how many times I have made a special dish and stated to everyone, “Now you guys are going to love this because it is so and so’s famous recipe!”

Helpful Tips ~

There are a couple of different secrets I am going to share with you.  Mainly, just because I’m a nice gal! 😏

  1. This recipe is best if you cut the potato slices thicker.  You may be asking yourself, “If I make them thick, how can I ensure they will get done all the way when baking?”  There, my friend, is the first secret.  You need to parboil your slices.  Parboiling can be tricky because if you overcook them they will get too soft.  I truly can’t give you a specific amount of time needed because it depends on how many potatoes you are using.  I use the old fashioned fork test.  After about 5 minutes of boiling, I consistently and gently poke one of the potatoes with the fork to see if it is slightly soft.
  2. You are going to cook the sauce over the stove and then pour it over the potatoes in 2 layers.  Many people just layer cold cheese, however, by making a sauce you are creating a much more flavorful and saucy potato dish.
  3. Timing everything while cooking is one of the hardest things to learn for new cooks.  Once you put your potatoes on to parboil, you should start your cheese sauce.

How to Make Cheesy Scalloped Potatoes ~

Ingredients ~
  • 10-15 Medium Sized Russet Potatoes – sliced thick
  • 32 Ounce Block (2 lb) Colby Cheese -cubed
  • 2 Cans of Cream of Mushroom Soup
  • 2 Cans Milk (using cream of mushroom soup can)
  • Salt & Pepper – to taste
Directions ~
  1. Preheat oven to 350°
  2. Peel and slice potatoes.                                                                                                                                                   
  3. Parboil sliced potatoes for 10-15 minutes.  Check for softness with fork starting at about 5 minutes.  The time needed will vary according to thickness of potatoes.  You want them to be slightly soft.
  4. While potatoes are boiling cut cheese into cubes.                                                                   
  5. Mix cheese cubes, soup and milk in pan.  Cook over medium heat until completely melted, stirring occasionally so mixture doesn’t burn.                                                                                                                                                   
  6. Spray a 9 X 13 casserole dish with cooking spray.
  7. Drain potatoes.  Place half of cooked potatoes in casserole dish.
  8. Top with half of cheese mixture and salt and pepper to taste.                                                                 
  9. Layer remaining potatoes on top of cheese mixture and then top with remaining cheese.  Sprinkle again with salt and pepper to taste.
  10. Bake for 45 minutes to an hour.  We like ours with the cheese browned quite a bit so I bake it for the longer amount of time.
More Tips for those Cheesy Scalloped Potatoes that are Ahhh…mazing ~
  • If your casserole dish is filled to the top, place it on a foil lined baking sheet to catch spillage of cheese as it melts.
  • Since parboiling potatoes can be tricky to get the perfect consistency, I always insert a fork into my casserole when done to ensure they are completely cooked through.  If they still seem a bit hard but your top is browned, put foil over them and bake for 15 minutes or so longer.
  • Since you are parboiling the potatoes, there is no reason to cover with foil when first baking.  However, see bullet above for example of when you may need foil.

I get requests to make this recipe ALL THE TIME.  I sometimes feel like I should stop making them for awhile because I don’t want people to get bored with the side dishes.  However, they just keep requesting them.  This alone tells you how awesome they really are!

Also, if you are thinking that your family may not like them because it is Cream of Mushroom soup, stop thinking that right now.  If it is that big of an issue just don’t let them know what is in it.  I promise you that once you make that cheese sauce, they will have NO idea!

What’s even better is that these potatoes can be paired with so many different meat items.  In fact, they would go awesome with the Smoked Poor Man Burnt Ends that I wrote about…see that by clicking here!  Heck, there are times we warm them up the next day (that is IF there are any leftovers) and have just potatoes for dinner!

As always, good food keeps people coming back….so be sure to give this one a try!

Printable Version of Cheesy Scalloped Potatoes that are Ahhh…mazing ~

These cheesy scalloped potatoes are a family recipe that has been handed down for years.  It has a special ingredient that you don't see in most cheesy potato recipes.  This will quickly become your family's favorite go to for scalloped potatoes!

Happy Cooking ~

Mimi

Cooking Fun with Grandkids

I got the best phone call the other day!  Picking up my cell phone, I expected to hear my daughter on the other line.  To my surprise, it was my sassy six year old granddaughter, Addi.  Excitedly, she says, “Mimi, I’m making dinner tonight.  Would you like to join us?”  Are you kidding me?  Of course I do!  I’m not missing out on a night of cooking fun with the grandkids!

What was on the menu you ask?  We were served mini pot pies/shepherd’s pies and a strawberry rhubarb tart.  Wow!  It was delicious!


Let’s back up to Addi’s birthday earlier this year.  We always like to find one special “big” gift to get for the kids.  It doesn’t necessarily have to be big in size, but it needs to be extra special!  A lot of time is spent thinking and shopping for that perfect gift.  Addi has recently become fascinated with the kid’s cooking shows so ideas started formulating around that.

The Birthday Gift Idea ~

I have enjoyed watching various bakeoff shows with the grandkids.  Have you ever watched them?  Let me tell you, that they are nothing short of amazing.  I truly would have never realized that kids can cook as “professionally” as they do…even better than a lot of us adults!  Through this the birthday idea came to life!  Addi needed all of her own kitchen tools.

We have already done some cooking with Addi over the past couple of years, so I knew her passion for time in the kitchen wasn’t going anywhere.  After watching the different episodes of Chopped Junior and MasterChef Junior, we realized Addi was ready to step up her game a bit.

Now, first of all my thoughts went  to purchasing  Addi her very own kitchen prep and storage rolling cart.  I will admit that I spent time shopping for the best one.  I then realized I should probably chat with my daughter about this.  Afterall, this would take up a lot of space in the kitchen, and I had to admit to myself that it is her kitchen and not mine.  So I scaled my gift idea down a bit so that Lauren could keep her kitchen in tact.

Cooking Basket Gift Items ~

These are a win/win…Addi was able to cut food by herself and we felt safe with her doing so!

 One thing Lauren and I noticed, having the tongue out while cooking is a MUST for any great chef! 🤣

Cooking Fun with Grandkids ~

As you can see, we tried a variety of different kitchen gadgets.  This will definitely be a gift that we can add on to in the years to come.  Fostering a love of cooking in kids has so many benefits…to the kids as well as the adults.  The important thing to remember is it’s going to get messy…and that’s ok!  If kids become afraid to mess up they will lose the passion to learn.

In an earlier post, I wrote about a great recipe book software.  You create your own cookbook…family, church, neighborhood.. or whatever you choose.  The first book I created was Pappy on the Penarve…Check out my fun cookbook here!  My intention was to make an “Addi” cookbook next…epic fail!  However, I am still going to make it and include new recipes for her to try plus old ones that she has made with the family.  What fun memories!

Make time to have some cooking fun with the grandkids….you will be glad you did!

Enjoy!

Mimi


Guys! I Made a Cookbook…And You Can Too!

You heard me….little ole me made a cookbook!  I am so excited!!!   What’s even better is that it was so fun and easy to do with FamilyCookbookProject.com.  My mind is now racing with so many great ideas for gift giving, fund raisers, church or family projects, or even for the neighborhood.   I am just super pumped about this new fun project!  Guys!  I made a cookbook…and you can too!

This cookbook is a compilation of recipes I have blogged about.  As a bonus, there are a few extra recipes that have yet to be added to my blog.   You will be able to save it to your computer and print out recipes as needed…or you can print the whole book.

The Family Cookbook Project ~

In a nutshell, this is a software program that lets you bring your recipes to life in a shareable form through print or save online.  I have been truly amazed at just how easy it was to put this together.  Now we have a keepsake of the beginning of our recipe blogging journey.  I have no doubt that there will be much more time spent on creating a much more indepth Pappy on the Penarve Cookbook – Version 2!

What about you?  Have you considered putting a cookbook together with all of your family favorites?  Are there treasured recipes that have been passed down through the generations?  Maybe there have been some church potlucks that everyone brings copies to share of the recipe they made.  Wouldn’t it be so much easier to hop online and let each of those people type in their famous recipes?  That’s right…you can set this up so that each person can be considered a “contributor.”

How It Works ~

  1. Create an account.
  2. Give your cookbook a title (that can be changed anytime throughout the process)
  3. Invite friends and family to contribute – optional!  You can also create the recipes by yourself.
  4. Follow along with the simple layout to enter your recipes…you can even copy and paste or import if you have them saved somewhere else on your computer.
  5. Select your cover, dividers and layouts to your personal preference.
  6. The table of contents, recipe index and list of contributors (optional) is automatically created for you.
  7. Order your cookbook.  They have a calculator to make the final setup and purchase process so easy.
  8. You can go back and add recipes to your online version at any point.


*Sample of Family Cookbook Project final copy


Have You Ever Misplaced a Special Recipe? ~

Isn’t this the worst?!?!  Ugh!  If only I had a nickel for every time I went frantically searching for that special recipe!  Another problem I encounter quite often…does your recipe card look like it’s been to h*ll and back?  Stains and tears all over it.  I always say you can tell those are the most loved!  Wouldn’t it be so much easier to have them in a nice little cookbook (luckily you can choose to have any pages/covers you want laminated!)

Maybe you are not as scatter brained as I am and your recipes are already nicely organized.  (Oh, how I try to be that person!)  This is still such a timeless treasure to create and gift to others!

Better yet, maybe you have some very special recipes you won’t share because they become even more special when you bring them to the party!  I have a VERY loved sister-in-law that does just this!  We give her grief over it all the time.  I’m thinking this would be such a great idea to make and have back for gifts when the right time comes along!  (You know who you are sweet See the source image…you know I love ya!)

Recipes from Sites Online ~

This is another way that many of us save recipes.  Pinterest is obviously a favorite go to.  However, have you saved a recipe and gone back to it later and it was GONE?  Yes….GONE!  This has happened to me on a few occasions.  What I have learned in my blogging journey is that Pinterest drives so many different blogs.  If a person is paying for their blog site and then quits blogging….guess what happens?  The blog goes down as do many of the sites it is linked to.

While the internet is a truly amazing way to create and store information, it is never a foolproof option.  It may be old school, but it is always a good idea to have those favorite recipes stored in a printed book!

Dedication Page ~

Below is the picture and dedication words I chose for Pappy on the Penarve.  It’s been so much fun deciding how I wanted to display everything from the pictures to the wording…

Welcome to Pappy on the Penarve! The love of family is our number one priority. We have discovered that good food keeps family members coming back for more. Thus we are lucky to have lots of family gatherings!

This is our first edition of a compilation of recipes we have shared on Mimiblog.org (plus a few bonus extras!). Our hope is that you and your family and friends will enjoy these wonderful recipes as much as us.

The main focus is on Pappy’s amazing grilling with a few appetizers, appetizers/sides and desserts to compliment the savory dishes that come off of Pappy’s magical grill!

Enjoy!

We dedicate this first edition to Lauren, Karleigh and Eli…our amazing children and all who are a part of their world!

*********

To see the above picture and dedication in book layout is a dream come true for me!  As stated earlier, you get to create the cover and dividers, choose from multiple recipe layouts, add your own dedication and introduction…the list goes on and on!

Drumroll Please ~

So without further adieu, I bring you the final version of Pappy on the Penarve.  Click on the link below to view or to download and print a free copy yourself.  I will be making a laminated binder version for our family.  If you are interested in purchasing one, email me at mamashellatino@gmail.com and I will give you the details.

See the finished version of Pappy on the Penarve Cookbook here!!! Check it out!

Guys!  I Made a Cookbook…AND YOU CAN TOO!

Are you excited about getting started on your own personal cookbook?  I haven’t seen an easier way to create such a special family treasure!  Get started on your personal cookbook right here!

Happy Cooking!

Mimi (Shelly)

Pita Bread Stuffed Grilled Cheese

Scoop it, dip it, stuff it…yep, I’m talking pita bread here!  What a fun and versatile bread.  My personal favorite is stuffing it with lots of goodies, so what could be better than some hot oozy cheese!  Pita bread stuffed grilled cheese…BLT (actually BST (spinach) and/or Caprese Style.  You have got to read on for this delightful recipe that can be made for breakfast, lunch or dinner!

BLT or Caprese Style? ~

We took it a step further and offered options.  I prepared all of the ingredients ahead of time and displayed on cutting boards and in bowls.  With this method, each person got to personalize their pita bread stuffed grilled cheese.  Of course, you do not have to always do it this way, but it is definitely a fun option.

BLT (BLS for Spinach) ~

Ingredients ~
  • Bacon, cooked and crumbled
  • Cheese – mozzarella, pepper jack, provolone – shredded
  • Spinach – chopped
  • Onions – diced
  • Tomatoes – chopped
  • Seasonings
    • Garlic powder/salt
    • Everything But the Bagel
    • Onion Powder
    • Italian Seasoning
  • Butter or Olive Oil
Directions ~
  1. Brown bacon and crumble once cooled.
  2. Chop spinach
  3. Dice onion
  4. Place all ingredients in separate dish or lay out on cutting board
  5. Have each person choose their ingredients and put in medium size bowl.  Stir until well blended.
  6. Slice pita bread so that it opens to a pocket.  *It is better to have ones that are NOT already split in the middle for easier grilling.
  7. Stuff pita bread filling to the back and moving forward until stuffed plump.
  8. Cover both sides of pita with butter or olive oil. *I buttered one side, added preferred spice and then placed on griddle.  I then buttered the other side while it was on the griddle.
  9. Cook until desired doneness and serve!
*Notice the small bowl to the right.  This is the bowl we used to mix the individual ingredient choices.

You can offer choices of condiments for dipping as well.  Options such as ranch dressing or sour cream pair well with the BLT pita bread stuffed grilled cheese.

Most of the family chose this style but DEFINITELY used different ingredients.  Max had bacon and mozzarella only with no spices. Uncle Eli stuffed his with bacon, onion, spinach, mozzarella balls and pepper jack cheese.  He then seasoned the outside with the Everything But The Bagel seasoning.    Lauren chose bacon, spinach, tomatoes, mozarella and pepper jack cheese and then seasoned with garlic.

As you can see, each person’s individual tastes took a big part in making these a success!

Caprese Style ~

Ingredients ~
  • Spinach – chopped
  • Mozarella balls
  • Mozarella – shredded
  • Fresh Basil – chopped
  • Tomatoes – chopped
  • Balsamic reduction
Directions ~
  1. Chop spinach.
  2. Chop fresh basil.
  3. Chop tomatoes.
  4. Slice pita bread so that it opens to a pocket.  *It is better to have ones that are NOT already split in the middle for easier grilling.
  5. Stuff pita bread filling to the back and moving forward until stuffed plump.
  6. Cover both sides of pita with butter or olive oil. *I buttered one side, added preferred spice and then placed on griddle.  I then buttered the other side while it was on the griddle.
  7. Cook until desired doneness and serve!

As you can see, the steps are the same.  Only the ingredients are different.  I drizzled mine with a balsamic reduction and it was FAB!  *I actually keep the Alessi brand of Balsamic Reduction on hand for many different recipes – delish!

I’m going to be honest here, we made these for dinner just last night!  The funny part is I made one again for brunch this morning!  I kid you not…I am obsessed!  They just add a different element from the traditional grilled cheese.

Now, I’m including links to some of the ingredients I mentioned.  You, of course, can get them at the store.  I am including these more for you to have a visual.

DISCLOSURE: This site contains product affiliate links for Amazon and other companies. We may receive a commission if you make a purchase after clicking on one of these links.  Thank you for supporting my small business!

I seriously LOVE this sxxx…Alessi Balsamic Reduction! I have it in the fridge at all times.  In the summer, I love to throw together a quick spinach, mozzarella, tomato and fresh basil salad.  I also use it in a lot of appetizers!

If you have not yet tried Anything But the Bagel Seasoning, do yourself a favor and do so!  Try this test…pull up Pinterest, type in Anything But the Bagel Seasoning and look at the results.  One would think you would get a lot of results with just the seasoning…but NOOO…you get all kinds of recipes using the seasoning.  I’m telling you, this seasoning is awesome for so many things!

Did you love the cutting board in the pics as much as I do? Check out the link here for own charcuterie cutting/serving board!   This board is so versatile and fun!

This fun twist on grilled cheese sandwiches is sure to become a quick family favorite!  Do you make a different and fun grilled cheese sandwich?  Let me know about it….I would love to add it to my recipe book!  Speaking of recipe books, be sure to check out this amazing collection of everything gooey and cheesey… whether for yourself or as an awesome gift!

I would love to hear from you…put your thoughts in the comment box below!

Enjoy!

Mimi


Velvety Potato Leek Soup

What a tantalizing soup to serve with salad and a sandwich or just a crusty piece of bread!!!  Make it lunch or dinner….just MAKE it!   Blend the sweet delicate flavor of leeks with potatoes to create this creamy soup.  Velvety potato leek soup will quickly become a family favorite!

Have you cooked with leeks before?  They are a member of the onion family and look like a very large green onion.  Leeks add a mild yet sweet flavor to any dish.  You will, however, need to take time to clean them as dirt and grit get caught in the layers easily.  It is best to clean them by cutting off the end and then slice in half length-wise from root to top.  Pull the layers of the onions apart and run each under the water to clean thoroughly.

Velvety Potato Leek Soup Ingredients ~

  • 1 Stick Butter
  • 2 Medium Leeks (sliced)
  • 1 Medium Onion (diced)
  • 3 Green Onions (diced)
  • 5 Russet Potatoes (peeled & sliced or cubed)
  • 32 Ounce Chicken or Vegetable Broth
  • 1 1/2 tsp. Thyme
  • 3 Cloves Fresh Garlic (minced)
  • 2 Cups Heavy Cream
  • Salt & Pepper to taste

Directions ~

Melt stick of butter in stock pan. Add sliced leeks, green onions, garlic and onion to pan.  Saute over medium heat until vegetables are translucent (be careful not to brown).

Add potatoes, thyme and broth and bring to a boil.  Reduce heat to medium and simmer until potatoes are softened (about 20-25 minutes depending on thickness of potatoes).

Using a food processor or immersion blender, blend about 3/4 of the soup until it is pureed.  *You can puree the whole batch, but I prefer to leave a small portion of it a bit chunky.  If you are using a food processor, ladel portions at a time to the processor depending upon the size of your processor bowl.

Return puree to pot and add heavy cream.  Season with salt and pepper to taste.  Cook over low heat until heated through.

Garnishments ~

  • crumbled bacon, bacon and more bacon!!!
  • shredded gruyere, parmesan or cheese of your choice
  • sprinkle of cayenne pepper
  • chives
  • cracked black pepper

Notes ~

You can omit the heavy cream or substitute half and half for a more low-fat version of velvety potato leek soup.  The soup will still have a creamy texture to it as the pureeing process creates a creamy a nice cream consistency.

Slice or dice the potatoes to your preference.  Whichever method you choose, you will not want them to be real thick or it will take longer for the potatoes to soften while cooking.  The picture belows shows slices, but I actually prefer dicing the potatoes.  Small chunks of potatoes give a nice texture for that 1/4 of the soup I do not puree.

Don’t let the idea of pureeing turn you away.  This soup is super easy to make and is well worth that extra step.  I love my Ninja.  Get your Ninja Mega Kitchen System Here!

  • Includes: 1500-Watt Motor Base, 72-Oz. Total Crushing Pitcher, 8 Cup Food Processor Bowl, Dough Blade, (2) 16-Oz. Nutri Ninja Cups with To-Go-Lids

As mentioned earlier, you can also use an immersion blender instead.  Check out the immersion hand blender here!

  • Hand-held immersion blender for mixing soups, sauces, smoothies, and more

Both of these gadgets have numerous benefits, you only need to decide which one works best for you!  In fact, maybe you already have one of these.  MAYBE, you have it tucked away and haven’t used it in a while.  Do me a favor, get it out and use it for this amazing recipe!

Serve this luscious soup with a leafy green salad or a side of pasta salad.  Add  some crusty bread that is great for dipping for a hearty and cozy dinner.  What’s even better is that this fun idea is coming to you right before St. Patrick’s Day.  Afterall, it is also called Irish Potato Leek soup!  Enjoy!

Happy Cooking ~

Mimi (Shelly)


%d