
Two year old Max declared he wanted a “Just Max” party for his third birthday. As is usually the case when having a discussion with Max, you can’t help but find yourself chuckling at his responses. Life is definitely a lot funnier with him in our world! After a bit, Lauren (his mommy) asked, “Why not?” And that, my friends, is how the PHOTOriffic birthday party theme came to life!
In true Lauren fashion, creative ideas started flowing right away. This girl definitely knows how to take a birthday party to the next level. Even more perfect is that she got to mix her love of photography with her love of party planning! The end result was a fun photoriffic birthday party theme that can be used for any age…child or adult!
Planning ~
You will need to decide if you want to use just a few pictures or if you want to use a large amount of various faces. As mentioned earlier, Lauren, (who we call Photo Lo) has an abundance of fun candids so the choice was easy for her. There are so many fun “faces” of Max that she couldn’t use just one or two. I, personally, am glad we used a lot of photos as it was fun to reminisce about the different ones throughout the evening. In fact, there were many responses of, “Bring ET back!”….this stemming from a short period of time when Max wore an ET mask everywhere!


Organizing the photos in one folder on your computer is very helpful. In this era, we tend to keep a lot of pictures on our phones and on social media apps. The most time consuming part is going through those pictures. If you have ever searched for a particular picture on your phone that was taken months earlier, you know this many times take longer than you expect. Once you find ones you think you will use, copy them into the folder you have created. This will prove to be very beneficial as you start creating your party props.
Crafting ~
Photo T-Shirts ~

Making shirts for everyone was a BIG hit. Instead of worrying about what size is good for each one, we bought men’s packages of t-shirts in large and extra large. Those who were smaller can get fancy with how they want to wear their shirt. These are obviously easy enough to get at discount stores, but if you plan ahead you can get even better deals through Amazon like the one below. You can’t beat prices like these:
Men’s package of 6 White T-Shirts at a lower price of $11.50!!

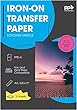
Next, you will need to purchase iron on transfer sheets. These are so much fun to use, but you need to follow the directions closely. One of the most important tips they give you is to use your hottest, non-steam iron setting. This is very important. Once again, these can be found in your local stores, but I did find better prices on Amazon.
Iron On Transfer Sheets for White or Light Colored T-Shirts
These are $8.98 for a pack of ten…that is a STEAL! We purchased some at both Michaels and WalMart. Neither one of those purchases were as cheap as the price above from Amazon.
Iron on Transfer Sheets for Dark T-Shirts
These are $12.94 for a pack of ten. If you are going to use darker shirts then you must use these. We tried transferring to a gray shirt and ruined it. You could barely see the image. So do yourself the favor if you want to use a dark shirt, spend the couple dollars extra.
Photo Banner ~

Creating a birthday photo banner is easy but time consuming….so plan ahead! You can do these in multiple colors or follow a specific theme. As you can see, we went with multi-colored hats.

Printing Out Pictures for the Banner~
The next decision is whether you want the banner single sided or double sided. The pics above are single sided. Regardless of which option you choose, it is important to print each picture out on heavy card stock. This creates more durability as well as a better image for the banner. If you choose to make your birthday banner double sided, you will need a program such as PrintShop to flip the image. By doing this, you can match the images back to back perfectly.
I took images we had saved in the folder discussed earlier, transferred them to PrintShop and enlarged them to get a clear but sizeable image. Once you get it as large as you can without losing the clarity, print it out on heavy card stock. Next you will need to cut the faces out.
Making Birthday Hats for the Banner ~

Let your creativity flow when making the birthday hats. We used both printed paper and solid paper and cut them out in the shape of a birthday hat. We cut ours out freestyle. I think one can get lost in trying to make it “perfect.” Seriously, don’t get to caught up in that. Also, you will find that the pictures will tend to be different sizes, therefore, you will need to make some hats smaller and some larger.
Adorn the hats with fun stickers, printable images and fun different dimensional items for the top of the hat. I printed out some of Max’s favorite characters on the computer and then cut them out to create our own stickers! We had hats with The Hulk, Scooby Doo, Batman, PJ Masks, and soccer balls. We even created a couple of hats with pictures of Addi and Max to help keep jealousy at bay. 😉
Multi-colored pom poms for the perfect birthday hat!

It is fun to top off the hats with different creative items, but you will find that your “go to” on most of them are pom poms. It’s fun to have different colors and sizes. We also used other articles such as a plastic bat ring left over from Halloween for the Batman hat and a soccer ball sticker for the soccer hat. As I said earlier, let your creativity flow when you are creating your photoriffic birthday themed props!
Use Banner Photos Around the Party Area ~
Are there so many cute pictures that you just couldn’t narrow it down to what you needed for the banner? I feel ya! So keep crafting and place extras in various places around the house.

We transformed dancing Santa into dancing Max for the evening!

We also updated center pieces for evening!
Spread the love all over for everyone to enjoy!
Photo Tattoos ~

Tattoos transcend all ages….well at least temporary tattoos! Now, let’s take that a step further and turn photos into temporary tattoos for this amazingly fun birthday party! Of course, Etsy comes to the rescue in helping to fulfill this step of the party planning.
Temporary Photo Tattoos are a MUST for the party!

Advance planning for these is a necessity, as any custom photo order item takes a bit more time. However, as always is the case, Etsy comes to the rescue with these temporary photo tattoos.

What birthday party is on your calendar to plan next? Do you have your pictures organized? Start planning today because this is a photoriffic birthday party them that you are definitely going to want to try!

This post may contain affiliate links which means I receive a small commission at no cost to you if you make a purchase.


This is so cool 😎
Thanks Bethann! It was so much fun!!! Max loved it!
Can’t wait to have a Karleigh photo party next year 🥳
Me either Kar! 🥰
photoriffic birthday party them sounds like fun!
This is sheer brilliance – now I’m thinking how much fun a photoriffic birthday party would be for my kids who love to laugh! Personalized t-shirts look great too.
Lol….so glad you like it Jenn! It truly was just as much planning this birthday party as it was having it! We had a blast…and Max felt so very special!
Oh. My. Goodness! This is the BEST idea for a little one (or adult) birthday. I never knew there were so many fun options to create a photoriffic birthday party! So fun! Thanks for sharing!
So glad you enjoyed this Birthday party idea Debbie. I agree….it would be perfect for kid or adult! I hope you choose to do it some day! Thanks for reading!