A Grandma's spin on crafts, games, recipes & lifestyle

Month: October 2021

Halloween Snail Mail for Kids

Even in this age of technology everyone loves receiving snail mail….well, as long as it isn’t bills!  Seriously though, when you open that mail box and find a pretty colored envelope addressed to you, doesn’t it just bring an instant smile to your face?  I’ve been working harder at getting back to this long lost sentiment, and right now I have been focusing on Halloween Snail Mail for Kids.
In one of my posts last week, Flat Skelly Skeleton, I introduced a fun Halloween project for kids that can be mailed out.  This post builds upon that and gives you some ideas for follow-up “Skelly Snail Mail” you can send after you mail out Flat Skelly.  However, even if you have not mailed Flat Skelly, you can still use these fun ideas to surprise the kiddos.

Hand-Made Envelope With Craft Inserted ~


I used a standard sized (8.5″ X 11″) piece of colored card stock to create this envelope.  The package can be decorated any way you wish if you are hand delivering.  My grandchildren live close so that is the method I chose.  You can still make this if you will be sending it in the mail, just do most of your hand decorating on the opposite side so you have ample space to address it.

Directions ~
  • Place card stock in horizontal position
  • Fold bottom up 3/4 of the way
  • Crease the folds nicely by running a pen along the edges
  • Fold sides in about 1/4″ on both right and left sides
  • Crease folds
  • Fold top portion down
  • Tape left and right sides down to secure (making sure to leave top open to put mail in)
  • Decorate


The skeleton theme is being used on all of our mail this week since we have dubbed it “Skelly Mail.”  You obviously can use any Halloween images you wish, but following a theme does make it fun!  For the first package, I inserted a fun stained glass craft.  As always, choose whatever fun item you want to put in the package, but I am including a link below so you can see what I included:
Halloween Makit & Bakit Craft

These were a fun little activity that the kids really enjoyed and are so very cute to let them hang in their bedroom window, kitchen window or wherever you would like to display their artwork!  (Halloween is almost here now, but still check out this fun link to look at their other holiday choices for Thanksgiving and Christmas….get them ordered before they run out!)

Skeleton Hand with Treat ~


Here we printed out a skeleton hand image on a standard (8.5″ X 11″) sheet of white card stock.  We then carefully cut around the hand to cut out most of the white space.

Use this free link to print out your own copy of the Skelly Skeleton Hand ~  Skeleton Hand Full Size Image to Print and Cut.
I cut the space between the index finger and thumb apart so that I could insert the Halloween treat.  This makes it look as if the hand is actually holding the treat.

These fun ring suckers were found at our local grocery store.  However, if you cannot find them and act quickly enough, you can still get them delivered on time by using this link ~ Skeleton “Sugar Skulls” Lollipop Rings.  I plan to use the extra for our trick or treaters!

Pumpkin Tags ~

To add extra flair, attach a fun tag in a way that it is dangling from the skeleton’s hand.  You can create your own or I have made some for you to print out for free.  Bonus…these are cute but basic enough that you can use them for quite a few different things!  Print them out on cardstock…you will get 4 per page!

Use this link… Free Pumpkin Tags.  Once you have printed them, use a marker to write the recipient’s name.  I then wrote “5 Days ’til Halloween.”  This will add extra excitement for them to know they can officially start counting down the days until it is time to go trick or treating!

What’s Next You Ask? ~

As you can probably assume, I plan on adding a new fun delivery each day.  Be sure to tune in each day to see what I have added to this post!  I will be sure to give detailed directions for each creation!  I’m not really sure who is having more fun this week…me creating the daily mailings or the kids receiving them!  This Halloween Snail Mail for Kids is a lot of fun!
I hope your week before Halloween is filled with lots of spooky fun! 🎃
Love ~
Mimi
 

DIY Yard Witches

Have you thought about being THE HOUSE that everyone loves to talk about once Halloween decorations start going up?  Do you get tired of seeing the same spooky decor at every other house?  You will love these very easy yet unique DIY Yard Witches and all of your neighbors will too!
There are some different ways you can create these spooky little gals, but using a tomato cage has to be the easiest.  Don’t have any tomato cages?  Don’t worry…read on and I will give you some other easy suggestions as well!

Items Needed for DIY Yard Witches ~

  • Tomato Cages (we used 4)
  • Styrofoam Heads (4)
  • Black Plastic Tablecloths
  • Large Black Trashbags (optional)
  • Black Tulle Material (4 yards per witch)
  • Witch Hats (4)
  • Black String or Yarn (or other item to tie with)
  • Yard Staples or Stakes

DISCLOSURE: This site contains product affiliate links for Amazon and other companies. We may receive a commission if you make a purchase after clicking on one of these links.  Thank you for supporting my small business!
(Sponsored)

Aogist Halloween Decorations Eyeball Swaying (Green, 4 Pack-24 LEDs)
$9.99


Buy Now
This site contains product affiliate links for Amazon and other companies. I may receive a commission if you make a purchase after clicking on one of these links. Thank you for supporting my small business!
04/08/2026 04:02 am GMT

Below are some links if you have a hard time finding some of the items in your local store:

DISCLOSURE: This site contains product affiliate links for Amazon and other companies. We may receive a commission if you make a purchase after clicking on one of these links.  Thank you for supporting my small business!

Landscape Staples 6 inch 11 Gauge Garden Stakes
$9.99


Buy Now
This site contains product affiliate links for Amazon and other companies. I may receive a commission if you make a purchase after clicking on one of these links. Thank you for supporting my small business!
04/08/2026 12:03 am GMT


A1 Pacific Female Styrofoam Mannequin Head, 11 L
$11.45


Buy Now
This site contains product affiliate links for Amazon and other companies. I may receive a commission if you make a purchase after clicking on one of these links. Thank you for supporting my small business!
04/08/2026 02:02 am GMT

6 Pcs Thin Lightweight Halloween Witch Hat


Buy Now
This site contains product affiliate links for Amazon and other companies. I may receive a commission if you make a purchase after clicking on one of these links. Thank you for supporting my small business!

BLACK Plastic Table Covers, 54 108 (2-pack)
$6.89


Buy Now
This site contains product affiliate links for Amazon and other companies. I may receive a commission if you make a purchase after clicking on one of these links. Thank you for supporting my small business!
04/07/2026 04:02 pm GMT

Some of these items are not pictured in the photo above!

Instructions ~

  1. Turn tomato cage upside down with prongs at the top.
  2. Rip large black trash bag down the seam and then place on top of prongs (so that it hangs to the right and left side of the cage to be used as the arms).  Pull the prongs of cage together and place styrofoam head over the prongs and trash bag (to secure the arms).                                                                                                                                                                                   
  3. Cover head and tomato cage with black plastic tablecloth.  We placed the long ends to the front and back of the witch so the tomato cage is not visible from the front.                                                                                                     
  4. Place tulle over the tablecloth so that it is even all around.                                                                       
  5. Tie off at the neck of the syrofoam head.                                                                                                               
  6. Place hat firmly on top of head.                                                                                                                                             
  7. Make other witches and then place side by side, a distance a part, in desired area of yard.  Pull the trash bags out a bit to tie “hands” of each witch together.
  8. Push yard staples at base of tomato cages to secure in the ground.

Alternate Ways to Make DIY Yard Witches ~

If you do not have any tomato cages and cannot purchase any at this point in the stores, don’t worry!  Thick yard stakes or poles can also be used.  Of course, the directions are a bit different, but the end result is the same.  We make yard ghosts every year and we use yard stakes to create these.

If you don’t have tomato cages try this ~

If the ground is dry, you will need to use a mallet or hammer to pound the stake firmly into the ground.  It is important that they are at least 2 to 3 inches in the ground for stability.  You can then follow the steps above to create the witch.

If you don’t have styrofoam heads try this ~

I actually use this method for my ghosts so that I can make fatter heads.  Take a plastic grocery sack and fill it with other grocery sacks, crumbled newspapers, packing plastic or bubble wrap.  Continue stuffing until you get the desired size for the head.  Carefully place the filled bag upside down over the yard stake, pinching it closed until you can get it tied off.
After securing the plastic bag head to the stake, follow the steps above to complete your witches.

Yard Ghosts ~

As mentioned earlier, we make ghosts at our house and they are truly looked forward to every year.  Different families come down and take pictures in front of them…they make a great photo opportunity!  If you choose to make ghosts instead or along with the witches, you will need white flat bed sheets.  These can be hard to find, so you will need to plan ahead.
At the end of the month, I take these down, wash the sheets and pack away all of the materials for the next year.  You may need to darken the faces again with a black sharpie each year, but it will help them last much longer.  Believe me, it is well worth the step to clean and pack away.  Here is a link to a more detailed post of how to make your own yard ghosts!
Brad made a campfire last year to add to our ghost scene.  It has been a very fun addition!

Happy October and Happy Halloween 👻to you all!  I hope your month is “spooktacular!”
Love-
Mimi

Flat Skelly Skeleton

*This post has been updated 10/25/23 with lots of Halloween ideas to share with the kiddos in your life….be the fun Grandparent, Parent, Aunt, Uncle, Friend….etc…….it’s easy and creates amazing memories!

Halloween shenanigans are in full swing…decorating the house, planning trick or treat costumes, fun at pumpkin patches, carving jack-o-lanterns, spooky crafts, fun snacks and more!  As a grandparent, I love to be as much a part of all this as possible, but realize it is not feasible to do so.  Flat Skelly Skeleton is here to help out with just that!
The Flat Stanley Project is an awesome project that our children were able to take part in back when they were in elementary school.  Have you been lucky enough to be a part of it as well?   The teacher provided a template of “Flat Stanley” for the kids to color.  The kids then mail him to various friends, family members or anyone of interest.  The recipient takes Stanley along with them for a day, taking pictures and writing about his visit.  Once done, they mail him back along with the pictures and journal notes.  It is a great literacy program that also teaches geography in a very fun way.

Flat Skelly Skeleton ~

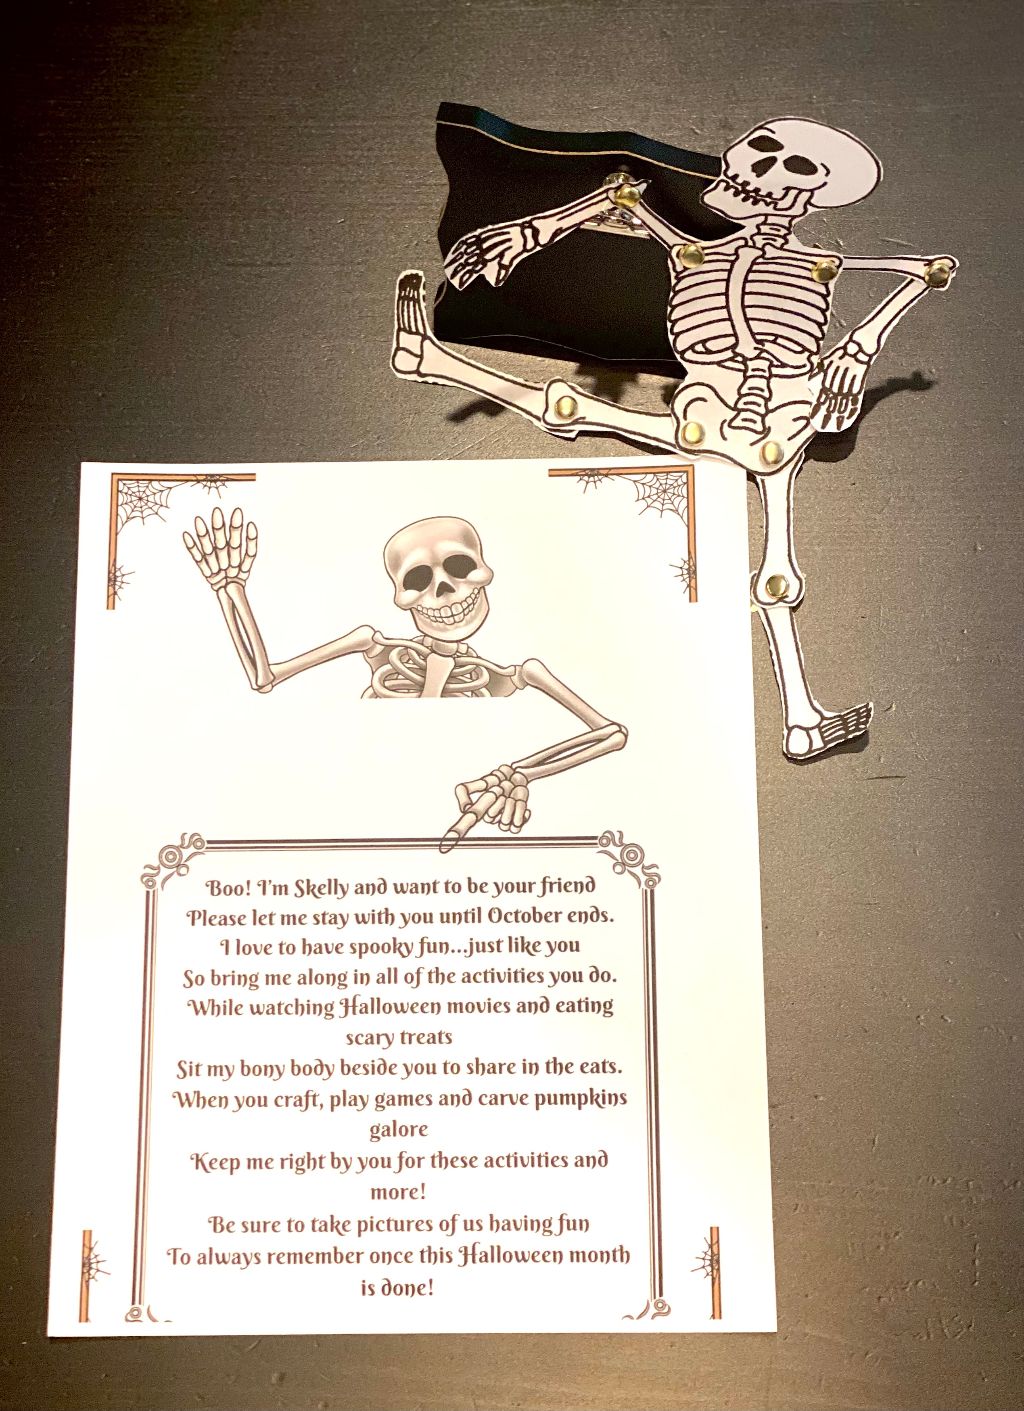
Flat Skelly is similar to Flat Stanley.  This is a fun way for grandparents (or any friend or family member) to be a part of Halloween activities…even if they are not physically present.  I have made it super easy for you to print out the fun Flat Skelly Skeleton poem along with the Jointed Skeleton template. Then all you have to do is mail them to your favorite little ghoul(s).  They will be so excited to share all of their Halloween fun with you!

Flat Skelly Skeleton Poem ~


Click here for free download of Flat Skelly Poem

Jointed Skeleton Directions~

Click here for FREE printout of Flat Skelly Skeleton
 
I found this free skeleton printout by Preschoolactivities.us.  You can use the link next to the picture above to print out or go to their website with the skeleton coloring page Preschoolactivities.us skeleton coloring page.  There are also other free options on Pinterest if you wish to use a different image.  Print these on copy paper or card stock.
You have options regarding how you wish to mail these to the little ones.  You can leave the skeleton template in tact so that they can cut out the pieces or you can pre-cut and put the pieces, along with the brads, in an envelope.  The option you choose will depend mostly upon the age of the child you are sending to and whether they are skilled with scissors yet.
Whoever ends up cutting and putting the skeleton together will need these instructions ~

  1. Cut out each skeleton part
  2. Let your child color and decorate, if desired
  3. Insert small brads at each joint to make Skelly movable (see below for more information on brads)
  4. Tape a popsicle stick or cookie stick to back of the skeleton

*************************************************************
*Types of small brads to try ~

Brads are two pronged paper fastners that usually have some type of decorative top.  There are different sizes, so pay attention to the details.  The mini-sized ones may be the best option for Flat Skelly since he is a bit smaller printout.  Below are some fun varieties:
DISCLOSURE: This site contains product affiliate links for Amazon and other companies. We may receive a commission if you make a purchase after clicking on one of these links.  Thank you for supporting my small business!

Sowaka 100 Pcs Mini Brads
$5.79


Buy Now
This site contains product affiliate links for Amazon and other companies. I may receive a commission if you make a purchase after clicking on one of these links. Thank you for supporting my small business!
04/07/2026 05:02 pm GMT

ARTCXC 4 Colors Brads 100 pieces
$8.99


Buy Now
This site contains product affiliate links for Amazon and other companies. I may receive a commission if you make a purchase after clicking on one of these links. Thank you for supporting my small business!
04/07/2026 04:02 pm GMT

30pcs 10 Styles Halloween Resin Cabochonsh


Buy Now
This site contains product affiliate links for Amazon and other companies. I may receive a commission if you make a purchase after clicking on one of these links. Thank you for supporting my small business!

*****************************************************************
Once you introduce your children to the world of “brads” in crafting, the possibilities are endless.  They are such a versatile and inexpensive item to add to your craft baskets.  I even use them for scrapbooking!
There have been numerous spin offs of the original Flat Stanly that are so much fun to explore.  This project is a little different in that the child is receiving Flat Skelly instead of sending him to others.  They then have the responsibility to make sure pictures get taken and if of writing age, journaling about their fun experiences throughout the month of October.
You can take it a step further and get them a little “Flat Skelly Skeleton” journal to use for their journaling.  Here are some fun ideas:
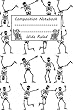
Fun Vintage Style Skeleton Notebook

Dancing Skeleton Journal with blank pages

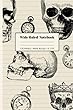
Wide Ruled Skeleton Journal

Sending Flat Skelly As A Package ~

If you live far away or like to send snail mail to the recepient of this awesome Halloween activity, here is what you will need to remember:

  • Skelly Skeleton Poem
  • Jointed Skelly Skeleton (or cut out pieces and put in envelop if sending to smaller children)
  • 8 brads
  • Popsicle or cake pop stick

Send it in a festive envelope.  I used a large manila envelope so there would be no fold creases.  Use stickers or color fun Halloween images on the outside.  What child would not be excited to receive this special delivery?
It’s no secret how much my family loves Halloween.  Even if you don’t love spooky things, you can enjoy Halloween with your kids.  To me, it is not just about the 31st….it’s a whole month of family fun!.  Whether it is as simple as coloring with your kids, crafting or making festive foods, you will create memories to last a lifetime.

Other Halloween Festivities to Check Out ~

Last year I shared some Halloween ideas:
Fun food ideas for Halloween!  Lots of fun ideas…including the infamous Feet Loaf!!!
Halloween Gingerbread Houses!  Buy a kit or make your own….it’s great fun either way!
You’ve Been Booed!!! 👻  This is an annual MUST in every neighborhood!
The month of October just really flies by way too quickly!  Don’t let these festive opportunities get away from you!  You may just find that you have more fun than your kids do!  Be sure to follow me if you aren’t already by entering your email…I promise you I won’t overfill your inbox….only good things coming and at good intervals!

Updated Skelly Ideas ~

Since I wrote this first post on Skelly, we have had a couple of years of more skeleton fun with the kiddos.  Last year, I wrote a post filled with some new ideas….check it out here ➡️➡️Flat Skelly Skeleton is BACK!  Included in it are some fun games and FREE printouts for you to use with your kiddos!
This year we have carried on the tradition.  We always start out at the beginning of October with Skelly happily announcing he is back!

I found these cute little felt skeletons, skeleton boxes and skeleton garland at the Dollar Store.  A perfect way to start the month out with EVERYTHING SKELLY!

The kiddos truly start talking around mid-September about Skelly.  I wonder when he will be back this year.  What crazy things will he be doing?  I love to hear the excitement in their voices as they discuss our little skelton friend!  Below are some of the fun we have shared with links to free printouts so you can share some of the fun with your little kids/grandkids/niece/nephew, etc.
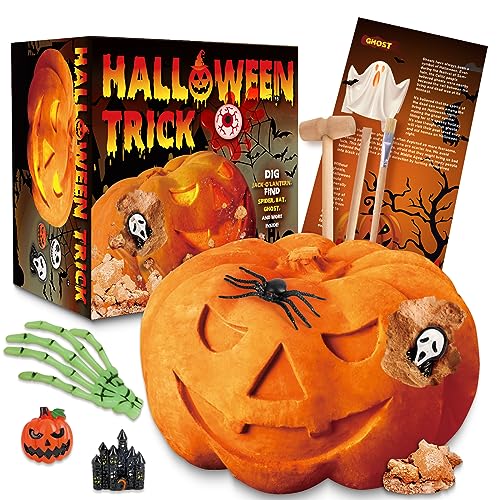
Pumpkin Dig Kit ~


Let’s Do Some Digging Printout!
Have you done any of the “dig kits?”  There are so many out there and my grandkids have tons of fun with them!  Needless to say, I was so excited when I found a Halloween version of one!  So a mailbox sign was created hinting at the fun they were going to find inside.  A pumpkin dig kit!!!   You guys….this was SO MUCH FUN!  The kids loved it!  The link for it is below:

sumsync Halloween Pumpkin Dig Kit Digging 12 Spooky Halloween Toys, Ghost, Spider, Cockroach and More, Science STEM Digging Kit Toys for 5 6 7 8 9 10 11 12 Years Old Boys Girls, Gifts for Halloween
Buy Now
This site contains product affiliate links for Amazon and other companies. I may receive a commission if you make a purchase after clicking on one of these links. Thank you for supporting my small business!

More Halloween Jokes~

We shared some Halloween jokes….all skeleton related, of course!  Below you can see what they are and there is also a link to print out your own to share!

The free link is here ➡️➡️  Skelly Skeleton Jokes
And of course…..the answers!
If you don’t know the answers….click here to find out! (Psst…free printout to share with the kiddos!)

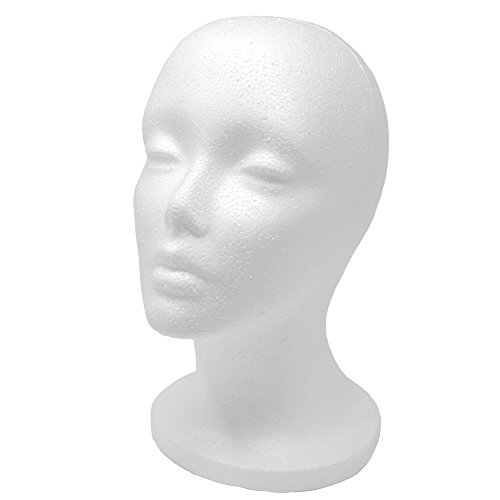
Skeleton Head Painting~

We introduced Jack the Pumpkin.  Jack was quite jealous that he wasn’t getting to have any fun so he entered the scene on Friday the 13th.  He brought along many craft supplies (glue, beads, paint, wooden letters,  for the kids to paint their own styrofoam skeleton heads.  These were purchased at the Dollar Store.

Hi I’m Jack printout!

More Skellys With Halloween Treats ~


Just Thinking About You Printout

Sticker Books With Skelly’s Friends ~


Skelly Skeleton’s Monster Friends Printout

This is a great way to have fun with your grandkids whether you live close or far away.  It is a low cost project as I got most of my stuff at the Dollar Store.  Be creative….be simple…..just be fun!
Happy Haunting to all of you!
Mimi