Ok….so Easter is nearing….your are hosting….and you haven’t planned everything yet! There is still time to create these awesome and very easy DIY Easter crafts. Whether you try all three of them or concentrate on one, they are sure to spruce up your Easter tablescapes or home decor!
Maybe you aren’t hosting….but you want to take a nice hostess gift….I’ve got you covered! These little carrots and bunnies are sure to delight everyone. Best of all….you can say, “I made it myself!” You go girl (or guy)!
Easy DIY Easter Crafts ~
Notice the plural on craft(s)! I just loved all of these Easter DIYs so much that I couldn’t share just one. I have separated them into sections, so if there is one particular craft you want to focus on, just scroll until you get to the correct heading desired.
Floppy Ear Bunny in Carrot ~

I have to admit that this one is my favorite…and the most challenging. Don’t let that stop you from making it….it honestly is still an easy DIY Easter craft. Just follow my tips and you will get it….easy peasy!
Items Needed ~
- 4 X 4 piece of cardstock
- Orange Jute
- Tan Jute
- Crafting Moss
- Hot glue gun & glue
- Scotch tape
- Wooden craft ball with hole
Instructions ~
- Paint eyes and “blush” for cheeks on the wooden ball and set aside to dry.
- Cut a 4 X 4 piece of cardstock.
- Cut that piece of cardstock in half diagonally.
- With point of diagonal piece facing up, fold a long edge over to the other side, tucking it under at the edge. Start rolling the paper until a cone is formed. Hot glue down the edge to seal.
- Starting at the top of the cone, put a thin strip of hot glue all around the top. Quickly lay the orange jute all around the top to form the top of your carrot.
- After gluing the strip around the top, you don’t need to glue every single strip around. I did a small patch of glue going down a bit of the cone at a time. When you wind the jute tightly around the cone, that one section of glue is enough to hold each time around. Follow this method all the way down until the cone is covered….but don’t stop there!
- I then put spots of glue on the outside of what was already wrapped and continued wrapping back up to the top for double coverage. This helps to not have any gaps between the rows of jute.
- Stuff the cone with crafting moss, leaving some overhang at the top.
- Wrap scotch tape tightly around the end of the tan jute (this will help the ends from fraying as you pull jute up and down through the wooden bead). Run it up through the hole. You will want a long piece in order to make both ears. Make a loop then run it back down through the wooden bead. Make a slight knot at the bottom to help hold it in place. Run the jute back up and down the same way to make second ear. Tie off with a larger knot at the bottom of bead.

- After tying off at bottom of bead, I added a glob of hot glue to help keep the twine secured under the head.

- Cut a piece of jute about 3 to 4″. Knot it in the middle…this will be the nose. Fray both ends of the string to create whiskers. Hot glue on to bead.
- Glue wooden bunny head on top of crafting moss.
Beaded Carrots ~

Items Needed ~
- Wooden craft beads (with holes) of various sizes
- Jute
- Green raffia
- Orange RIT dye
- Embellishment ribbon of choice

A Huge array of art supplies for all of your DIY needs!
Instructions ~
- Heat about 1 to 2 cups of water. Add 1 Tbsp (or as much as you desire) of orange dye to warm water. Layer wooden beads into the colored water.
- Let these soak for as long as you desire. The longer you soak them the darker the color will get. I let mine soak for about an hour. This gave the beads a deep rich orange color with some areas soaking a little more in and getting a deeper hue. I like this as it gives it an imperfect look much like a carrot.
- Let the dyed beads dry.
- Cut a piece of jute about 12″ long and set aside.
- Cut several pieces of green raffia (I made mine about 8″ and then cut down as desired in the end. Fold the raffia in half and tie a knot at the middle with the jute. You will have equal amounts of jute on each side of the knot.
- Holding both ends of the dangling jute, line your orange beads onto the string, starting with your biggest bead first. How you choose to layer your beads is completely up to you. I sometimes did 1 big bead and sometimes 2 and then just layered them on as I liked.
- Once you get your final bead on, tie a knot at the bottom to secure.
- Tie your embellishment ribbon of choice between the raffia and the beads.
Light Bulb Carrots ~

Items Needed ~
- C9 and/or C7 Orange light bulbs
- Hot glue gun & glue
- Crafting moss
- Jute
Instructions ~
- Start with a thin strip of hot glue around the the silver part of light bulb. Start layering the jute around. Glue sections at a time and then continue wrapping jute around to the top.
- Put hot glue on top of silver portion of light bulb.
- Place a chunk of crafting moss on top of that hot glue.
Links for Items Used ~
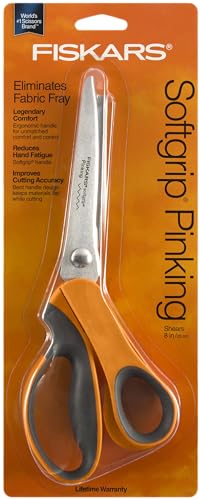
Below are some of the items that you may not have hanging around at home. The paper cutter….game changer! Do you have one of these already? If not, it makes a difference in so many diferent craft projects!
DISCLOSURE: This site contains product affiliate links for Amazon and other companies. We may receive a commission if you make a purchase after clicking on one of these links. Thank you for supporting my small business!


If you love these and still want more Easter bunny ideas, be sure to check out my DIY Sock Bunnies here! Another fun craft that is super easy to make!

There you go friends….three easy Easter DIY crafts that can be made very quickly! Let me know your thoughts!
Happy Crafting My Friends ~
Mimi