A Grandma's spin on crafts, games, recipes & lifestyle

Category: Holidays

DIY Bubbling Cauldron

Chances are you already have several items laying around that can be used for a DIY Bubbling Cauldron.  Whether it is a plastic Halloween cauldron you have purchased or you have a fun bucket of some sort that can be converted to one.  With a few supplies, you can easily convert it to a spooky cauldron filled with a realistic looking witche’s concoction that is sure to be enjoyed by all.

Items Needed for DIY Bubbling Cauldron ~

  • clear ornaments – different sizes
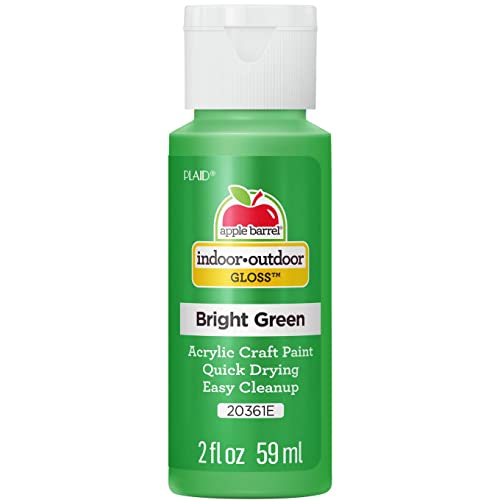
  • craft paint – green, orange, yellow, rust/bronze, black (depending on your color scheme)
  • paint brushes/sponge of various sizes
  • half or full styrofoam ball (depending on size of “cauldron”)
  • hot glue gun
  • hot glue
  • cauldron or bucket
  • cut paper sacks if your bucket is larger to help fill space
  • string lights or fairy lights

Additional Items to Complete the Look ~

Before I move on with the easy to follow steps, I want to take a minute to tell you about this great group of crafters I am involved with.  Every month, Julie from Sum of Their Stories blog, presents a theme for us to create a substainable craft.  This month’s theme is Tradition.  For those of you who know me, you are already aware of how much I love traditions.

A long standing tradition that was handed down from my mom is decorating for the holidays.  We always have the tried and true decorations that were brought out every year…some purchased and some crafted.   However,  we would also make new decorations to add to the ongoing collection.  Halloween was very big at our house and I have such wonderful memories of everything about the month of October.  This fun DIY Bubbling Cauldron is a super fun craft that I will now be adding to my annual display of everything spooky!

How to Create Your Own Bubbling Cauldron ~

We had an antique bucket that has been moved from space to space to space in our garage over the years.  I had to laugh because when I brought it in and set it next to my other supplies, my hubby asked, “Well, you aren’t going to ruin that cool bucket are you?”  First of all…RUIN?  😉 Second of all, I quickly replied, “What plans did you have for this bucket…did you even know we had it?”  He laughed and agreed!

  1. Run lots of hot glue over the rim of the bucket, letting it ooze down the sides as it wishes.  (If you are using a plastic cauldron, you can paint it first if you wish to give it a “rusty” look.
  2. Once the glue has dried, you can paint it with your desired paint colors to look like the concoction inside is boiling over.  I used different brushes and quickly realized I preferred the sponge brush as it gave it more of a “soupy” look.
  3. Once the paint has dried, fill the bottom of your bucket with paper sack strips (if needed) and then place the stryofoam ball or half ball on top of papers.
  4. Place your string of lights all around the stryofoam ball.  *I tried several different types and colors of lights.  The colored light strand that blinks became our favorite.  It seems to have a more realistic hot brewing look to it.
  5. Remove the clear ornaments from their boxes and take the tops off of each one.  (side note…I couldn’t throw those away because I am POSITIVE I will find a use for them later!  Can you say CRAFT HOARDER! 🤣)
  6. Start placing the bulbs around inside the cauldron, putting a bit of hot glue on each one to secure them.  Once your have the inside top filled with “bubbles”, start dripping them down the sides.  After you have them all glued together you should be able to lift the whole thing up as one unit.  This makes it easy if you need to change out your lighting.
  7. Complete the look with spider webbing, a big spider, a witch and of course that Potion book I mentioned earlier.

Find the Items Here ~

If you are a craft hoarder like me, you may already have all of the items needed to make this DIY Bubbling Cauldron.  Many of the items can be found at the Dollar Store if needed.  I love this because I try to share crafts that aren’t expensive to make.  Let’s talk about the vessel for your cauldron first.  The plastic bucket can work perfectly, but get creative and look around for something you may already have.  Flower pots could be a great idea to be converted!

DISCLOSURE: This site contains product affiliate links for Amazon and other companies. We may receive a commission if you make a purchase after clicking on one of these links.  Thank you for supporting my small business!

Here are some handy links if you need to purchase any of the items online:

*Be sure to measure your cauldron size before choosing the size of ball.

October Sustainable Craft Challenge ~

Back to the monthly challenge.  Listed below are the awesome ideas that my fellow bloggers created for the Tradition theme this month.

Julie from Sum of Their Stories ~ Vintage Doily Afternoon Tea Embroidery Upcycle

Terri from Our Good Life ~ Halloween Scenes on Thrift Store Paintings

Gail from Purple Hues and Me ~ DIY Paper Mache Pumpkin Centerpiece

Mel from Decor Draft Design ~ DIY Halloween Haunted House Sign

Jo from A Rose Tinted World ~ DIY Halloween Bowling Game

Be sure to check out each of their posts for some amazing ideas…you are sure to find something new to create!

Come back and let me know how your crafts turn out….looking forward to hearing from you!

Happy Crafting ~

Mimi 

The ABCs of Gratitude

Here we are…almost to the beginning of yet another new year.  Have you make any resolutions?  Are you still going strong with the current year’s resolutions?  Have you ever considered instead on just being grateful?  Maybe you are saying right now, “I am grateful.”   Well then, I challenge you…how deep does that gratitude go?  Let’s dive into the ABCs of Gratitude!

Like everyone else, I feel I am full of gratitude.  Recently though, I have discovered that I tend to ignore the “small” stuff…you know, take it for granted!  As I sit here typing, I look at my hands (which are not pretty and stylish like so many of my friends and family members), and I realize how blessed I am to have the ability to use my hands in the way I want.  I love to write….and my hands allow me to do that.

Heck, I have a computer!  I am definitely blessed to have a computer.  Have I ever sat and pondered why that is such a blessing?  Of course, it allows me to write….but I have started digging deeper than the obvious.  It allows me to keep in touch with my family and friends, pay my bills, watch videos and movies, research ANY topic my heart desires, create fun graphics for blogging and party planning, research my family geneology, create spreadsheets, and on and on!

What’s Your Point?

My point is, I am learning to focus deeper on the everyday things in my life AND I FEEL GREAT!  Seriously, it has given me such a sense of happiness that I haven’t felt in a long time.  Is this a New Year’s resolution…No!  I just have been reading so many different ideas on finding joy in everyday life, and I believe I have hit the jackpot!

I’m sitting here in awe….seriously everyone….in AWE of just how much this little “project” is making me more grateful and appreciative in my everyday life.  Of course, now I want to share it with you in hopes that you, too, will enjoy it as much as I am.

How Do I “DO” the ABCs of Gratitude?~

The biggest recommendation I have for you is to cut out a little bit of “me” time before you start this project.  Time that you can just sit and focus….for a few minutes, for a half hour or just work on it various times over a period of several days.  That’s the beauty of it….there are no steadfast rules.

Drumroll please……..

Yes, it’s that easy!

If you are like me, you want it to be on some pretty paper, but that’s not necessary.  I am going to provide you with several free downloads if you would like to use those.  However, you can also just write it out on a plain old sheet of paper or in a journal/notebook.

The next part is where it gets a little tricky!   You can’t fill in the blanks with the items/people that you are always thankful for.  You know what I’m talking about…the spouse, the children, the grandchildren and the furry children.  That’s why you need a little quiet time so you can sit and think.

The good part is that nothing….and I mean NOTHING is a stupid answer.  Trust me on this!  You will understand that more once we get to the next step!

Free Downloads ~

I have created some fun printouts for you to use….just click on the green link after each image!

     Greenery Pattern Gratitude Sheet

        Unicorn Pattern Gratitude Sheet


          Brown Floral Pattern Gratitude Sheet


          Superhero Pattern Gratitude Sheet

Journals & Fun Notebooks ~

You can also use a beautiful journal.  Gorgeous books filled with decorative pages make me happy.  Do you feel that way too?  Stampington & Company has amazing products.

Magical Thinking Journal by Papaya Art     This Magical Thinking Journal is perfect for the project!

Paper House Productions is another favorite online site I love:

        This Batman Mini Notebook could be a fun booklet for kids to use!

           Here is another super cute journal for writing out thoughts!

The Next Step to ABCs of Gratitude ~

Once you print out the form or get your journal, you are ready to get to work.  Think of a word for every letter of the alphabet.  Remember, I told you earlier that there is NO wrong answer.  When I did this, I first thought some of the words seemed somewhat juvenile.  What is interesting is where each word will eventually lead you!  Here is what I came up with:

My very first word was apples.  Shouldn’t it be more substantial like air or authenticity?  Well, those are good answers too, but I went with what my mind first went to.  You may find that as you think of each letter of the alphabet, it is a bit harder to come up with a word you think is “good.”

I chose to write out a word for every letter of the alphabet in one sitting.  You can follow this method or choose to go back and add to it throughout a set amount of time if you wish.  After completing the list, I sat and focused on it.

Being thankful for apples is obvious for the very reason of food and nutrition.  This is where I challenge you to go further.  Why else am I thankful for apples?

  • Wildlife –  Many animals in wildlife love apples, apple peels, etc.  I am so grateful for animals in our world.
  • Compost – Apples are good for compost…they provide a good source of nitrogen.  I love gardening!
  • Songs – There are so many fun songs to sing with your kids about apples….music makes me happy.
  • Dessert – Some very delicious desserts are made with apples…and I love desserts!

Hopefully you are getting the idea here.  Take time to focus on each word and the MANY different reasons you are thankful for it.  You have now gone beyond the obvious and focused on so many things that you may have taken for granted.  Seriously, have you ever even considered being thankful for compost???  I sure haven’t…but I am now!

I have chosen to focus on each word over several days.  It has been very fun to see where each word leads me to!  Give it a try…you may be surprised where it leads you!

Grateful to be sharing this with you…

Mimi


Christmas Cookie Party

Can you smell that?  The cozy scent of warm cookies filling the whole house?  One of my favorite holiday activities is making and decorating Christmas cookies.  When my kids were younger, they would each invite a friend over for a day filled with creating Christmas cookie masterpieces as well as playing fun Christmas games.  Fast forward to 2021, these kids are now adults and yet we still get together every year for a Christmas Cookie Party!

Roll Out Cookie Recipe ~

Click Here to Print Recipe of Roll Out Cookies

In the early days I had a fun-filled day planned for all of the kiddos.  Memories of all of the kids rushing in after school all excited about the day’s events are still crystal clear in my mind!  The cookies would already be baked and placed all around the table.  Bowls of brightly colored icing  scattered all around within reach of their little hands.  Next come the paint brushes…you know the ones?  The inexpensive pack of multi-colored kid’s paintbrushes.  These served as the main decorating tool.

The Paintbrush Rule ~

If you ask any of those little bakers today, you will know the golden rule of cookie decorating.  The purple paintbrush goes in the purple icing bowl, the green paintbrush goes in the green icing bowl, the yellow paintbrush goes in the yellow icing bowl….you get the picture!  This keeps our colors fresh.    I guarantee you that when these said kids (now adults) read this they are laughing, as I am a stickler for this rule!

The small multi-colored paint brushes just like these work perfectly!


While I have included an easy link for you, I honestly try to gather the paintbrushes whenever I see them at the local Dollar Store or department store.  It is sometimes hard to find all of the colors you need, but collecting them over time usually proves to be successful…as long as you remember where you have stored them! 😉

Small ramekins like these are used for the many icing colors that they insist we have…ok, I insist too! 😉


The four primary colors are definitely not enough for this festive day!  You will need a lot of small bowls to make all of the icing colors requested.  It is much more fun if you let them create just the perfect shade of each color.  Once again those memories come rushing in, “Do you think this red is bright enough?”  “Should we do dark purple or light purple…or both?”  “Did someone make black…we need lots of black!”  “Ooooh, what about gray?”


The icing recipe itself is simple.  We have tried different recipes but have finally all decided this simple recipe is our favorite.  Printable version of the simple, but oh so good, icing recipe can be reached right here!

Cookie Cutters ~

We all have our favorite cookie cutter.  I continue to add new ones to the mix, but nothing melts my heart more than when I hear, “Wait a minute, did you make any snowglobe cookies?”  “Does anyone have a Christmas tree cookie they can share?” “What was this one??  A penguin, oh yea!”

Yes, sometimes the cookie shape is hard to tell what it is until you bring it to life with some color!  Other times they get broken and still get turned into a major work of art…thanks to Ali!  No, we do not have a Starbucks cookie cutter, but somehow she made the perfect latte cookie!

If I had to choose, I would say the snowglobe is one of everyone’s favorites…

It has been so much fun to watch their artistic ability change over the years.  However, no matter how beautiful they are, the taste is always the same…..delicious!  We are always careful to make an abundance so that everyone has plenty to take home and share….and to sample along the way.

When this tradition first began, the kids would start the afternoon out icing the cookies.  We would then move on to Christmas scavenger hunts and Christmas Bingo.  These activities ended with lots of festive prizes, of course.  I would send the kids home hyped up on sugar but exhausted from a fun-filled day!

The tradition has now moved to evenings as we have to schedule our Christmas Cookie Party around work schedules (that damn adulting thing always interferes!  😜).   We have a Cookie Crew text group that gets busy at the end of November working on the current year’s date.  The phone goes ping, ping, ping and voila…we have a date!  Now they all roll into the house with bottles of wine and fun Christmas gifts to share before we get to decorating!  Oh, did I mention the food?  Yes, we now have lots of savory appetizers as well.  Now instead of me sending them off exhausted and with full bellies the exact opposite happens….oh how the times have changed!

New Decorating Tools ~

*This site contains Amazon affiliate links.  When you buy through any of these links, I will receive a commission at no cost to you.  Thank you for supporting my small business and allowing my blog site to continue to bring you fun & valuable content!

We have recently upped our decorating game.  As Ali put it best, “Oh Shel, this is a game changer!”  The addition of squeeze bottles brought a whole new way of decorating to our Christmas Cookie Party fun!  Wow, these are so much fun and allow for more precise decorating.

A cookie scribe is a pointy tool that is used to redistibute icing and make fun swirls on glazed cookies.  The ones below have cute snowflakes on the top for a Christmas theme.

There are also some super cute decorating scribes on Etsy too!  These festive gingerbread scribes by Equinox Pastry Supply are a definite plus for any cookie decorating party!

Addi demonstrates for us…

As the years go by, we add new little ones to the crew and continue making wonderful memories.  Had I known years ago how special this tradition was going to be, I would have urged others to do the same!

One thing I know for sure is that these girls will continue this tradition and that makes me a very happy Mimi!

Photo Gallery of More Recent Years ~

(Some year I will go back to my old files to add pictures from the younger years!)


Now everyone get out there and get to baking…..enjoy your Christmas season!  And to you, my precious Christmas Cookie Party crew…I love you…thank you for all of the wonderful memories…and cheers to many more!

Much love~

Mimi


P.S.  Check out a similar post I wrote about this last year (with less details), however there are some of the fun cookie cutter links included in this one!


Christmas Gift Ideas!!🎄

Hello friends~

12-12-21 Update ~ I have added new deals in RED!  Be sure to check back regularly!!!

Christmas is around the corner and I would love to help you out with your shopping needs as best I can.  I have been given promo codes for various items that last for specific amounts of time.  Some specials run longer than others and all are available until the date stated OR until they run out of the product.

This is not my typical type of post, however, I do like to pass along savings to you…my friends and loved ones!  I love sharing good deals!  Yes, I do receive a small commission but this in no way affects your price…it is a win win!  I seriously just LOVE to pass along good things!  Are you looking for something specific?  Let me know and I will keep my out for you!

I will update this page every 1 to 3 days…depending upon when new codes are given to me.  SO CHECK BACK REGULARLY.  I will make sections with labels for each one stating the date that each sale is good for.   Once a date has passed, I will remove all items under that date for ease of reading.

Please note, items will show at the regular price until you go to check out.  The sale price will show before you place your order.  I believe the discount will decrease if you purchase more than one item at a time, so please pay close attention to the prices.


Promo Codes Good Through 12-15-21 (or while supplies last!) ~

Computer Folding Desk

Regular Price $82.00

Sale Price With Link Above $41.00

5 Foot Long Tunnel

Regular Price $15.44

Sale Price With Link Above $12.35

Promo Codes Good Through 12-18-21 (or while supplies last!) ~

Learning Tablet for Children-Laugh & Learn 123ABC Electronic Activity Pad with Lights, Music, Content for infants too!

Regular Price $79.99

Sale Price With Link Above $16.00

Promo Codes Good Through 12-21-21 (or while supplies last!) ~

Up to 20% Off

Simple Joys by Carter’s

Up to 20% off Simple Joys by Carter's and Moon and Back by Hanna Andersson Baby Toddler and Kid's Apparel

Valentine’s Day Family Fun

Valentine’s Day ~ The celebration of romance and love!  My dad always said it was another Hallmark holiday…😂!  As a child, it is such a fun day to share Valentine’s cards and specialty candies with your friends.  But it can be so much more than that.  Being the hopeless romantic that I am, I have always loved this holiday and I still do.  For us it evolved into a special time to have some Valentine’s Day family fun!

If your children are of school age, you are probably already working ahead with them to create their decorated box or bag to collect their precious valentines in.  IF, due to Covid this year, you don’t get to do this at school, take the time to still make one for home.  Ask family members to send valentines to fill their goody box!  While in the planning process, why not make a special breakfast to start their day out right?

Valentine’s Day Breakfast ~

Mornings are hectic, I know!  But with just a little planning, it doesn’t take much to make breakfast special for this day!   Over the years, we have added food coloring to different food dishes to match the theme of the holiday…some have been great…and some not so much! For example, I urge you to NOT make green oatmeal on St. Patrick’s Day…I promise…it does not go over well!

Last year, Lauren got pretty creative with her breakfast ideas for the kids.  Suffice it to say that they LOVED it!  It consisted of red, heart shaped pancakes with whipped cream and fresh strawberries.

They also had some festive strawberry milk.  She made a batch of strawberry milk ahead of time and poured it into heart-shaped ice cube trays.  When it was time for breakfast, they popped those ice cubes into a plain glass of milk….and voila!

There was a little planning ahead time.  Not too time consuming but oh so fun!  Next, let’s get to work on how we are going to present their Valentine goodies!  Need those fun ice cube trays….Get this 24-cube silicone heart mold by Wilton!  The trays can be used for ice cubes, gelatin, baking and candy molds!

Some other fun food ideas are:

Valentine Fruit Wands by afewshortcuts.com ~ This is an oh so easy yet festive snack recipe the kids will definitely love!

Valentine Grazing Board by ediblecrafts.craftgossip.com ~ Shove the diet aside for one day because you are going to love this Valentine’s Day grazing board!  yum!

Valentine Candy Poster ~

For many years, I would make a valentine candy poster for the kids.  It is such a fun way to give them their Valentine goodies.  It warms my heart that Lauren has continued this tradition.  They are so much fun to make and even more fun to receive.

I think it is easiest if you buy your candy first before making your Valentine poem.  Of course, you will want to try to work in their favorites.  This way you know what candy names you are working with to create the clever wording needed to make your poem work.

Types of Candy with Sample Sayings ~

Please don’t

You are  Extra Sugarfree Bubble Gum Slim Pack - 10 / Boxspecial

I love you to Image result for Reeses pieces

I wouldn’t trade you for Image result for 100 Grand bar

You are the best kid in the See the source image

Sending you hugs & Hershey's Kisses - 1 piece

This Valentine’s Day is going to be a Image result for Whoppersof a day!

To my   Sweetarts - 1.8 Oz Roll

You are A--zing!

You’re no!

You Skor - 1.4 Oz Baran A!

These are just a few examples of how you can create your own personalized Valentine’s poem.  There are so many clever sayings you can create with the names of the candy in it.  In fact, it is not only fun to make one for the kids but have fun and make one for your honey too!

Valentine’s Day Family Fun Continues ~

Now you weren’t planning on just handing these works of art to the kiddos, were you????  Of course not!  They need to work to get their special treats!  After all, you put a lot of time into making that Valentine poster for them.  So how do you suggest we do that?  Glad you asked!  Have you ever played the Yarn Scavenger Hunt game?

Items Needed for the Yarn Scavenger Hunt ~

1 color of yarn for each person playing

A room that has items to crawl under and over

Not too bad, right?  You will start off by choosing one color for each child and tying one end of each ball of yarn to something in the room.  This will be the starting point.  You can start everyone off at the same point or in different areas.  Weave the yarn over couches, under chairs, around tables.  Safety is key, but you want them crawling over and under as much as possible….even over each other at times when their yarns cross each other.

They will collect the yarn as they go in an effort to get to the end and ultimately to their Valentine candy!  For such a simple game, you will enjoy watching the children laugh hysterically as they race to get to the end.

Of course, once they get to the end of their yarn, they will be gifted with their candy poem poster.

You can also have fun decorating cookies in fun Valentine’s Day shapes.  Although the cookie and icing recipe I shared in an earlier post was for Christmas, you can still refer back to it for the recipes.  Click here to find the cookie recipe and icing for your Valentine’s Day cookies!  Making cookies is always a fun festive idea!

Whatever you choose to do to make this day special….be sure to have a full day of Valentine’s Day Family Fun!!!!

Love ~ Shelly


%d