
I wish I could tell you how many people comment, “Bring back E.T.!” whenever we post a picture of Max in his E.T. mask! There was a short span of time that EVERYTHING he did was done with that big E.T. head. One only has to be around him for a short period of time before he has you engrossed in his imagination and role playing. While we are all laughing with delight at his antics, we never stop to think of the many benefits there are to children when playing dress up.

Have you ever been told, “Maybe you should try walking in my shoes for a bit?” I’m sure almost everyone has either heard that phrase at one time or possibly even said it. This is a person wanting you to understand what their life or situation is like…a person asking for empathy. When a child engages in role playing, they are doing just that. Whether it be dressing up like mommy and daddy, a superhero, a princess, or even E.T., they are “walking in their shoes,” and without realizing it, learning empathy.

Sure, it’s fun to pretend they can fly like a superhero or swim like a mermaid. However, they have also watched this person in action and are now trying to mimic them…or walk in their shoes. The process of watching…remembering…then mimicking is building brain power without them even realizing it!
Continue reading
Month: December 2020

Several years ago while vacationing down south, I discovered the delicious dish called burnt ends. I honestly don’t remember what type of meat they were made from, I just remember LOVING them. Since then, Brad has made several attempts (all of which were delicious!) to recreate the exact dish that I enjoyed so much. Just recently, we have discovered Smoked Poor Man’s Burnt Ends…and WOW!!!
Burnt ends traditionally are made from beef brisket. It is indeed a very delicious meal, but is a more expensive cut of meat. Thankfully, we can still get that AMAZING flavor with chuck roast. While the cost is less for this cut of meat, the resulting flavor of smoked poor man’s burnt ends is seriously out of this world!!!

Yes folks, Pappy on the Penarve is at it again! This recipe was a definite WIN!!! The end result was a very tender piece of beef with a full-bodied and sticky BBQ flavor. The crispy burnt edges complete the perfect flavor! You MUST try this recipe…soon!
Steps ~
For this recipe, we used two nice cuts of chuck roast, each weighing about 3 1/2 pounds. Generously season both sides of the meat with salt and pepper. Preheat smoker to 275 degrees. We used hickory chips to smoke the chuck roast. Place your seasoned meat on the grill and plan on total smoking time to be about 5 hours.

After smoking for 4.25 hours, remove roast from grill and wrap in foil. Below is a picture of how the meat should “look” when removing it to wrap.

Return to grill and continue smoking an additional 45 minutes. Remove from grill and let wrapped meat rest for 15-20 minutes. After resting, hold wrapped meat over disposable foil pan to unwrap, letting the juices flow into the pan. Set cooked meat on cutting board. Slice and then cut each roast into 3/4-inch chunks. Place cut chunks in disposable foil pan.


Mix 1 cup brown sugar and 1 cup BBQ sauce in small bowl until thoroughly combined. Pour BBQ mixture over burnt ends. Stir meat until completely covered in the BBQ mixture. Place pan of meat back on grill, uncovered, and smoke for an additional 20 minutes.
Serving Smoked Poor Man’s Burnt Ends ~
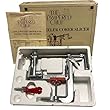
As anyone who has tasted Pappy’s recipes knows, everything he makes is made to perfection. I will say, this recipe is now at the top of my list of favorites. It is truly finger-licking good. Therefore, I now have to find the perfect serving platter and accessories, right? So I have set out on my small business shopping…
This BBQ tray from Etsy will be a perfect fit for this dish (even though the meat is beef 🤣) This is manly enough for Pappy to use for his grilling yet cute enough for me to use at the table setting. LOVE!

This Personalized Grill Master Platter would be perfect too! I LOVE that you can personalize this and it still looks “woodsy.” This will look perfect with Pappy, The Grill Master…don’t you agree? What would you personalize it with?

BBQ journal is perfect for logging notes or any changes made while grilling!

I have always believed that cooking and grilling good home cooked meals keeps the family coming back. What we have discovered is not only do we get to share a lot of time with our grown children over prepared meals, but we have been lucky enough to share many meals with all of their friends as well. Let’s not forget the gatherings with neighbors too! Food and drink are the basics for all of the good times!
Don’t forget to add this one to your list of recipes….you won’t be disappointed!


It’s December and it’s cold outside so I ask you, “Do you still grill during the winter months?” We do! Brad is an avid grill master all…year…long! I love that he enjoys grilling so much! However, whether you grill in the cold or you prefer to cook inside when it’s cold, everyone can enjoy this wonderful recipe of caramelized onions and provolone cheese stuffed chicken breasts.
Bone In or Boneless??? ~
We used bone in chicken breasts, however, I believe the process of assembling is easier if you use the boneless chicken breasts. Brad prefers to grill meats with bone in to enhance the flavor. I do not disagree. However, with the robust flavor of the caramelized onions, it will taste just as wonderful using boneless for this recipe.
Begin with preparing the onions. To create the rich flavor needed, this process will take 30 to 45 minutes. The full recipe for caramelized onions and provolone cheese stuffed chicken breasts is included below, but I have also included some tips.
Caramelizing Onions ~
Oh how I love the smell of onions cooking. The wonderful aroma conjures up good memories of family gatherings and food being prepared in the kitchen. Caramelized onions are so easy to make. The trick is to cook them slow and on low heat. You will be rewarded with a robust flavor that enhances the flavor of so many dishes.

Slice the onions thin and set aside. Heat your skillet with butter or oil. The amount of oil you will use depends upon the number of onions you are caramelizing. The general rule is one tablespoon per one medium onion. Once your oil is heated, add the onions and stir until they are completely coated. Add a pinch of salt and stir every 3 to 4 minutes. Add a couple of tablespoons of broth (chicken, beef or vegetable) or water as you are cooking to deglaze the pan and rehydrate the onions. Continue this process for 30 to 45 minutes, depending upon the amount of browning you prefer.
Many recipes call for a small amount of sugar, however, you do not need to add sugar if you follow the method above. They will sweeten naturally as they cook.
Preparing Chicken Breasts ~
Cut chicken breasts lengthwise almost completely through to the other side. Season the chicken with salt, pepper, thyme and parsley flakes. Layer inside of chicken with your choice of cheese, a layer of caramelized onions and top with another layer of cheese.

I prefer to use different cheeses for each layer, creating a an array of flavors, however, it is just as wonderful using the same type of cheese for each layer. If you are baking the chicken, you can then secure it with toothpicks. When grilling, Brad prefers to use cooking twine to better hold the stuffed meat together. This is a grilling must in his book!
Use this link to order twine for cooking: Stock up on twine for all of your cooking needs here!

Caramelized Onion Broth ~
After you have stuffed the chicken breasts and started the cooking process, place the remaining onions on the stove and add beef broth, extra parsley flakes and thyme. Cook on low heat until thickened. When the meat is fully cooked, use this broth to spoon over the top of the chicken. Of course, take this opportunity to add a little extra cheese on top….both for presentation and to enhance the flavor.
Stuffed chicken breasts are a delicious and appealing recipe when looking for “that special recipe to impress.” The addition of fragrant and delicious caramelized onions is the perfect choice for a wonderful meal. There is no doubt that you won’t LOVE these caramelized onions and provolone cheese stuffed chicken breasts!
A Perfect Dessert Pairing ~
Looking for a great dessert recipe to compliment this amazing chicken? Look no further….this decadent apple strudel recipe pairs wonderfully with your meal.

You can find this amazing recipe in my link here: Get the recipe for a DELICIOUS apple strudel here! Enjoy!

The traditions continue as we enjoyed our annual night of viewing Christmas lights while sipping on hot cocoa and munching popcorn. I can’t tell you how wonderful it is to watch our children carry on our family traditions with their loved ones. Of course, that is what traditions are, right?
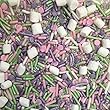
A few changes were made to this year’s Christmas light adventure. Normally the kids would grumble about any changes made to our family traditions. However, we all enjoyed these fun additions, so we didn’t hear those usual complaints. It all began with a hot cocoa snack board. We have always enjoyed cocoa while driving around looking at the festive lights, but this year, everyone got to create their own cocoa masterpiece.

This is so much fun to create and, of course, there are no rules! When assembling your snack board, keep in mind that some goodies will be for the hot cocoa and some will just be for snacking. This being the first year, I had a lot of fun assembling the goodies, but my mind is already swirling with different ideas for the next occasion.
Ideas for Creating Cocoa Snack Board ~
The other good thing to remember is that this just doesn’t have to be a Christmas thing! We drink cocoa as many times as we can throughout the winter months. This leaves more opportunities to have fun with this chocolate-filled idea! As mentioned earlier, the goodies are endless that can be included in your setup. Here are some fun ideas:
- Candy canes or peppermint sticks
- Crushed peppermint candies
- Marshmallows – plain, flavored or festive shaped
- M & Ms
- Malt Balls
- White mini Kit Kats
- Chocolate nonpareils
- Gingerbread cookies
- Graham Crackers
- Caramel candies
- White chocolate pretzel rods
- White chocolate chips
- Various candy Kisses
- Biscotti
- White chocolate covered Oreos
It was so much fun watching the kids create their specialty cocoas. Addi even discovered a new favorite…she couldn’t get enough of the chocolate nonpareils (also known as sno-caps). We used the disposable soup bowls for each person to create their own snack mix. Each bowl started with a little popcorn and then they filled them to their heart’s content.


Hot Chocolate Bombs ~
Have you seen this new and totally fun idea for hot cocoa??? This is definitely something I will add to the snack board for next year. But why wait???? You can make these all winter long! They have gone viral on Tik-Tok and everyone is raving about them. They are available in stores to buy or you can make your own. I have saved several posts for reference, but I especially like the post by Gluesticksblog.com. She gives great ideas and tips and also references a video of them if you have not yet seen how they work. How to Make Hot Chocolate Bombs by Gluesticksblog.com.
We will definitely be making our own soon and will share our results once we have done so. However, I am starting preparations for them now and ordered the silicone chocolate mold so I am ready to go. After reading many reviews and scouring for the best prices, these are the chocolate molds I ordered. These are the chocolate molds I ordered for Hot Chocolate Bombs! From my research, I have discovered you need to pay close attention to size. I also saw where many of the chocolate mold companies weren’t so good on delivery!
Marshamallows are obviously an important ingredient as well. The dehydrated marshmallows work best as they are small and easier to work with when making hot chocolate bombs. If you do not plan ahead, these can be very hard to find in the stores *voice of experience here!!! Here are some handy and fun links to help out with that…
Dehydrated Marshamallows in 1-Pound Sealable Bag –

Mini Marshmallows With Snowflake Sprinkles & Chocolate Jimmies –
Off To View the Lights ~
Everyone gathered their hot cocoa and snack bowl and loaded into the car for the next step. Unfortunately, I believe this will be the last year that we will all be in the same vehicle. Fortunately, that means our family is growing…❤! Next year we will have to use 2 cars….but you can be sure that won’t stop this family tradition! We drive through neighborhoods to enjoy the festive decorations. To those people who decorate every year…thank you! Some of the displays are the same as they were when our kids were youngsters. How cool is that?
Carry Out and Puzzles ~

The final part of the evening is Chinese take-out at the end of our Christmas light viewing. We call ahead and pick it up on our way back home. Our little Addi already asks for this when we start choosing the date for this night. Those traditions obviously make a difference even at a young age. This just melts my heart!
The other new activity we added this year is doing a Christmas puzzle. Not a large one, as we want to be able to finish it the same night. My suggestion is to stick with 100 pieces or choose one that is a “family” style puzzle with three different sizes of pieces. Have you seen these kind? They are truly so much fun when you are puzzling with a variety of ages.

(Frosty the Snowman 100 piece puzzle)
Here are a couple options of the family time puzzles. Our family has had one since the kids were young and we would do that same one every year. Now there are even more options.
Mickey Mouse and Minnie Mouse Family Time Puzzle ~ The image Amazon includes here doesn’t show the different size pieces, but if you click on the link you will see that the Family Time puzzles have small, medium and large pieces for family puzzling.

Snoopy and Linus ice skating – Peanuts Family Time Puzzle ~ A super cute Family Time puzzle that also has small, medium and large pieces.

Christmas lights and cocoa has long been one of our kids’ favorite traditions of the many we try to do throughout the month of December. I love watching our grown kids still juggle their schedules to make it all work. Family time is oh so valuable and especially during this wonderful holiday of celebrating the birth of Christ!
Merry Christmas everyone!

Imagine for a minute… you are curled up by a cozy fireplace in a warm, fuzzy blanket. The room is aglow with colorful lights emitted from the Christmas tree or Fall decor. Suddenly the scents of apple and cinnamon begin to fill the room. What is that amazing smell? Then a perfect little pastry is handed to you, and not only is the smell out of this world but it is almost too pretty to eat. You soon decide that you would forget about how pretty it is and bite into the mouthwatering Apple Strudel recipe that was just shared with you.
Heavenly, delightful, appetizing, delectable and irresistible. They must have slaved all day long over this dessert that is tantalizing your taste buds. Nah! While it looks and tastes amazing….it’s a pretty simple recipe.
Mouthwatering Apple Strudel Recipe ~

Use this link for a printable version of the Mouthwatering Apple Strudel Recipe
Step by Step Instructions ~
Step 1 ~
Preheat oven to 375 degrees. Either line a baking sheet with parchment paper or spray with cooking spray.
*TIP* – You will definitely want to use a baking sheet with raised sides…otherwise, you will be very unhappy when you have to clean your oven (*voice of experience speaking to you here 🙄)
Step 2 ~
Spread Wewalka puff pastry sheet (or brand that you may have) evenly out on baking sheet and set aside.

*TIP* – I have used the frozen Pepperidge Farm puff pastry sheets in the past, which are wonderful. However, I just discovered these refrigerated Wewalka puff pastry sheets and they are so much easier since you do not have to spend time thawing them out!

Step 3 ~
Peel, core and thinly slice apples. I use my apple peeler, corer, slicer from Pampered Chef. I have had this tool for years and I absolutely LOVE it! LOVE LOVE LOVE this Pampered Chef Apple Peeler Corer Slicer!!!
There are different versions of the apple peeler, corer, slicer out there and I have read many reviews. Some have the suction cup base, which seems nice if you don’t have a countertop with a ledge to attach the clamp version. However, you need to pay attention to the reviews of the ones that don’t hold the suction very well. Speaking from experience, I am a BIG fan of the Pampered Chef version. I just attach it directly to my counter top and have those babies peeled in a matter of minutes!
Step 4 ~
In a large mixing bowl, combine the sliced apples, lemon juice, vanilla, brown sugar, cinnamon and flour. Once the apples are evenly coated, spread the mixture lengthwise down the puff pastry sheet.

*TIP* – I would use a slotted spoon and not get all of the juice that you see in the above picture. The apples will create more natural juice as they are cooking, which will still leave you with a very juicy apple strudel. We made a second one with less of the juice and it turned out perfectly!
Step 5 ~
Next, cut one inch sections along both sides of the pastry sheet. We found that 11 strips made a good number of sections for braiding the dough. Start taking every other section and pull up and over the apple mixture in a braided fashion. This is a simple step that looks daunting at first…but it’s not!

Step 6 ~
Whisk the egg in a small bowl until frothy. With a pastry brush, cover the top of the mouthwatering apple strudel with the egg wash. Then sprinkle evenly with the cinnamon sugar mixture.


Step 7 ~
Bake at 375 degrees for 25 to 30 minutes or until golden brown.

Seriously!!! Isn’t your mouth watering right now? You guys, this is truly such an easy recipe that there is NO reason for not making this mouth watering Apple Strudel Recipe for your family! Of course, it was even better when we had it last week because Karleigh and I got some good mother-daughter baking time together. Priceless! Add it to your list of recipes for the fall and winter seasons! This would be a great dessert or perfect with that Christmas morning coffee!!!
Other Delicious Recipes ~
Are you looking for other yummy recipes? Check out these Red Velvet Cheesecake Cookies. This is another great recipe that not only looks pretty but tastes delicious!
Or maybe you need to look at several recipes to decide on what you want to create next. My post on Christmas Cookie Exchange is filled with a lot of amazing recipes for you to peruse! Check it out before you bake your next batch of cookies!
Happy Cooking My Friends ~
Mimi

Christmas traditions are a very important part of the spirit of Christmas! The year 2020 has made us all look back at years past and re-evaluate what truly is important. It also has urged us to look forward, beyond pandemics and all the scary times that came with that, and decide what we wish to carry with us for the coming years. Spending time with loved ones is something I believe we can all agree is at top of the list. How amazing is it that a small little cookie, decorated with sprinkles and festive colors can do just that? Making memories with Christmas cookies is a tradition my mom started with us years ago.
As a child, we would sit in our cozy little kitchen at a fold up card table. There was one gingerbread cookie sheet that was the moldable type. I can still see my pudgy little fingers molding the soft cookie dough into the form until it was just right. Mom would pop them in the oven and it didn’t take long for the sweet smell to fill the small kitchen. Anticipation is what comes to mind!
Bowls of colorful icing would be brought to the table in preparation for the next step. Once those cookies were done, we got the wonderful job of icing each gingerbread man and woman in an attempt to make the prettiest one. Corn cob butter brushes were converted to paint brushes for the icing. My heart still warms as I think back to these sweet memories.
Carrying On The Tradition ~
Fast forward to the 1990’s. It was now time for me to start making memories with Christmas cookies with my own small children. The cookie shapes and icing methods have changed a bit, but the family fun remains the same. We switched to cookie cutters and small kid’s paint brushes for the icing. (only because the corn cob butter brushes have become next to impossible to find!)
If your little ones are still young, don’t let this deter you. It may be a bit messier, but oh so worth the time spent. Taking pictures through the years will create fun memories of how their decorating style has changed over time. Plus, kids of all ages love cooking in the kitchen with their parents.

As the years progressed, the kids would each start inviting a couple of friends for the annual Christmas cookie decorating event. The cookies were made ahead of time, which left the icing fun to them. Back then we would add extra Christmas festivities to the day with Christmas Bingo and Christmas Scavenger Hunts. It became a day they looked forward to each year. Thus the Christmas tradition lives on. I would have small holiday toys purchased ahead of time and they would get to pick from the treasure box each time they won.
Making Memories With Christmas Cookies~
Fast forward to 2020…the tradition lives on! We just celebrated Year 15 with the same girls….and my son joins in each year to help with one or two. These girls are now in their 20’s and 30’s and somehow we all manage to find one day each year for Christmas cookie fun!!! We have also happily added my precious grandchildren. Isn’t this what Christmas is all about? Making memories with those that you hold dear to your heart!


Making memories with Christmas cookies is so much more than just decorating cookies. It’s sharing stories and laughter while you all create your works of art. It’s laughing and reminiscing about the year’s past. It sharing dreams of the future. It’s watching your children’s friends treat the new kiddos at the table with love. It’s a whole lot of love wrapped up into one short night!
We have tried different cookie recipes and various icing recipes as well. We have come to the conclusion that these are our favorites! In fact, we love them so much that we can’t seem to get the cookies all decorated before we start enjoying our works of art.


Recipes ~
Perfect Printable Roll Out Cookie Recipe – No Need To Chill!

The BEST but oh so easy Cookie Icing Recipe can be printed right here!

Of course, I have to share with you some quick links to get you started on your Christmas cookie adventures. We have found that we tend to add one or more new shapes each year, however, there are several that tend to be the tried and true favorites. You have to have a good Santa, Christmas Tree, Reindeer and Candy Cane. Get Christmas Tree, Reindeer, Santa and Candy Cane cookie cutters in one grouping!

We also have come to love the cute little penguin. He is so fun to decorate! You will definitely want to add the penguin cookie cutter to your collection!

Another favorite is the snow globe…this one has created a lot of imagination over the years! The snow globe cookie cutter is a definite favorite of the whole cookie crew!

It is my biggest wish that each of these girls (and my son) carry this tradition on with their families. That they too can have their hearts filled with happiness as mine is each year we all gather. We continue to add new “things” to our group each year…sometimes its gifts, aprons and ornaments we share with each other and other times it is even better because its a new “crew member.” And just like that….we continue making memories with Christmas cookies!


Encouraging kids to get involved in the kitchen is beneficial in SO many ways! While it means extra patience and cleaning for parents, the numerous benefits are very worth it. I happen to believe that the biggest perk is extra bonding time! So, how do we go about encouraging the children to WANT to help us cook? Well, it looks like we have another mystery on our hands…OR do we? Finding really cool cookbooks should do the trick! What kid wouldn’t enjoy cooking fun with Scooby?

Scooby Doo is one of those cartoon characters that transcends all ages. Am I right? I still enjoy sitting with the kids and watching Scooby and those meddling kids. So what could be more fun than recreating some of those fun foods we see Scooby and the gang eat in the shows? From Donut Demons to Shaggy & Scooby’s Jaw Stretcher Special, you are sure to satisfy even the most pickiest of eaters!
And it doesn’t stop at food items! There are some fantastically fun drink ideas! You may even be able to sneak a veggie in these blended delights without them even knowing. If you dare, you can carry the mystery on by asking them to use their detective skills to figure out what the secret ingredient is!!!

Order your Scooby Doo cook book by Katrina Jorgensen here and get it in time for Christmas!
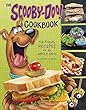
Jinkies, this may be the favorite gift of 2020.!!!
Taking Cooking Fun With Scooby a Step Further ~
This cookbook is truly awesome, but you can make it more “Scoob-ariffic!” Why not create a gift basket of themed Cooking Fun with Scooby! Here are some cooking gift ideas:


Other Scooby Doo Fun Recipes ~
Of course, there are tons of wonderful Scooby Doo recipes and fun ideas out there. I have rounded up a few of them for you. For example MyKidsTime.com has a super cute compilation of Scooby birthday party ideas. You can use some of these for your basket gift as well. They have a great recipe for dog-bone shaped cookies. These would be fun to add in for Christmas cookie decorating too! Scooby Doo free recipes and ideas from MyKidsTime.com
Betty Crocker shared some cooking fun with Scooby too. Check out this fun recipe using candy and fruit snacks: Scooby Doo Pops Recipe by Betty Crocker
Scooby Printables ~
Cooking in the kitchen may be all the excitement they can handle for one day. However, keep in mind that just because it wears us out does not mean it will wear them out! If you happen to have one that runs like the energizer bunny, take some time to print out some fun games. These will be sure to keep them busy while everyone is waiting to eat or to finish up the fun Scooby themed evening!
Print out this Scooby word search to use while waiting for the food to cook!

Print this fun Scooby coloring page by Michael’s Family

Find What’s Different in this fun Scooby printable by activities.websincloud.com

What’s next for Mystery Inc? I don’t have an answer to that, but I am sure that whatever it is, the whole family will love it! For now, put your oven mitts on and get started on your cooking fun with Scooby!

Two year old Max declared he wanted a “Just Max” party for his third birthday. As is usually the case when having a discussion with Max, you can’t help but find yourself chuckling at his responses. Life is definitely a lot funnier with him in our world! After a bit, Lauren (his mommy) asked, “Why not?” And that, my friends, is how the PHOTOriffic birthday party theme came to life!
In true Lauren fashion, creative ideas started flowing right away. This girl definitely knows how to take a birthday party to the next level. Even more perfect is that she got to mix her love of photography with her love of party planning! The end result was a fun photoriffic birthday party theme that can be used for any age…child or adult!
Planning ~
You will need to decide if you want to use just a few pictures or if you want to use a large amount of various faces. As mentioned earlier, Lauren, (who we call Photo Lo) has an abundance of fun candids so the choice was easy for her. There are so many fun “faces” of Max that she couldn’t use just one or two. I, personally, am glad we used a lot of photos as it was fun to reminisce about the different ones throughout the evening. In fact, there were many responses of, “Bring ET back!”….this stemming from a short period of time when Max wore an ET mask everywhere!


Organizing the photos in one folder on your computer is very helpful. In this era, we tend to keep a lot of pictures on our phones and on social media apps. The most time consuming part is going through those pictures. If you have ever searched for a particular picture on your phone that was taken months earlier, you know this many times take longer than you expect. Once you find ones you think you will use, copy them into the folder you have created. This will prove to be very beneficial as you start creating your party props.

Amazon Associate ~
This post and its photos may contain affiliate links. As an Amazon associate I earn from qualifying purchases. If you make a purchase through these links, I may receive a small commission at no extra cost to you!

