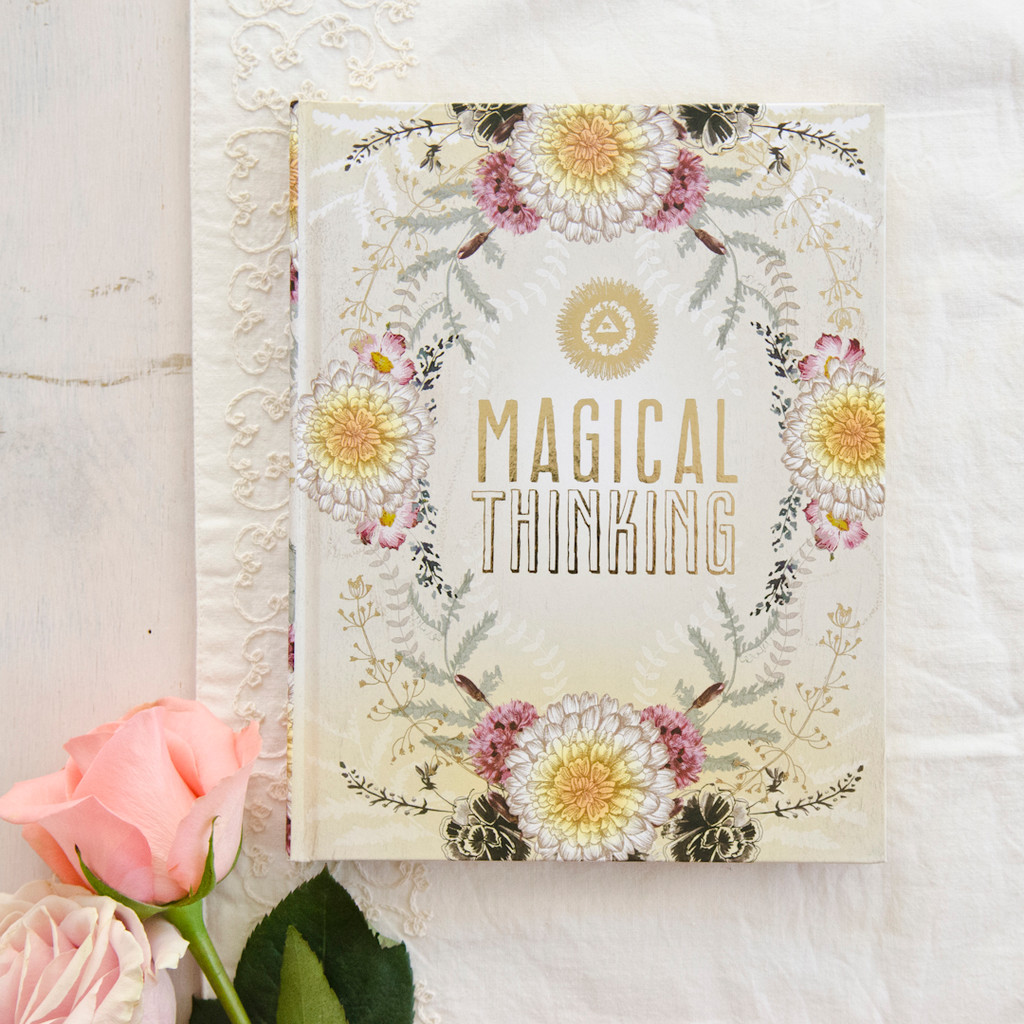
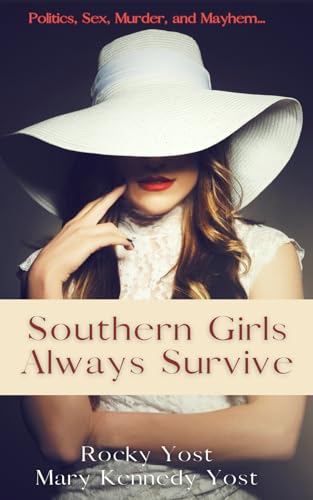
A Grandma's spin on crafts, games, recipes & lifestyle

Category: Uncategorized (Page 1 of 3)

New Year’s Eve Countdown Bags

Traditions are a big part of family events throughout the entire year.  New Year’s Eve is no exception.  Whether you are staying home and celebrating with your kiddos or if you are going out and have a sitter staying home with them, kids still like ringing in the new year like the rest of us.  These New Year’s Eve Countdown Bags are a perfect way for the littles to enjoy the celebration of a new year as well.

There are a nunber of fun options when creating the countdown bags.  I love creating just one bag per each child.  A clock with a movable hand will be affixed to the front and goodies will be hidden inside.  As each hour approaches, the child will move their clock hand to designate the appropriate hour.   The big reveal of course will be when the hand reaches 12!

Making the New Year’s Eve Countdown Bags ~

Supplies ~
  • Lunch sized bags (also known as party paper goody bags)
  • Glue stick
  • Paper fasteners/brads of choice
  • Clock and clock hand (free printout below)

We chose fun metallic party bags for this year’s celebration ~

*WHEN YOU MAKE A PURCHASE THROUGH MY LINKS I MAY EARN COMMISSIONS FROM AMAZON OR OTHER RETAILERS.  YOU CAN LEARN MORE ABOUT MY EDITORIAL AND AFFILIATE POLICY HERE!  THANK YOU FOR SUPPORTING MY SMALL BUSINESS!

Instructions ~

Print and cut out the clock face and clock hand provided in this post.  *Links for various clocks are at bottom of post!

Using the glue stick, affix the clock face to the front of the bag.  *Be sure to not paste it too close to the top as you will need space to fold the top of the bag down.

Make a small hole in the end of the clock face.  You can push the brad right through the paper, but if it looks as if it is going to rip, try punching a small hole first with a pointy object.   Put the paper fastener/brad through the hole and then through the middle of the clock.

Reach into the sack and bend the arms of the brad to help secure the clock hand.

Fill the bag with the goodies you have collected.

Fold top of bag over and secure with sticker or make a small hole and tie a pretty ribbon through to hold in place.

How the Bags Work ~

At the top of every hour, the children get to move the clock hand.  Explain to the children that when the hand FINALLY reaches the 12 they will get to open their New Year’s Eve countdown bag.  *If your children are younger and will not make it to midnight, choose another designated time for them to receive their goodies!

Playing games, having dance parties and of course eating lots of yummy food are all, of course, an integral part of the time spent between the moving of the clock hand toward midnight!  Heidi, from OneCreativeMommy.com has some great free printables for New Year’s Eve Bingo.  Click this link to go directly to One Creative Mommy and get the Bingo game boards to print!  Use fun candies for the Bingo markers…and of course, be sure to have extras on hand for those candies that the little ones “sneak” to eat while playing! 😉

Festive Ideas for the Bag Fillers ~

Fill these fun bags with everything from small toys, to little candies to, of course, NOISE MAKERS!!!!  Below are some of the items we have filled our bags with for this year.  *Notice we have chosen some toys to inspire a little quiet time play…sometimes you need just a little break to slow down for breaks ~


Also included are small snack size bags of cookies and teddy grahams.  Individually wrapped candies and Nutrigrain bites.  You might even want to consider adding a juice box or favorite drink pouch!

New Year’s Eve Food Ideas ~

Fun ideas for festive food are galore on Pinterest, in recipe books and probably even in your recipe box!  Munchies can range from simple to more difficult as far as preparations go.  Remember that when you are adding in all the fun of games and dance parties, whatever food you choose to serve will be loved.  Yes, I, Mimi, am saying that….shocking right?  The gal who loves everything theme oriented.

My point is….it’s been a very busy last couple of months.  With that being said, we are ready for a good mix of simple and festive!  We plan on mixing simple recipes with a few of our favorite more time consuming ones.  For example, popcorn is simple right?  Our family loves popcorn so that will be on the menu!  However, we definitely need one or two fun foods.  Below are a couple of links for you to check out that have great ideas…from sweet to savory.

Adventures in Familyhood has some great ideas for food ideas.  Check out these awesome food ideas from Adventuresinfamilyhood.com in this link!  As far as savory goes, I have to say one of my favorites are the Crescent Dippers by Pillsbury…rolled out in numbers so you can make dippers in the year you are celebrating.  Use this link for the instructions on making New Year’s Eve Crescent Dippers by Pillsbury!  Another website that has loads of fun finger foods is from Brightcolormom.com.  Click here to see all of the fun ideas Michelle from Brightcolormom.com has in store for your New Year’s Eve celebration!

Choose Your Clock Face ~

I created several clock faces for you.  If you choose the monster or penguin, you will have to be a bit more careful cutting out the clock hands.  In order for those clock faces to fit on the bags I had to make them and the clock hands a bit smaller.  However, they are super cute and worth a little extra work!  I have provided a small pic so you can see which green link you want to choose….or you can print them all!

New Year’s Eve Countdown Clock – Blue

New Year’s Eve Countdown Clock – Purple

New Year’s Eve Countdown Clock – Monster

New Year’s Eve Countdown Clock – Penguin

There you have it friends!  Have fun putting these adorable New Year’s Eve countdown bags together…Come back and let me know what fun ideas you fill yours with!

Happy New Year’s to you my friends ~

Mimi


33 FAVORITE Books for Kids

How do I know these are favorite books for kids you might ask?  Well…we attended a baby shower for my niece, Olivia.  She lives in a different state than all of the attendees of the shower.  Therefore, gifts were mailed directly to her home.  (That could get a little crazy getting all those gifts home, right?)  However, what is a baby shower without gifts to open?  Sooo….everyone brought their favorite children’s book for her to open at the shower.

Now, while I believe it is common to request books in lieu of cards these days, for this particular shower, people really threw their hearts into sharing their all time favorite books.  Books they read to their own children and/or books that were read to them as a child.  I  believe that since these were the “gifts” that Olivia opened, we all watched with anticipation as each book was unwrapped.  It was truly heart warming to listen to each story of why these 33 FAVORITE books for kids made the list!

33 FAVORITE books for kids ~

I am taking the time to share a link for each one.  You, of course, can also find many of these books in some of your local stores.  Even if you like to purchase your books at perhaps a local bookstore (I am a HUGE fan of bookstores!) or some other shop, you can at least learn a bit about each book listed in the link before heading out to shop!

DISCLOSURE: This site contains product affiliate links for Amazon and other companies. We may receive a commission if you make a purchase after clicking on one of these links.

In this book, it is school picture day and Juno Valentine is having a fashion emergency!  We probably all have at least one crazy  memory from picture day, right?  😉 Follow along Juno’s adventures as she decides just how she should dress for this big day!  ***(This book was indeed perfect, as my beautiful niece is an amazing fashion designer of women’s wear.  Please check out her amazing website here!  )

Learn ways to celebrate ALL the things that make you happy each day whether big or small!  A snuggly book that has adorable illustrations!

A cute book with 10 bears that slowly decrease in number.  Not only is this a great bedtime story, but one that easily introduces subtraction.  That’s a win-win in my book!

A wonderful board book that shows kids being kind in many different situations.  It helps teach kids that kindness goes a long way in building good friendships!

A super cute book that is sure to bring laughter!  Big Foot (the Sasquatch) is naked because well, that’s just how Sasquatch’s live!  In this rhyming adventure, he explains to the ranger why he shouldn’t wear clothes!

A long time favorite of many!  Little Sal is out picking blueberries while a baby bear is too.  Will each little one go home with the correct mama?

A heartfelt book written by Dolly Parton about a little girl in need of a warm winter coat.  She is teased by her friends for being poor?  What does this sweet girl learn in the end?

The classic edition of a Christmas favorite of so many!  The illustrations in this edition are simply beautiful!  It also was a repeat gift so that pretty much sums it up that it is a necessity in every child’s library!

A fun way for young ones to learn about baby animals.  A set of 16 colorful flashcards with pictures and textures!

Enjoy the beautiful illustrations of children and animals.  Through acts of kindness, kids learn that not only are we loved, but we also matter!


Spooktacular Halloween Snacks for Kids

October is a month of Spooktacular Halloween Snacks for Kids.  It’s time to take those after-school or bedtime snacks up a notch.  This doesn’t mean that a ton of time needs to go into the preparation (well not all of them anway 😉).  What it DOES mean is that you will be creating fun memories for your children!

Believe me when I say, your kids will crown you “Parent of the Spooky Season” when you take a few extra minutes to create these goodies.  You also will be able to sneak in some healthy items that they may not even realize because they just look so fun.  What are you waiting for…….let’s dive in!

This post and its photos may contain affiliate links. As an Amazon associate I earn from qualifying purchases. If you make a purchase through these links, I may receive a small commission at no extra cost to you!

Apple Vampire Bites ~

It really doesn’t get any easier than this fun snack!  Slice apples, layer one side of each slice with peanut butter, add some mini marshmallows for teeth!  This scary snack is healthy and delicious.  Lay each “mouth” on a plate and add some spooky eyeballs to complete the look!

Items/Ingredients Needed ~

  • apples (sliced)
  • peanut butter
  • mini marshmallows
  • plastic eyeballs

Below is a link to purchase the eyeballs.  You may also have luck finding them in some of your local stores!

Hocus Pocus Spellbook Brownies ~

You will notice several steps in this spooktacular Halloween snack, but don’t run away just yet….this is a simple recipe too since you are using boxed brownie mix.  The detail in the instructions is just on the decorating, which goes quickly once you get the hang of what you are doing!

Items/Ingredients Needed ~

  • 1 box brownie mix
  • black tube of icing
  • white tube of icing
  • large candy eyes (optional)

If you choose to use candy eyes instead of the icing (either one works perfectly), you can usually find candy eyes in your local store.  I have also included a link to purchase them below.  *You will want the jumbo size ones for the best look….pay attention to sizes as there are many different sizes of candy eyes.

I’m including this link as well because it is handy to have several sizes on hand when preparing different spooktacular Halloween snacks for kids all month long.

Directions ~

  1. Bake brownies per box instructions.
  2. Let cool and then cut into rectangular (book looking) pieces.
  3. Pipe white icing in a large circle for the eye.  (Optional – you can use a large candy eye in place of this step).
  4. Pipe black icing in middle of eye (unless using large candy eyes).
  5. Pipe a ziz zag line down one long side of brownie.  Next, pipe a straight line next to that and then add stitches down the length of the straight line.
  6. Pipe half circle on opposite two corners of the brownies.

Let’s not forget to add those special candy Halloween extras on our serving plate once we are done making the Hocus Pocus Brownies.  It just makes the presentation that much more fun!

Homemade Chocolate Halloween Candies ~

Another super simple recipe that is so fun to make.  You can be as simple or as creative as you wish.  Bonus….the kids can join in on the fun making these!  (Look in the Hocus Pocus Brownie picture above and you will see the various colored candies on the serving platter!)

Items/Ingredients Needed ~

  • silicone Halloween chocolate molds
  • colored melting chocolates

You can look in your local stores for the chocolate molds or purchase them from the links below.

Directions ~

  1. Place candy melts in a heat proof bowl.  *You can add a tsp. of shortening per each package used to thin the chocolate out a bit.
  2. Put bowl of melts in the microwave and MICROWAVE FOR 30 SECONDS!  (this is in all caps for a reason….follow these directions to ensure your chocolate doesn’t burn!)
  3. Take bowl out and stir thoroughly.
  4. Place back in microwave for another 30 seconds.  (even if it doesn’t look like they are melting, DO NOT go over 30 seconds at a time!  I promise, they are melting!)
  5. Continue doing this until chocolate is melted.

*If you need to thin chocolate out at any point during using, add one teaspoon of shortening.

The link below shows green candy melts (which is indeed a fun Halloween color), however, when you click on the link there are more color options.

If you prefer to use white chocolate melts, or even white almond bark and color it to your own liking, be sure to use oil based food coloring or your chocolate will get VERY thick….believe me….I know this to be a fact because I have ruined my chocolates before!

Halloween Frankenstein Kiwis ~

How cute are these little frankensteins?  A healthy snack that is oh so fun to serve up!

Items/Ingredients Needed ~

  • Kiwis
  • candy eyeballs
  • pretzel sticks
  • black tube icing

Directions ~

  1. Wash kiwi and pat dry.  Cut it in half and place flesh side down.
  2. Cut a little bit off of the ends and throw away.  Using a small vegetable peeler,  gently peel the skin upwards, leaving some on the top for his “hair.”
  3. Pat again with paper towel to remove excess moisture.  This ensures the icing will stick.
  4. Put small dots of icing for the “glue” for each eye.  Then place candy eyes on the icing dots and press lightly.
  5. Draw a mouth and “stitching” on side of face with tube of icing.
  6. Gently snap a pretzel stick in half and push into sides for his arms.

Banana Ghosts ~

*See picture above

Ingredients Needed ~

  • bananas
  • tube of black icing

Directions ~

  1. Peel bananas and then cut in half.
  2. Using tube of icing, draw your ghost face of eyes and mouth!

Mummy Juice Boxes ~

How cute are these?????  Another easy spooky treat that the kids will LOVE!

Items/Ingredients Needed ~

  • Juice boxes
  • Googly eyes
  • Gauze
  • Scotch tape

Directions ~

Wrap gauze around each box.  Gently tuck loose end in the gauze wrapping to secure.

Roll small piece of tape and place on back of googly eyes.  Then place eyes on gauze juice box.  *You can also get googly eyes with adhesive backs to use instead of tape.

Graveyard Pudding Cups ~

Kids love pudding and this ghostly treat will be sure to bring a smile to their faces!

Items/Ingredients Needed ~

  • chocolate pudding cups
  • ghost marshmallow Peeps
  • graham crackers OR Oreos
  • candy pumpkins

Directions ~

  1. Chop graham crackers or cookies in blender or food processor until finely chopped (it should resemble dirt).
  2. Peel top of pudding cups off.
  3. Layer crumbs on top of chocolate pudding.
  4. Top with a marshmallow ghost Peep and a candy pumpkin.

While not necessary, it so much fun to add the casket backdrop to many of your snack presentations, giving a fun name to each snack!

Baked Halloween Quesadillas ~

Items/Ingredients Needed ~

  • Mexican blend shredded cheese
  • flour tortillas
  • spray cooking oil
  • Halloween shaped cookie cutters

Directions ~

  1. Place 2 tortillas together face down on cutting board.  Press cookie cutter into tortillas, making sure to cut through both.
  2. Spray baking sheet with cooking spray.
  3. Place bottom tortilla on prepared baking sheet.
  4. Top with handful of shredded cheese.
  5. Place top tortilla over top of cheese.
  6. Lightly spray top of tortilla with cooking spray.
  7. Bake at 350° for about 7 minutes or until cheese has melted.

*It helps to have the comfort grip cookie cutters for this snack to make cutting through both tortillas a bit easier!

Another fun Halloween serving idea is the coffin shaped cutting board.  This will come in handy for so many reasons throughout the month of October.

Mummy Dogs ~

This can be a fun little snack or part of your dinner menu.  You can mix it up and use regular size hot dogs or cocktail weenies.

Ingredients Needed ~

  • hot dogs or cocktail weenies
  • crescent rolls
  • mustard, ketchup OR candy eyes

Directions ~

  1. Unroll dough and separate at perforations, creating 4 rectangles.
  2. Press perforations to seal.
  3. Use a knife or pizza cutter to cut 10 strips lengthwise down the dough.
  4. Wrap strips of dough around the mummy, layering them randomly to resemble mummy wraps.  Use 3 to 4 strips of dough for each mummy.
  5. Bake at 350° for 15 minutes or until dough is golden brown.
  6. Dot mustard or ketchup on the mummy for eyes OR push candy eyes into the dough.

Wrapping It Up! ~

There you have it my Halloween friends…a list of Spooktacular Halloween Snacks for Kids that will be a hit this season for sure!  I hope that you will create some (or all) of these yummy recipes…and have fun….maybe add your own little touches!  Send pics back in the comments when you do….I would love to see what you have created!

Once you have made all of your snack list ideas, be sure to engage the family in outdoor Halloween fun too!  Try this neighborhood fun…You’ve Been Booed!!! 👻.  Maybe have some Skelly Skeleton fun as explained here….Halloween fun by mail with Skelly Skeleton.

Last, but definitely not least, I would like to thank my dear daughter, Lauren.  I (and I have to say I on this one and not we) raised our kids to love Halloween and all of the fun that goes into the month of October.  She has taken that up a notch and created each of these snacks already this month (and we are not even half way through the month!!!)  She is a dedicated mom that truly enjoys holiday fun with her kiddos!  Our grandkids are indeed lucky!

Happy Halloween my friends ~

Mimi


Mimi’s Favorite Finds

This page will be dedicated to all unique finds that I want to share with you.  It will be an ever-changing page as I will also put current great deals on here also!


If you are not a Prime member, you can use the handy link above ⤴️to get yourself set up.

Favorite Gift Ideas from Amazon

*Mimiblog.org is a participant in the Amazon Services LLC Associates Program, an affiliate advertising program designed to provide a way for websites to earn advertising revenues by advertising and linking to Amazon.
Below are items that I love or have read amazing things from my fellow bloggers.  You will see that I tend to gravitate to educational toys.   Happy Shopping!

Fun gift ideas for your Christmas shopping!

Brick Loot Products

The ABCs of Gratitude

Here we are…almost to the beginning of yet another new year.  Have you make any resolutions?  Are you still going strong with the current year’s resolutions?  Have you ever considered instead on just being grateful?  Maybe you are saying right now, “I am grateful.”   Well then, I challenge you…how deep does that gratitude go?  Let’s dive into the ABCs of Gratitude!

Like everyone else, I feel I am full of gratitude.  Recently though, I have discovered that I tend to ignore the “small” stuff…you know, take it for granted!  As I sit here typing, I look at my hands (which are not pretty and stylish like so many of my friends and family members), and I realize how blessed I am to have the ability to use my hands in the way I want.  I love to write….and my hands allow me to do that.

Heck, I have a computer!  I am definitely blessed to have a computer.  Have I ever sat and pondered why that is such a blessing?  Of course, it allows me to write….but I have started digging deeper than the obvious.  It allows me to keep in touch with my family and friends, pay my bills, watch videos and movies, research ANY topic my heart desires, create fun graphics for blogging and party planning, research my family geneology, create spreadsheets, and on and on!

What’s Your Point?

My point is, I am learning to focus deeper on the everyday things in my life AND I FEEL GREAT!  Seriously, it has given me such a sense of happiness that I haven’t felt in a long time.  Is this a New Year’s resolution…No!  I just have been reading so many different ideas on finding joy in everyday life, and I believe I have hit the jackpot!

I’m sitting here in awe….seriously everyone….in AWE of just how much this little “project” is making me more grateful and appreciative in my everyday life.  Of course, now I want to share it with you in hopes that you, too, will enjoy it as much as I am.

How Do I “DO” the ABCs of Gratitude?~

The biggest recommendation I have for you is to cut out a little bit of “me” time before you start this project.  Time that you can just sit and focus….for a few minutes, for a half hour or just work on it various times over a period of several days.  That’s the beauty of it….there are no steadfast rules.

Drumroll please……..

Yes, it’s that easy!

If you are like me, you want it to be on some pretty paper, but that’s not necessary.  I am going to provide you with several free downloads if you would like to use those.  However, you can also just write it out on a plain old sheet of paper or in a journal/notebook.

The next part is where it gets a little tricky!   You can’t fill in the blanks with the items/people that you are always thankful for.  You know what I’m talking about…the spouse, the children, the grandchildren and the furry children.  That’s why you need a little quiet time so you can sit and think.

The good part is that nothing….and I mean NOTHING is a stupid answer.  Trust me on this!  You will understand that more once we get to the next step!

Free Downloads ~

I have created some fun printouts for you to use….just click on the green link after each image!

     Greenery Pattern Gratitude Sheet

        Unicorn Pattern Gratitude Sheet


          Brown Floral Pattern Gratitude Sheet


          Superhero Pattern Gratitude Sheet

Journals & Fun Notebooks ~

You can also use a beautiful journal.  Gorgeous books filled with decorative pages make me happy.  Do you feel that way too?  Stampington & Company has amazing products.

Magical Thinking Journal by Papaya Art     This Magical Thinking Journal is perfect for the project!

Paper House Productions is another favorite online site I love:

        This Batman Mini Notebook could be a fun booklet for kids to use!

           Here is another super cute journal for writing out thoughts!

The Next Step to ABCs of Gratitude ~

Once you print out the form or get your journal, you are ready to get to work.  Think of a word for every letter of the alphabet.  Remember, I told you earlier that there is NO wrong answer.  When I did this, I first thought some of the words seemed somewhat juvenile.  What is interesting is where each word will eventually lead you!  Here is what I came up with:

My very first word was apples.  Shouldn’t it be more substantial like air or authenticity?  Well, those are good answers too, but I went with what my mind first went to.  You may find that as you think of each letter of the alphabet, it is a bit harder to come up with a word you think is “good.”

I chose to write out a word for every letter of the alphabet in one sitting.  You can follow this method or choose to go back and add to it throughout a set amount of time if you wish.  After completing the list, I sat and focused on it.

Being thankful for apples is obvious for the very reason of food and nutrition.  This is where I challenge you to go further.  Why else am I thankful for apples?

  • Wildlife –  Many animals in wildlife love apples, apple peels, etc.  I am so grateful for animals in our world.
  • Compost – Apples are good for compost…they provide a good source of nitrogen.  I love gardening!
  • Songs – There are so many fun songs to sing with your kids about apples….music makes me happy.
  • Dessert – Some very delicious desserts are made with apples…and I love desserts!

Hopefully you are getting the idea here.  Take time to focus on each word and the MANY different reasons you are thankful for it.  You have now gone beyond the obvious and focused on so many things that you may have taken for granted.  Seriously, have you ever even considered being thankful for compost???  I sure haven’t…but I am now!

I have chosen to focus on each word over several days.  It has been very fun to see where each word leads me to!  Give it a try…you may be surprised where it leads you!

Grateful to be sharing this with you…

Mimi


Hearty Personal Breakfast Skillet

If you are anything like me, you are always searching for new and exciting recipes.  Sometimes, those recipes can be similar to ones you have already made, but you need only to change up the method in which you serve them!  Through the years I have heard people say, “Why do you worry about so many small details?”  My response is always…”Presentation is Key!”

This very topic is what helped me to discover personal-sized cast iron skillets.  I love cooking with the small skillets both for presentation and to have the ability to cater to each individual’s personal preferences in foods.  These Hearty Personal Breakfast Skillets are a big hit on Sunday mornings in our family.

Which Skillets to Use ~

There are so many wonderful skillets out there, however, we tend to lean toward the Lodge brand.  The benefits of this brand are as follows:

  • Retain heat well
  • Preseasoned
  • Can be used on stovetop, in oven, on grill or over an open fire
  • Lifetime warranty
  • Long-standing history of quality products
  • Can be used for everything from frying to sauteing, to broiling and everything in between
  • Have a large variety of sizes and different series
  • Easy to find locally and on-line

Size to Use for Hearty Personal Breakfast Skillet ~

We use the Lodge Pre-Seasoned 6-1/2 Inch Skillet for the breakfast skillet as well as many other individualized recipes.  It is a good idea to have 6 to 8 if you are planning on serving several people.  I use them many times for just Brad and I as well, so if you are empty nesters, it is fun to get 2 and have fun creating!  *Pay close attention to the size because many brands have an even smaller size that is not big enough for this savory dish!

What is even better about these is that you can create savory or sweet recipes in them.  Who doesn’t like digging into a steaming hot personal pan brownie or cookie topped with ice cream?  Yum!  These have quickly become known as pizookies!

Recipe ~

Ingredients for 6 Personal Skillets:
  • 14 Red potatoes, cubed small
  • 10 Sausage patties, crumbled
  • 6 Ham slices, cut into small squares
  • 1 Small Onion, diced
  • 2 Bell peppers, color(s) of choice, cubed
  • 2 Anaheim peppers, diced
  • 12 – 14 Eggs
  • 1/2 to 3/4 Cup Milk
  • Salt
  • Pepper
  • Montreal Steak Seasoning
  • Shredded cheddar cheese

*Please note, you can customize these ingredients to your liking.  Other topping ideas:

  • Mushrooms
  • Spinach
  • Mozzarella, Swiss, Gruyere, Fontina, Gouda or your favorite cheese of choice
  • Tomatoes
  • Bacon
  • Avocado
  • Black Olives
  • Jalapenos
  • Hash Browns
Directions for 6 Hearty Personal Breakfast Skillets ~
  1. Brown sausage.  I used patties because that is what I had on hand.  (You can, of course, use any type as you will be crumbling it after cooked.)
  2. While sausage is cooking, continue chopping the rest of the veggies and ham.
  3. Cook chopped potatoes, onions, and peppers until browned in a separate small skillet.                   
  4. Layer sausage and ham in prepared 6 1/2″ skillets.                                                                                         
  5. Follow with cooked potatoes and veggies.                                                                                               
  6. Season liberally with Montreal Steak Seasoning and then salt and pepper to taste.
  7. Beat eggs with milk until completely combined.
  8. Pour egg mixture over meat and veggies in each skillet.                                                               
  9. Top with desired amount of cheese.  (We love cheese so I completely cover the skillet.) 
  10. I placed each skillet on foil lined baking sheets to protect oven from spillage.
  11. Bake at 350 for 45 minutes or until browned.

*You can exclude necessary ingredients to create a Keto version.

Want To Top It With Gravy? ~

Let’s take it a step further and add gravy.  You can go the traditional route and make gravy from scratch or you can make it from a mix.  I use Pioneer Country Sausage Gravy Packets when not making gravy from scratch.  Season it up with salt and pepper and it becomes the perfect final topping for this delicious recipe!

Make Ahead ~

Holiday season is upon us.  Chop up all of your ingredients ahead of time for prep and put together early Christmas morning.  Put your coffee on and assemble these before the Christmas present frenzy begins.  While you are all opening presents, this delicious breakfast can be cooking and filling the room with scents of a cozy Christmas morning!

If you are in a pinch for time, put it all in one large skillet to scoop out individual servings when ready!

Serving Choices ~

As you can imagine, the skillets are extremely hot when taking out of oven. I love to serve these yummy dishes with quilted handle covers for functionality and to keep the presentation fun!  Basic Black Set of 3 Skillet Handle Covers are a good place to start for your collection!

Of course, these fun bandana ones are adorable for many occasions as well!  Are these not the cutest???

Bandana Hot Handle Holders by Lodge

Crafty Hands Primitive has a large assortment of colors to choose from to match any season/holiday/theme you wish.  Be sure to look at the beautiful patterns by CraftyHandsPrimitive on Etsy by clicking here!

Primitive Skillet Handle Pot Holder choose fabric image 2

Care of Iron Skillets ~

I had never cooked with an iron skillet until I got married.  Brad quickly taught me the beauty of using them, but even then I shied away from them because I was unsure how to care for them.   I soon realized that they truly are very easy to clean.  This is all you need to clean your cast iron skillet:

Stainless Steel Scrubber Set

What’s even better is that this fun idea has come to you just in time for Christmas.  Whether adding them to your Christmas wish list or surprising someone special, a set of single-serving sized iron skillets will be sure to bring a smile to anyone’s face!  Soon I will bringing you a cookbook featuring a variety of iron skillet recipes just like this delicious hearty breakfast skillet!

Happy Cooking ~

Mimi


Halloween Snail Mail for Kids

Even in this age of technology everyone loves receiving snail mail….well, as long as it isn’t bills!  Seriously though, when you open that mail box and find a pretty colored envelope addressed to you, doesn’t it just bring an instant smile to your face?  I’ve been working harder at getting back to this long lost sentiment, and right now I have been focusing on Halloween Snail Mail for Kids.

In one of my posts last week, Flat Skelly Skeleton, I introduced a fun Halloween project for kids that can be mailed out.  This post builds upon that and gives you some ideas for follow-up “Skelly Snail Mail” you can send after you mail out Flat Skelly.  However, even if you have not mailed Flat Skelly, you can still use these fun ideas to surprise the kiddos.

Hand-Made Envelope With Craft Inserted ~

I used a standard sized (8.5″ X 11″) piece of colored card stock to create this envelope.  The package can be decorated any way you wish if you are hand delivering.  My grandchildren live close so that is the method I chose.  You can still make this if you will be sending it in the mail, just do most of your hand decorating on the opposite side so you have ample space to address it.

Directions ~
  • Place card stock in horizontal position
  • Fold bottom up 3/4 of the way
  • Crease the folds nicely by running a pen along the edges
  • Fold sides in about 1/4″ on both right and left sides
  • Crease folds
  • Fold top portion down
  • Tape left and right sides down to secure (making sure to leave top open to put mail in)
  • Decorate

The skeleton theme is being used on all of our mail this week since we have dubbed it “Skelly Mail.”  You obviously can use any Halloween images you wish, but following a theme does make it fun!  For the first package, I inserted a fun stained glass craft.  As always, choose whatever fun item you want to put in the package, but I am including a link below so you can see what I included:

Halloween Makit & Bakit Craft

These were a fun little activity that the kids really enjoyed and are so very cute to let them hang in their bedroom window, kitchen window or wherever you would like to display their artwork!  (Halloween is almost here now, but still check out this fun link to look at their other holiday choices for Thanksgiving and Christmas….get them ordered before they run out!)

Skeleton Hand with Treat ~

Here we printed out a skeleton hand image on a standard (8.5″ X 11″) sheet of white card stock.  We then carefully cut around the hand to cut out most of the white space.

Use this free link to print out your own copy of the Skelly Skeleton Hand ~  Skeleton Hand Full Size Image to Print and Cut.

I cut the space between the index finger and thumb apart so that I could insert the Halloween treat.  This makes it look as if the hand is actually holding the treat.

These fun ring suckers were found at our local grocery store.  However, if you cannot find them and act quickly enough, you can still get them delivered on time by using this link ~ Skeleton “Sugar Skulls” Lollipop Rings.  I plan to use the extra for our trick or treaters!

Pumpkin Tags ~

To add extra flair, attach a fun tag in a way that it is dangling from the skeleton’s hand.  You can create your own or I have made some for you to print out for free.  Bonus…these are cute but basic enough that you can use them for quite a few different things!  Print them out on cardstock…you will get 4 per page!

Use this link… Free Pumpkin Tags.  Once you have printed them, use a marker to write the recipient’s name.  I then wrote “5 Days ’til Halloween.”  This will add extra excitement for them to know they can officially start counting down the days until it is time to go trick or treating!

What’s Next You Ask? ~

As you can probably assume, I plan on adding a new fun delivery each day.  Be sure to tune in each day to see what I have added to this post!  I will be sure to give detailed directions for each creation!  I’m not really sure who is having more fun this week…me creating the daily mailings or the kids receiving them!  This Halloween Snail Mail for Kids is a lot of fun!

I hope your week before Halloween is filled with lots of spooky fun! 🎃

Love ~

Mimi


DIY Yard Witches

Have you thought about being THE HOUSE that everyone loves to talk about once Halloween decorations start going up?  Do you get tired of seeing the same spooky decor at every other house?  You will love these very easy yet unique DIY Yard Witches and all of your neighbors will too!

There are some different ways you can create these spooky little gals, but using a tomato cage has to be the easiest.  Don’t have any tomato cages?  Don’t worry…read on and I will give you some other easy suggestions as well!

Items Needed for DIY Yard Witches ~

  • Tomato Cages (we used 4)
  • Styrofoam Heads (4)
  • Black Plastic Tablecloths
  • Large Black Trashbags (optional)
  • Black Tulle Material (4 yards per witch)
  • Witch Hats (4)
  • Black String or Yarn (or other item to tie with)
  • Yard Staples or Stakes
Below are some links if you have a hard time finding some of the items in your local store:

<

Yard Staples or Stakes can be found here ~


Styrofoam Heads can be found here!

Plastic Witch Hats can be found here!

Black Plastic Tablecloths can be found here!

Some of these items are not pictured in the photo above!

Instructions ~

  1. Turn tomato cage upside down with prongs at the top.
  2. Rip large black trash bag down the seam and then place on top of prongs (so that it hangs to the right and left side of the cage to be used as the arms).  Pull the prongs of cage together and place styrofoam head over the prongs and trash bag (to secure the arms).                                                                                                                                                                                   
  3. Cover head and tomato cage with black plastic tablecloth.  We placed the long ends to the front and back of the witch so the tomato cage is not visible from the front.                                                                                                     
  4. Place tulle over the tablecloth so that it is even all around.                                                                       
  5. Tie off at the neck of the syrofoam head.                                                                                                               
  6. Place hat firmly on top of head.                                                                                                                                             
  7. Make other witches and then place side by side, a distance a part, in desired area of yard.  Pull the trash bags out a bit to tie “hands” of each witch together.
  8. Push yard staples at base of tomato cages to secure in the ground.

Alternate Ways to Make DIY Yard Witches ~

If you do not have any tomato cages and cannot purchase any at this point in the stores, don’t worry!  Thick yard stakes or poles can also be used.  Of course, the directions are a bit different, but the end result is the same.  We make yard ghosts every year and we use yard stakes to create these.

If you don’t have tomato cages try this ~

If the ground is dry, you will need to use a mallet or hammer to pound the stake firmly into the ground.  It is important that they are at least 2 to 3 inches in the ground for stability.  You can then follow the steps above to create the witch.

If you don’t have styrofoam heads try this ~

I actually use this method for my ghosts so that I can make fatter heads.  Take a plastic grocery sack and fill it with other grocery sacks, crumbled newspapers, packing plastic or bubble wrap.  Continue stuffing until you get the desired size for the head.  Carefully place the filled bag upside down over the yard stake, pinching it closed until you can get it tied off.

After securing the plastic bag head to the stake, follow the steps above to complete your witches.

Yard Ghosts ~

As mentioned earlier, we make ghosts at our house and they are truly looked forward to every year.  Different families come down and take pictures in front of them…they make a great photo opportunity!  If you choose to make ghosts instead or along with the witches, you will need white flat bed sheets.  These can be hard to find, so you will need to plan ahead.

At the end of the month, I take these down, wash the sheets and pack away all of the materials for the next year.  You may need to darken the faces again with a black sharpie each year, but it will help them last much longer.  Believe me, it is well worth the step to clean and pack away.  Here is a link to a more detailed post of how to make your own yard ghosts!

Brad made a campfire last year to add to our ghost scene.  It has been a very fun addition!

Happy October and Happy Halloween 👻to you all!  I hope your month is “spooktacular!”

Love-

Mimi

Flat Skelly Skeleton

Halloween shenanigans are in full swing…decorating the house, planning trick or treat costumes, fun at pumpkin patches, carving jack-o-lanterns, spooky crafts, fun snacks and more!  As a grandparent, I love to be as much a part of all this as possible, but realize it is not feasible to do so.  Flat Skelly Skeleton is here to help out with just that!

The Flat Stanley Project is an awesome project that our children were able to take part in back when they were in elementary school.  Have you been lucky enough to be a part of it as well?   The teacher provided a template of “Flat Stanley” for the kids to color.  The kids then mail him to various friends, family members or anyone of interest.  The recipient takes Stanley along with them for a day, taking pictures and writing about his visit.  Once done, they mail him back along with the pictures and journal notes.  It is a great literacy program that also teaches geography in a very fun way.

Flat Skelly Skeleton ~

Flat Skelly is similar to Flat Stanley.  This is a fun way for grandparents (or any friend or family member) to be a part of Halloween activities…even if they are not physically present.  I have made it super easy for you to print out the fun Flat Skelly Skeleton poem along with the Jointed Skeleton template. Then all you have to do is mail them to your favorite little ghoul(s).  They will be so excited to share all of their Halloween fun with you!

Flat Skelly Skeleton Poem ~

Click here for free download of Flat Skelly Poem

Jointed Skeleton Directions~

Click here for FREE printout of Flat Skelly Skeleton


I found this free skeleton printout by Preschoolactivities.us.  You can use the link next to the picture above to print out or go to their website with the skeleton coloring page Preschoolactivities.us skeleton coloring page.  There are also other free options on Pinterest if you wish to use a different image.  Print these on copy paper or card stock.

You have options regarding how you wish to mail these to the little ones.  You can leave the skeleton template in tact so that they can cut out the pieces or you can pre-cut and put the pieces, along with the brads, in an envelope.  The option you choose will depend mostly upon the age of the child you are sending to and whether they are skilled with scissors yet.

Whoever ends up cutting and putting the skeleton together will need these instructions ~

  1. Cut out each skeleton part
  2. Let your child color and decorate, if desired
  3. Insert small brads at each joint to make Skelly movable (see below for more information on brads)
  4. Tape a popsicle stick or cookie stick to back of the skeleton

*************************************************************
*Types of small brads to try ~

Brads are two pronged paper fastners that usually have some type of decorative top.  There are different sizes, so pay attention to the details.  The mini-sized ones may be the best option for Flat Skelly since he is a bit smaller printout.  Below are some fun varieties:

Mini-sized, multi-color brads

Assorted colors of brads ~

Halloween brads ~

*****************************************************************

Once you introduce your children to the world of “brads” in crafting, the possibilities are endless.  They are such a versatile and inexpensive item to add to your craft baskets.  I even use them for scrapbooking!

There have been numerous spin offs of the original Flat Stanly that are so much fun to explore.  This project is a little different in that the child is receiving Flat Skelly instead of sending him to others.  They then have the responsibility to make sure pictures get taken and if of writing age, journaling about their fun experiences throughout the month of October.

You can take it a step further and get them a little “Flat Skelly Skeleton” journal to use for their journaling.  Here are some fun ideas:

Fun Vintage Style Skeleton Notebook

Dancing Skeleton Journal with blank pages

Wide Ruled Skeleton Journal

Sending Flat Skelly As A Package ~

If you live far away or like to send snail mail to the recepient of this awesome Halloween activity, here is what you will need to remember:

  • Skelly Skeleton Poem
  • Jointed Skelly Skeleton (or cut out pieces and put in envelop if sending to smaller children)
  • 8 brads
  • Popsicle or cake pop stick

Send it in a festive envelope.  I used a large manila envelope so there would be no fold creases.  Use stickers or color fun Halloween images on the outside.  What child would not be excited to receive this special delivery?

It’s no secret how much my family loves Halloween.  Even if you don’t love spooky things, you can enjoy Halloween with your kids.  To me, it is not just about the 31st….it’s a whole month of family fun!.  Whether it is as simple as coloring with your kids, crafting or making festive foods, you will create memories to last a lifetime.

Other Halloween Festivities to Check Out ~

Last year I shared some Halloween ideas:

Fun food ideas for Halloween!  Lots of fun ideas…including the infamous Feet Loaf!!!

Halloween Gingerbread Houses!  Buy a kit or make your own….it’s great fun either way!

You’ve Been Booed!!! 👻  This is an annual MUST in every neighborhood!

The month of October just really flies by way too quickly!  Don’t let these festive opportunities get away from you!  You may just find that you have more fun than your kids do!  Be sure to follow me if you aren’t already by entering your email…I promise you I won’t overfill your inbox….only good things coming and at good intervals!

Happy Haunting to all of you!

Mimi


Nurturing Self-Esteem in Children

I truly thought nurturing self-esteem in children was one of the hardest tasks of parenthood.  It doesn’t take long to realize that each child that enters your family dynamic has a very different personality.  Because of this, some of your parenting tactics will differ a bit if you want your child to grow up with self confidence.

Don’t get me wrong.  I’m not suggesting that you have to have a “smorgasbord” of family rules.  In fact, I feel just the opposite.  Most of your parenting skills should be the same to help in creating strong family bonds between your children.  Please understand, I am not a child psychologist or any form of specialist.  I am just a now “Mimi” that has experienced motherhood first hand.   Through victories and failures you learn quite a bit.

Our immediate family has a very strong connection.  Does this mean everything was done perfectly???  Hell no!  Wow, raising kids is the toughest, yet most rewarding, thing you will ever do (in my opinion).   While you are in the thick of it, you just keep pushing through, hoping you are making the “right” choices.   What I discovered is that it is important that your kids learn that some mistakes are made along the way….it is through failure that we find the most success!

Failure is OK!

We all want our kids to be the smartest, the best, the happiest, the kindest…….and on and on.  It is so important that they understand that they will fail at times and that is ok!  It is the lesson they learn from that failure that is so valuable.  Take this time to help them evaluate where things went wrong and discuss what they could have done differently to make it better.  However, don’t solve the problem for them.  Just be there to guide when needed.

It is also important for us, as parents, to understand it is ok for them to fail.  We have to be able to take a step back and realize they aren’t always going to be the “winner.”  Once we understand that, we are a huge help in building their self confidence.  This was hard for me as I am a competitive person by nature.  I quickly realized that my children were made differently from me and I needed to respect and nurture each of their personality traits.

Let them try numerous things.  You never know what hidden talent may arise from sampling different extra-curricular activities.  Likewise, you, as parents should try new things so that children can see their role models handing new situations as well.  My daughter has recently started boxing and as you can see it has had a positive effect on her children.

Mental Strength

This is many times referred to as “grit.”  While my husband and I were athletes, we quickly realized with our children (Karleigh in particular) that you don’t have to be an athlete to have grit.  That child was interested in so many other things in life, but we knew that whatever she set her mind on to do she would eventually accomplish it…or have a ton of fun trying!  She taught us that being good at kindness, community projects and mastering the violin were just as good of a lesson at “grit” as being a good athlete.  We just had to learn to let her follow her dreams….not ours!

I will never forget the first school orchestra concert we went to.  Our whole family went (because it is so very important for siblings to support each other).  Lauren and Eli were athletes like us so this was a very different experience for all of us.  The boredom we had to battle from them was painful.  However, when they watched their sister step on the stage and take her seat, we were all mesmerized.   Moments like these are amazing for nurturing self-esteem in children…for Karleigh as well as Lauren and Eli.  They quickly learned that the interests of each family member is important.

Boundaries ~

I was from the era that you had to remain at the dinner table until your meal was finished.  It was so agonizing!  Thank goodness for the dogs in my family that loved to sit under the table 😉.  This was a boundary that was set by my parents and we all knew it wasn’t negotiable.

I believe a good boundary set for today is no technology at the dinner table….for children AND parents.  Today’s dinner table may look a little different…maybe one parent is working late, maybe there is only one parent, maybe it is grandparents raising the kids.  However that table looks, still make it a family dinner and still set boundaries.  This is such a great time to talk, REALLY TALK about the kids’ day.  This, too, boosts self-confidence as it makes the child feel loved and cared about.

When our children were young, my husband worked late hours.  We didn’t switch to separate dinners, we moved our family dinners to later so that we could be together as much as possible.  For a long time, we also had “Sunday” dinners.  I tried to make this more of a special meal with themed dinners or special dinner settings as much as possible.  The kids got involved with this and enjoyed it as well.  As the kids got older, I let this tradition slide a bit….I wish I would have never let that happen.  However, now that we are all adults, we try to get together for “Sunday” dinners as much as possible now which is very special to us.

Conversation Starters ~

  1. What was the favorite part of your day?
  2. How were you kind/helpful to someone today?
  3. Who did you play with today?  What did you play?
  4. If you were the teacher, what rules would you have for the class?
  5. What is your favorite room in our house?  Why?
  6. If you could only keep one toy, what would it be?
  7. What do you like best about our family?
  8. What was the most challenging part of your day?
  9. Were there any instructions you had a hard time following today?

Responsibilities ~

Otherwise known as chores, responsibilities for each child is so important.  It may create extra work for you following up on spills and such, but the pride a child feels when you trust in their abilities goes a long way.  My daughter, Lauren, is amazing at this.  At very young ages, her children have been responsible for feeding the animals, cleaning their rooms, setting their clothes out, etc.  It isn’t always done perfectly, but when Max shows up to Mimi and Pappy’s in a thick velvet sport coat with shorts in the middle of summer….priceless!

Speaking of dressing, if the kids want to wear a Superman (or E.T.) costume to the grocery store…let them.  Maybe your daughter wants to go to dinner dressed as Elsa.  Who is it hurting?  In fact, it is only building their self confidence.  Check out the many benefits of role playing in my earier article Bring Back E.T. ~ Imagination and Role Playing.  Many times, the smallest things can make the biggest impact.  Besides, most people get a kick out of seeing children dressed in costumes…it may just make someone’s day!

Play Outside ~

Not only is the physical exercise so important, but so many life lessons are learned while kids are playing outside.  They have to learn to be creative and make decisions on their own, which of course, builds self confidence.  Even if you take the kids to the playground, don’t be that “helicopter” parent that stands right by them.  Sit/stand in watching distance but let them learn how to make friends and stand up for themselves when someone isn’t so nice.

It’s so hard to watch if someone isn’t being the kindest to our children, but how else are they going to learn to cope.  We are not always going to be there to fight every battle.  Now am I suggesting you let some child physically abuse your child…NO!  However, most of the time when there are struggles between children doesn’t mean it’s going to turn into some huge war!  Children will learn to stand up for each other and for themselves while playing with others.

Don’t Dismiss Their Emotions ~

When you child has had a bad day or a bad experience, DO NOT just say, “It will be ok!”  Take this time to REALLY TALK with your child and ask questions…

  • Why do you feel that way?
  • What could have been done to make it better?
  • Can you tell me more about it?
  • I’m so sorry this happened, how can I help?
  • What are you thinking about?

GREAT Children’s Book Series ~

As an Amazon Associcae I earn from qualifying purchases.

Steve Herman is a best selling children’s books author.  The My Dragon Books Series has some great books to help children with learning from mistakes, dealing with bullies, handling sibling rivalry, loving yourself and much more.  Here is a link to his book Help Your Dragon Learn From Mistakes.

There is even a cute plush Diggory Doo Dragon Plush that kids can play along with as you read through each book.  How fun is that?

Nurturing self-esteem in children is so very important.  It helps a child thrive throughout life, teaches them coping skills and how to handle adversity.  Do everything you can to make this happen!

Much love ~

Mimi

« Older posts
%d bloggers like this: