A Grandma's spin on crafts, games, recipes & lifestyle

Category: Uncategorized (Page 2 of 3)

Nurturing Self-Esteem in Children

I truly thought nurturing self-esteem in children was one of the hardest tasks of parenthood.  It doesn’t take long to realize that each child that enters your family dynamic has a very different personality.  Because of this, some of your parenting tactics will differ a bit if you want your child to grow up with self confidence.

Don’t get me wrong.  I’m not suggesting that you have to have a “smorgasbord” of family rules.  In fact, I feel just the opposite.  Most of your parenting skills should be the same to help in creating strong family bonds between your children.  Please understand, I am not a child psychologist or any form of specialist.  I am just a now “Mimi” that has experienced motherhood first hand.   Through victories and failures you learn quite a bit.

Our immediate family has a very strong connection.  Does this mean everything was done perfectly???  Hell no!  Wow, raising kids is the toughest, yet most rewarding, thing you will ever do (in my opinion).   While you are in the thick of it, you just keep pushing through, hoping you are making the “right” choices.   What I discovered is that it is important that your kids learn that some mistakes are made along the way….it is through failure that we find the most success!

Failure is OK!

We all want our kids to be the smartest, the best, the happiest, the kindest…….and on and on.  It is so important that they understand that they will fail at times and that is ok!  It is the lesson they learn from that failure that is so valuable.  Take this time to help them evaluate where things went wrong and discuss what they could have done differently to make it better.  However, don’t solve the problem for them.  Just be there to guide when needed.

It is also important for us, as parents, to understand it is ok for them to fail.  We have to be able to take a step back and realize they aren’t always going to be the “winner.”  Once we understand that, we are a huge help in building their self confidence.  This was hard for me as I am a competitive person by nature.  I quickly realized that my children were made differently from me and I needed to respect and nurture each of their personality traits.

Let them try numerous things.  You never know what hidden talent may arise from sampling different extra-curricular activities.  Likewise, you, as parents should try new things so that children can see their role models handing new situations as well.  My daughter has recently started boxing and as you can see it has had a positive effect on her children.

Mental Strength

This is many times referred to as “grit.”  While my husband and I were athletes, we quickly realized with our children (Karleigh in particular) that you don’t have to be an athlete to have grit.  That child was interested in so many other things in life, but we knew that whatever she set her mind on to do she would eventually accomplish it…or have a ton of fun trying!  She taught us that being good at kindness, community projects and mastering the violin were just as good of a lesson at “grit” as being a good athlete.  We just had to learn to let her follow her dreams….not ours!

I will never forget the first school orchestra concert we went to.  Our whole family went (because it is so very important for siblings to support each other).  Lauren and Eli were athletes like us so this was a very different experience for all of us.  The boredom we had to battle from them was painful.  However, when they watched their sister step on the stage and take her seat, we were all mesmerized.   Moments like these are amazing for nurturing self-esteem in children…for Karleigh as well as Lauren and Eli.  They quickly learned that the interests of each family member is important.

Boundaries ~

I was from the era that you had to remain at the dinner table until your meal was finished.  It was so agonizing!  Thank goodness for the dogs in my family that loved to sit under the table 😉.  This was a boundary that was set by my parents and we all knew it wasn’t negotiable.

I believe a good boundary set for today is no technology at the dinner table….for children AND parents.  Today’s dinner table may look a little different…maybe one parent is working late, maybe there is only one parent, maybe it is grandparents raising the kids.  However that table looks, still make it a family dinner and still set boundaries.  This is such a great time to talk, REALLY TALK about the kids’ day.  This, too, boosts self-confidence as it makes the child feel loved and cared about.

When our children were young, my husband worked late hours.  We didn’t switch to separate dinners, we moved our family dinners to later so that we could be together as much as possible.  For a long time, we also had “Sunday” dinners.  I tried to make this more of a special meal with themed dinners or special dinner settings as much as possible.  The kids got involved with this and enjoyed it as well.  As the kids got older, I let this tradition slide a bit….I wish I would have never let that happen.  However, now that we are all adults, we try to get together for “Sunday” dinners as much as possible now which is very special to us.

Conversation Starters ~

  1. What was the favorite part of your day?
  2. How were you kind/helpful to someone today?
  3. Who did you play with today?  What did you play?
  4. If you were the teacher, what rules would you have for the class?
  5. What is your favorite room in our house?  Why?
  6. If you could only keep one toy, what would it be?
  7. What do you like best about our family?
  8. What was the most challenging part of your day?
  9. Were there any instructions you had a hard time following today?

Responsibilities ~

Otherwise known as chores, responsibilities for each child is so important.  It may create extra work for you following up on spills and such, but the pride a child feels when you trust in their abilities goes a long way.  My daughter, Lauren, is amazing at this.  At very young ages, her children have been responsible for feeding the animals, cleaning their rooms, setting their clothes out, etc.  It isn’t always done perfectly, but when Max shows up to Mimi and Pappy’s in a thick velvet sport coat with shorts in the middle of summer….priceless!

Speaking of dressing, if the kids want to wear a Superman (or E.T.) costume to the grocery store…let them.  Maybe your daughter wants to go to dinner dressed as Elsa.  Who is it hurting?  In fact, it is only building their self confidence.  Check out the many benefits of role playing in my earier article Bring Back E.T. ~ Imagination and Role Playing.  Many times, the smallest things can make the biggest impact.  Besides, most people get a kick out of seeing children dressed in costumes…it may just make someone’s day!

Play Outside ~

Not only is the physical exercise so important, but so many life lessons are learned while kids are playing outside.  They have to learn to be creative and make decisions on their own, which of course, builds self confidence.  Even if you take the kids to the playground, don’t be that “helicopter” parent that stands right by them.  Sit/stand in watching distance but let them learn how to make friends and stand up for themselves when someone isn’t so nice.

It’s so hard to watch if someone isn’t being the kindest to our children, but how else are they going to learn to cope.  We are not always going to be there to fight every battle.  Now am I suggesting you let some child physically abuse your child…NO!  However, most of the time when there are struggles between children doesn’t mean it’s going to turn into some huge war!  Children will learn to stand up for each other and for themselves while playing with others.

Don’t Dismiss Their Emotions ~

When you child has had a bad day or a bad experience, DO NOT just say, “It will be ok!”  Take this time to REALLY TALK with your child and ask questions…

  • Why do you feel that way?
  • What could have been done to make it better?
  • Can you tell me more about it?
  • I’m so sorry this happened, how can I help?
  • What are you thinking about?

GREAT Children’s Book Series ~

As an Amazon Associcae I earn from qualifying purchases.

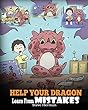
Steve Herman is a best selling children’s books author.  The My Dragon Books Series has some great books to help children with learning from mistakes, dealing with bullies, handling sibling rivalry, loving yourself and much more.  Here is a link to his book Help Your Dragon Learn From Mistakes.

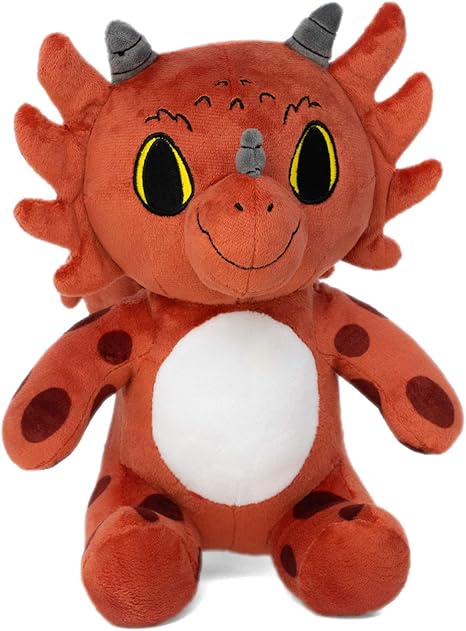
There is even a cute plush Diggory Doo Dragon Plush that kids can play along with as you read through each book.  How fun is that?

Nurturing self-esteem in children is so very important.  It helps a child thrive throughout life, teaches them coping skills and how to handle adversity.  Do everything you can to make this happen!

Much love ~

Mimi

Science Experiment ~ Cleaning Coins With Kids

There are so many things we do throughout the day that we don’t even realize have a “scientific” explanation.  Some of these things we do on a day to day basis, while others may be less common tasks.  Other times are planned just to create a learning experience for the kids.  Today we did a Science experiment cleaning  coins with the kids.

Have you stopped to wonder why some of the cleaning products work the way they do?  Do you take for granted that they just work?   (When it comes to cleaning I think I get taken for granted….anyone got an Amen?  Just kidding…I love being a StayAtHomeMimi)  Take a few minutes to think of items you clean regularly and how you could make it a learning experience for the young ones in your world.

Coin Cleaning Experiment ~

Now I am fully aware that the average person does not sit around and clean coins.  However, this is a very good place to help explain why items clean the way they do!  This is a simple experiment that encompasses quite a bit of learning and coordination.

Materials Needed ~
  • Warm vinegar – 1/4 cup
  • Salt – 1 tsp
  • Coins
  • Small bowl or jar
  • Tweezers
  • Paper towels
  • Spoon or something to stir with
Directions For Cleaning Coins With Kids ~

Warm the vinegar slightly in microwave.  Pour in salt.  Let children stir the mixture until salt is fully dissolved.  Drop coins in and watch the magic happen.  It is so much fun to watch their face as they are observing not only how the salt dissolves but also how  the solution cleans the coins.  They may notice that some coins become shiny quicker than others….why is that?

The Knitty Gritty Details ~

Depending on the age of the child you are performing this experiment with will determine how much detail you will want to give.  However, it is good for children to know that different liquids and items create different effects when mixed.   Its actually a pretty cool phenomena.  Below is a basic explanation:

Vinegar contains acetic acid, which strips the tarnish or patina on copper, thus revealing the shiny metal underneath all of the grime.  When metal (coin) touches acid (in vinegar), they neutralize each other. 

Brainstorming On Other Liquids That Could Be Used ~

If vinegar contains acetic acid, what other items contain acid as well?  Will these items clean coins too?  If they will, do we still need to use salt?  Does it have to contain acid to clean the coins?  Wow!  Can you see those gears turning in their little heads….so cool!  Let the kids brainstorm on what “cleaning agent” they should try.  Here are a few examples:

  • Ketchup
  • Lemon/Lime Juice
  • Orange
  • Dish Soap
  • Milk
  • Soy Sauce
  • Plain Old Water
  • Coca Cola
  • Juice

We only did the vinegar and salt, however, I think it would be so much fun and very educational to set out several bowls or jars and try the different ingredients to see which one works best.  This would create more of a “lab-like”  setting for a scientific experiment.  Heck, go the distance and get them some goggles and lab coats.

Check out these colorful kid-sized science goggles!

And, of course, this awesome lab coat for kids ages 2-16 years.


You can make this experiment as simple or as bougie as you wish (I have always wanted to use that word 🤣).  Obviously, the most important takeaway is that the children are engaged and excited about science!

Other Ways To Gain From This Experiment ~

I threw in the tweezers on this activity.  What a great way to work on coordination.  Max had so much fun figuring out how to pick up the coins with the tweezers.  The fun didn’t stop there though!  Once the coin was in the grasp of the tweezers, he had to move the coin from the bowl to the paper towel.  *This is definitely where goggles come in handy as the coin can splash in the liquid very easily.  

If you think you have a budding scientist on your hands, you might want to go ahead and invest in a fun kit for your little one!  This science kit is so dang adorable and includes everything you need for an inquisitive child!

Seriously, isn’t this just too cute?  It includes:

  • Lab Coat
  • Name Badge
  • 4 Large Test Tubes with Stand
  • 4 Eyedroppers
  • 3 Funnels in Different Sizes
  • 5 Measuring Spoons
  • 1 Large Measuring Cup
  • 6 Small Measuring Cups
  • 1 Plastic Beaker
  • 1 Magnifier
  • 1 Set of Tweezers
  • 1 Set of Safety Glasses
  • 1 Stirring Rod
  • 3 Color Agents
  • 1 Pack Citric Acid
  • 1 Pack Baking Soda
  • 2 Balloons
  • 20 Color Catching Sheets
  • 1 Double-Sided Activity Cards Book

Conclusion of Science Experiment ~

I have done this with the kids a couple of times.  In fact, I wasn’t planning on this activity when Max came to visit yesterday.  We were supposed to be having basketball camp with Mimi.  However, Max looked at me with those big eyes and asked, “Mimi, can we clean coins?”  Well, of course we can Max!  Obviously, he enjoyed this activity.

What I wasn’t planning on (but should have knowing my daughter’s obsession with cleaning) is Max being worried about one coin that just wasn’t getting clean enough.  “You see that dark spot Mimi?  We need to get that off of there!”  Next time I will have an old toothbrush ready for issues such as this.  This time, however, we used an SOS pad because that is what I came up with on the fly.

  • Yes, we washed his hands thoroughly right after using it
  • No, I wouldn’t necessarily suggest using this unless maybe they have gloves on
  • Yes, my cream colored chair stayed clean….whew!!!
  • Yes, THE SPOT CAME OUT OF THE COIN!

Have fun experimenting with your little ones and please, come back and let me know if you tried other methods of coin cleaning.  I can’t wait to hear about it!

Much love and learning ~

Mimi


Pen Pal Fun With Grandkids

I walked out to retrieve our mail today expecting the usual advertisements and bills.  However, as I opened the mailbox, my eyes went straight to a different piece of mail.  There was a long white envelope addressed to Mimi & Pappy.  Well,  that sure did bring a quick smile to my face!  As I began to open the letter, I had an epiphany.  It is time to start having some pen pal fun with the grandkids!

In July, I wrote this post about Grandparenting from a Distance and in that article I discussed snail mail with the grandkids.  In fact, I even admitted then that I am not very good at it but want to get better.  Well, NOW is the time to start having some fun with the snail mail and pen pals!

Letters From The Grandkids ~

This particular mail was from Max.  He drew us pictures and wanted to send them to us.  Now, keep in mind that we are very lucky grandparents that get to see the kids several times a week.  However, this should not keep anyone from sending fun letters, cards, games, jokes, etc. to the grandkids.  As we all know, everyone likes to receive a special piece of mail.  It gives you the same feeling you get when opening gifts at Christmas.  Someone took the time to personally acknowledge you.

I actually keep a folder in my office of artwork and letters they have written for us.  Each one gets labeled with their name and date on the back of the pages so they can see how their writing and picture drawing improves over time.  I also pull them out once in a while just to enjoy the love they share in each page they create for us.

Pen Pal:  A person with whom one keeps up an exchange of letters, USUALLY someone that is so far away that a personal meeting is unlikely.

Benefits of Pen Pal Fun With Grandkids ~

  • Create a close connection
  • Allows opportunity to praise the children’s artwork and writing = boosts self confidence
  • Long-lasting memories
  • Teaches correspondence skills – stamps, addressing envelopes, proper writing etiquette over time
  • Patience – in this world of everything at our fingertips, it is good for them to learn the anticipation of “waiting for something good to come.”
  • Fosters creativity
  • Improves penmanship

Fun Snail Mail Ideas ~

  • Pre-stamp and address some fun post cards and give them as a gift to your grandchildren.  This way they can correspond with you any time they want.
  • If they are old enough to practice envelope format, then give them a blank notebook/stationery and envelopes.

Include some small item with your letter to them:

  • An old picture of you
  • A picture of the two of you together
  • Several charms – one at a time so they can make a bracelet or keychain once all are sent
  • A fun drawing
  • A coloring page
  • A seek and find page – I have always loved the Highlight brand but you can also find a lot of free ones to download on Pinterest! – I especially love this Highlights Back to School Version!

  • Bookmark
  • Ask a question and tell them to reply with their answer in a letter back to you
  •  Origami
  •  Stickers
  • Send a small puzzle a few pieces at a time
  • Cut the letter in large pieces so they have to put together like a puzzle
  • Write the letter in coded ink and send special pen for them to uncover the message.  I LOVE this Invisible Ink Spy Pen set…kids will too!

  • Bible verse – you can write them yourself in your letter or use something like this fun book to send in your letter – Fun Bible Memory Book for Kids

  • Send a Hug!  – I love this idea by Becca of Who-arted.com
  • Start a Write Me Back! – Jennie Moraitis describes this fun idea in her littlegirldesigns.com blog
  • Write a letter on a deflated balloon for them to blow up and read
  • Make an origami fortune teller – We love to create our own but if you struggle in this department, here is an easy fortune teller (or cootie catcher as we used to call them) book with templates – Origami Fortune Teller Booklet with pre-printed and blank templates!

  • Create a family quiz – it would be fun do do this annually and save to look back at their answers later!

These are just a few fun ideas.  Once you get started I am sure more fun ideas will come your way.  These ideas are simple ones that can be included in a small envelope.  It is also fun, of course, to send a small gift once in awhile.  However, the bigger importance here is trying to foster a fun relationship with your grandchildren with money not being the focal point.

Keep in mind, too, that it doesn’t matter if you live far away or in the same town.  It still can be such a fun activity between grandparents and grandchildren.  As I am sitting here writing this, I am getting so excited about all the fun ideas that are forming in my head.  I am truly looking forward to having some pen pal fun with my grandkids!  (And don’t you think for a second that I won’t be involving Pappy in this fun adventure as well! 😉)

Happy letter writing to you ~

Mimi


Blackberry Festival Family Date Night

Are you trying to squeeze the last bit of family fun into the remaining days of summer?  Why not plan a family date night?  Our family headed out to Wild Blackberry Farms for the inaugural Blackberry Festival.   While it can be difficult (but oh so worth it!) to find a night that works in everyone’s schedule, this was so worth the planning of our Blackberry Festival family date night!

I’ve had many people ask me how we knew about this particular festival.  I agree that it is hard to know about every fun event around you, but it led me to look into festival informational sites.  Each state has many local resources, but I also found a couple of sites that you can search all 50 states….

Blackberry Festival Family Date Night Activities ~

U-Pick Blackberries ~

This particular festival was a smaller fare, but not short on fun family activities.  We started out with the U-pick blackberries.  I wasn’t sure how much the younger ones would enjoy this part, but they loved it!  We had a quick lesson on which berries were ready to pick and everyone headed out with their buckets.  They had so much fun searching the rows for the ripest berries!  Also important here is that it kept them entertained for quite a long time!

What was even better was they could pick down low on their own while also enjoying a little help up from the family members.

Face Painting ~

Continue reading

Cheesy Scalloped Potatoes that are Ahhh…mazing!

You may already have a scalloped potato recipe that you love.  However, do yourself and your family a favor and give this recipe a try!  Then once you try it, please come back and let me know if it is the new family favorite.  This recipe has been handed down through my family for years, and I decided to be very nice and share.  These, my friends, are cheesy scalloped potatoes that are ahhh…mazing!

It’s been a family debate over whether we should share special recipes.  One common belief is that if you keep the recipe secret everyone looks forward to you  bringing that special dish to family gatherings, right?  While this is indeed true, I am here to attest that your are still thought of when someone else makes your recipes.  I can’t tell you how many times I have made a special dish and stated to everyone, “Now you guys are going to love this because it is so and so’s famous recipe!”

Helpful Tips ~

There are a couple of different secrets I am going to share with you.  Mainly, just because I’m a nice gal! 😏

  1. This recipe is best if you cut the potato slices thicker.  You may be asking yourself, “If I make them thick, how can I ensure they will get done all the way when baking?”  There, my friend, is the first secret.  You need to parboil your slices.  Parboiling can be tricky because if you overcook them they will get too soft.  I truly can’t give you a specific amount of time needed because it depends on how many potatoes you are using.  I use the old fashioned fork test.  After about 5 minutes of boiling, I consistently and gently poke one of the potatoes with the fork to see if it is slightly soft.
  2. You are going to cook the sauce over the stove and then pour it over the potatoes in 2 layers.  Many people just layer cold cheese, however, by making a sauce you are creating a much more flavorful and saucy potato dish.
  3. Timing everything while cooking is one of the hardest things to learn for new cooks.  Once you put your potatoes on to parboil, you should start your cheese sauce.

How to Make Cheesy Scalloped Potatoes ~

Ingredients ~
  • 10-15 Medium Sized Russet Potatoes – sliced thick
  • 32 Ounce Block (2 lb) Colby Cheese -cubed
  • 2 Cans of Cream of Mushroom Soup
  • 2 Cans Milk (using cream of mushroom soup can)
  • Salt & Pepper – to taste
Directions ~
  1. Preheat oven to 350°
  2. Peel and slice potatoes.                                                                                                                                                   
  3. Parboil sliced potatoes for 10-15 minutes.  Check for softness with fork starting at about 5 minutes.  The time needed will vary according to thickness of potatoes.  You want them to be slightly soft.
  4. While potatoes are boiling cut cheese into cubes.                                                                   
  5. Mix cheese cubes, soup and milk in pan.  Cook over medium heat until completely melted, stirring occasionally so mixture doesn’t burn.                                                                                                                                                   
  6. Spray a 9 X 13 casserole dish with cooking spray.
  7. Drain potatoes.  Place half of cooked potatoes in casserole dish.
  8. Top with half of cheese mixture and salt and pepper to taste.                                                                 
  9. Layer remaining potatoes on top of cheese mixture and then top with remaining cheese.  Sprinkle again with salt and pepper to taste.
  10. Bake for 45 minutes to an hour.  We like ours with the cheese browned quite a bit so I bake it for the longer amount of time.
More Tips for those Cheesy Scalloped Potatoes that are Ahhh…mazing ~
  • If your casserole dish is filled to the top, place it on a foil lined baking sheet to catch spillage of cheese as it melts.
  • Since parboiling potatoes can be tricky to get the perfect consistency, I always insert a fork into my casserole when done to ensure they are completely cooked through.  If they still seem a bit hard but your top is browned, put foil over them and bake for 15 minutes or so longer.
  • Since you are parboiling the potatoes, there is no reason to cover with foil when first baking.  However, see bullet above for example of when you may need foil.

I get requests to make this recipe ALL THE TIME.  I sometimes feel like I should stop making them for awhile because I don’t want people to get bored with the side dishes.  However, they just keep requesting them.  This alone tells you how awesome they really are!

Also, if you are thinking that your family may not like them because it is Cream of Mushroom soup, stop thinking that right now.  If it is that big of an issue just don’t let them know what is in it.  I promise you that once you make that cheese sauce, they will have NO idea!

What’s even better is that these potatoes can be paired with so many different meat items.  In fact, they would go awesome with the Smoked Poor Man Burnt Ends that I wrote about…see that by clicking here!  Heck, there are times we warm them up the next day (that is IF there are any leftovers) and have just potatoes for dinner!

As always, good food keeps people coming back….so be sure to give this one a try!

Printable Version of Cheesy Scalloped Potatoes that are Ahhh…mazing ~

These cheesy scalloped potatoes are a family recipe that has been handed down for years.  It has a special ingredient that you don't see in most cheesy potato recipes.  This will quickly become your family's favorite go to for scalloped potatoes!

Happy Cooking ~

Mimi

Frozen Fruit Yogurt Bites

Finding snacks that are just as much fun to make as they are to eat can be challenging.  While our frozen fruit yogurt bites did not turn out exactly as anticipated, Addi, Max and Mimi had lots of fun in the kitchen and still enjoyed the end result.  This post is a tad different as I will fill you in on the right way to make these….and the wrong way! 🤣

I am notorious for just “winging it” in the kitchen.   The kids used to sit and watch at the kitchen island and marvel at how I just added a little of this and a little of that.  They have now learned that as you get more comfortable in the kitchen, it becomes easy to guesstimate while cooking.  However, sometimes one should really follow the directions.

Frozen Fruit Yogurt Bites Ingredients ~

  • 1 Cup Plain Greek yogurt
  • Handful of Frozen fruit of choice
  • 1 tsp. Honey (or more to taste)
  • Spinach (let’s get real sneaky!)

Directions ~

  • Place frozen fruit and honey (and spinach if you choose to add) in blender to puree.  We love our Ninja Personal Smoothie Blender… it makes smoothies so much easier to make.  By using the personal size, each person can choose their own fruit flavors.  Check it out here➡➡➡ Ninja Personal Smoothie blender – we LOVE it!

  • Scoop the puree into a bowl and add 1 cup greek yogurt.  Stir until well mixed.
  • Pour the yogurt mixture into a baggie (or a piping bag if you have one).  I definitely suggest a zip type baggie to alleviate any future messes.

Of course, even with a zip type baggie you can still get leakage out of the top if it isn’t sealed well.  Oh well, at least this is a recipe that is safe to eat even before you freeze!⬇⬇

  • Put in freezer for 3 to 4 hours or until solid.  These will melt fairly fast, so be sure to have them completely frozen before enjoying.

Very Important Tips ~

***Do not add water when making the puree.  This is the first step I messed up on.  I told Addi to add water to her cup to make the puree process easier.  Instead, we should have let the frozen fruit thaw a bit and NOT add water.  By adding water, the mixture came out runnier than it should have been! 

***Puree completely as small chunks will create a hole in your bag later….which you do NOT want!

***Greek yogurt helps with the consistency.  

***Let the kids use a whisk to blend.  They enjoy that so much more than a spoon and it blends better.  We started out with a spoon and switched once we realized it wasn’t mxing well.

***When letting kids help, as I highly recommend that you do, be prepared for the fact that you may not get “dots” as you originally intended.  That is ok!

***Add that spinach….it will make a very fun green color frozen yogurt bite and yet the kids won’t realize it’s coming from spinach.  Unless of course, you let them take part in the puree step as the spinach should be pureed with the fruit and honey.

End Result ~

Ok, so ours did NOT end up in the cute little button style.   I realized very early on that this step was not going as planned.  So, I put on my big girl panties and said to myself, “That’s ok!”  Afterall, isn’t learning in the kitchen part of this whole process?

Seriously, look at that determination in his face.  Who cares that they weren’t perfectly formed.  They still taste the same.  It was time for a little improvision.

We smeared that stuff around and decided to cut little squares instead.   This way, they got to use Addi’s new kid-safe kitchen knife that I talked about for her birthday post.  Did you catch that post?  If not, check it out here as I showed several great kitchen tools for kids….Great ideas for kids in the kitchen!

Does it look like she cared that her yogurt bites weren’t in the button shape?  Who can resist the happiness in that face?

Quick and Easy Version ~

While it is so much fun to create your own flavors, there is an easier version.   Using store bought Go-Gurts , snip off a small corner as mentioned earlier(do not use the precut pull tab they provide).  Proceed to squeeze small dots on wax paper and freeze until solid.  This is quick and easy!

These frozen fruit yogurt bites are a big hit with the kids and adults alike.  Everyone chooses their favorite flavors.  You can get creative and mix different fruits to make new fun flavors.  Have fun and enjoy!

Hugs ~

Mimi


The Buzz on Cicadas

I walked outside this morning and heard birds singing.  So cliche, right?   If you had the surge of Cicadas 2021 in your yard, you understand.  It’s truly the first time I have heard several birds sing at once this month.  While I am happy to have the birds and bees back in our yard, I honestly have learned a lot about cicads this time around.  Follow along for the buzz on cicadas ….and maybe some really goofy videos!

The first thing you hear anyone say about the cicadas is, “Gross!”  They are such an annoyance as well as being so very ugly…and THOSE CREEPY EYES!

Put those thoughts aside and what you actually have is a pretty cool phenomena!  Think about it!  These little critters are underground for 17 years!  Contrary to popular belief, they are not hibernating.  Cicadas keep busy feeding off the sap of trees, digging tunnels and aerating the soil while we cannot see them.  Isn’t it intersting that just as we are emerging from our homes after COVID, they too are emerging from their homes?

Nutrition for Nature ~

Aside from the noise, one of the biggest things I have noticed is my bird feeders have been empty.  Not empty of birdseed, but empty of birds.  It took me a couple of days to realize that my seed isn’t quite the delicacy that the cicadas are.  I’m assuming that after they fill up on that special appetizer they just don’t want dinner at the feeder anymore.  Now we know why parents always tell us not to ruin our appetite on chips and snacks before dinner! 😏

Basically almost every wildlife creature you can think of feasts on cicadas.  Heck, even while they are underground, “rodents” like moles eat them as well.  Afterall, while moles may be considered a rodent to many, they are actually insectivores (thus eating insects!)  As you can see, cicadas are a postive benefit to society right there just as food alone!

Slug feeding on dead cicada

Nutrition for Humans ~

Seriously?  People eat those nasty things?  The astounding answer is yes!  In this Keto diet loving world, cicadas appeared just at the right time.  They are high in protein and low in fats and carbs.  Did you create any fun cicada recipes this year?  While I think these little guys are pretty awesome, I will admit that my family had NO interest in chomping on them!

Cicada Life Cycle ~

  • Rice shaped eggs are deposited in small grooves of tree limbs
  • Young cicadas feed on tree fluids of those grooves they are in
  • Cicadas crawl from groove and fall to ground
  • 17 year cicadas are active underground for the whole amount of time
  • Cicadas emerge by digging up through ground and creating small holes

  • The outer shell of the cicada is shed

  • Wings of the cicada are inflated with fluid

  • They live their very short lifespan above ground
  • Wash, Rinse, Repeat as the saying goes!

Can you even imagine working for 17 years with no credit?  No awards, no pay raise, no pat on the back with a “good job!”  When I think of it that way, I start realizing that cicadas are pretty awesome creatures!  Keep in mind that this is the 2021 Brood X cicadas I am talking about.  There are other cicada broods, some come out every summer and some every 13 years.

90 Decibels ~

The buzz on cicada sound is that they reach up to 90 decibels.  If you did not get to experience it, let me tell you, with a yard full of cicadas, it is LOUD!

The following video was taken a week before they got to their loudest.  You will notice you can hear one or two birds in the background.  Our backyard is usually filled with the melody of many birds.  TURN YOUR VOLUME UP and listen to the video ➡➡Cicada music at 90 decibels.

So what makes that sound?  These guys are pretty big as far as insects go, but how are they SO LOUD?  I was surprised to hear that only the males make the sound.  Obviously, this is a mating call.  They flex organs in their abdomens, just under their wings.  Pretty cool!

Cicada Attack ~

What is not cool, is if you make a loud sound similar to their mating call, they will FLOCK to you!  Seriously!  I figured that out by accident.  I am a gardener and yard person by nature so I am outdoors a lot.  While cutting the grass I would have to swat away a crazy flying cicada every once in awhile.  However, when I started the leaf blower to clean up the grass clippings, I was SWARMED!  Kid you not!

I have to assume now that it was all females coming at me since I have learned that only males make the noise.  Mind you, they do not sting, but when there are bunches of them flying at you at once, you get a little stinging feeling as they all hit you at the same time.  I truly felt like I was in a new version of the Alfred Hitchhock movie, The Birds.  If only someone had been home to video me.

I immediately turned the blower on the little buggers to get them away from me.  Have you seen how long the attachments on most leaf blowers are?  They are pretty darn long, thus making it hard to get at the cicadas that are already all over me.  I turned the blower off thinking I was insane (and secretly hoping none of my neighbors were watching me!)  They all flew away.

Next, I did what everyone laughs about when watching scary movies.  You know what I ‘m talking about.  The lady walks by herself down the long dark hallway where she knows someone is hiding out to kill her.  Everyone watching the movie is saying, “You idiot, don’t go down the hallway…run!”  Well, I turned that lovely blower back on…yes I did!  Guess what happened?

The Buzz on Cicada Aftermath ~

Ok, I will tell you what happened.  Yes, they returned.  I was the idiot we all scream at and I paid the price.  However, I promptly turned it back off and the grass clippings remained on my driveway until a storm hit.

June 2021 is coming to a close and the cicadas have almost disappeared from our area.  I have to admit I actually kind of miss the little creepy guys.  Afterall, it is truly a a pretty miraculous lifecycle that is fun to learn about and teach to your children and grandchildren.   We can use their story to teach children about “coming out of their shell.”  Maybe even, “make noise when you need to be noticed.”

Some of the houses around me that got hit pretty hard may not miss them quite as much as me though.  Some of my neighbors were literally using snow shovels to clean off their driveways.   And the smell of rotting cicada carcasses leaves something to be desired.


So yes, they are creepy and loud, but they are really pretty amazing, regardless of the downside.  Besides, haven’t we always learned to look at the glass half full?  Find the beauty in all of God’s amazing creations!

The Promised Goofy Video ~

I’m letting you all in on the goofy side of Mimi….well those of you who know me know I’m usally always pretty goofy.  I decided we needed a little update to The Birds movie with my version of The Cicadas 2021…click the link and enjoy! Cicadas attacking

And if you want to have a little memento from this special time, Check out these cool cicada earrings!💚

Hugs~

Mimi


Outdoor Griddle Fun for Father’s Day

IT’S NOT TOO LATE!!!!  Run, do not walk, to get Dad an outdoor griddle for this Father’s Day.  Maybe you are saying, “Mimi, I am not a procrastinator!  I already have Father’s Day covered!”  That’s ok, keep this idea in mind for the next time you need a great gift idea.  However, our family is definitely going to have some outdoor griddle fun for Father’s Day this year!

My son brought this perfect idea up about a month ago.  I casually mentioned it to my amazing chef of a husband.  I have to admit, at first he totally pooed pooed the idea.  Being the loving family that we are, however, we knew not to listen to him.  However, the joke was on us because exactly one week before Father’s Day, my loving husband decides he is going to go buy himself an outdoor griddle grill!  What?!?!

It’s Not Father’s Day YET! ~

Yes, you are correct!  He went ahead and bought it himself!  At first we were all frustrated, but seeing how happy he is made the frustration fade quickly.  The man is happiest with a grill and a beer!  Besides, we decided there are now a slew of accessories he will now need for this new type of grill.  So….many…..gift…..ideas!

Click here for a MUST HAVE set of accessories for the griddle!

Cast Iron Grill Press is another necessity!

Hard Lid Cover is a DEFINITE must if you purchase one without a lid attached!

All in all, I was personally glad that he went ahead and picked out the one that he wanted.  He purchased his at Cabella’s, however, you can find them at most home improvement stores and, of course, on Amazon.  As you can see above, it really didn’t ruin the gift idea for the kids as there are so many accessories available for the MANY different types of meals you can cook on this awesome grill!

Things to Consider When Purchasing ~

There are many features you will need to consider when deciding on which outdoor griddle you want:

  • Number of burners (Brad wanted 4)
  • Attached lid or not
  • Sturdiness of the whole unit
  • Drain hole in upper left front corner (for easy access to remove the grease)
  • Sturdy shelving on both sides

Pinterest Anyone??? ~

You can be sure that I will have a new Pinterest Board set up by the end of the day today.  There are so many fun ideas just waiting to be created on this grill!  The first night we did smashburgers (as you can see from the pics).  Wow!  Those were AMAZING!

Tonight we are doing breakfast for dinner.  We are huge lovers of the Waffle House (very low cal, I know! 😉).  Now Brad can recreate all of our favorites right here at home!

Do you follow me on Pinterest yet????  Mimi~A Great Name for Grandma Pinterest Ideas can be found here!  I am on Pinterest daily looking for new ideas from grandparenting to cooking to gardening and more!  Do you have a Pinterest account?  Drop your name in the comments below….I would love to follow you as well!

How Is This Grill Different?~

There are a lot of accessories available for the traditional gas and charcoal grills that allow you to do pretty much the same thing.  Believe me when I say, we own most of those accessories!  For instance, there is a griddle top that you can place on your  gas or charcoal grill.  If you do not do a lot of grilling, this is perfect!

Griddle top for Gas and Charcoal Grills

We bought him one of these a few years ago, and we have gotten great use out of it.  It was an earlier Father’s Day gift along with this fun breakfast set.  One of the things I love most about cooking breakfast outdoors is the clean up is SO much easier!

Check out the fun griddle breakfast set here!!!

Do We Still Love Our Traditional Grills? ~

The answer is definitely YES!  As stated earlier, Brad is happiest with a grill and a beer!  He has a deck, “The Penarve,” dedicated to all of his grills.  It got so crazy that we had to give it a name (thanks Kelly W 😉 for coming up with the winning name!)  My personal dream is that some day Brad will open a restaurant.  The tough choice is what name should he give to his restaurant?

  • Pappy’s
  • The Penarve

Cast your vote in the comments…I would love to hear your opinion!  Maybe you have a different name idea…let me know!

For now, he will keep doing his magic on the Penarve at the Latinovich homestead!  Stay tuned for some great cooking ideas because you KNOW he will be creating those wonderful meals and I will be sharing them!

Happy Father’s Day to all you wonderful fathers!  Enjoy!

Mimi


Cooking Fun with Grandkids

I got the best phone call the other day!  Picking up my cell phone, I expected to hear my daughter on the other line.  To my surprise, it was my sassy six year old granddaughter, Addi.  Excitedly, she says, “Mimi, I’m making dinner tonight.  Would you like to join us?”  Are you kidding me?  Of course I do!  I’m not missing out on a night of cooking fun with the grandkids!

What was on the menu you ask?  We were served mini pot pies/shepherd’s pies and a strawberry rhubarb tart.  Wow!  It was delicious!


Let’s back up to Addi’s birthday earlier this year.  We always like to find one special “big” gift to get for the kids.  It doesn’t necessarily have to be big in size, but it needs to be extra special!  A lot of time is spent thinking and shopping for that perfect gift.  Addi has recently become fascinated with the kid’s cooking shows so ideas started formulating around that.

The Birthday Gift Idea ~

I have enjoyed watching various bakeoff shows with the grandkids.  Have you ever watched them?  Let me tell you, that they are nothing short of amazing.  I truly would have never realized that kids can cook as “professionally” as they do…even better than a lot of us adults!  Through this the birthday idea came to life!  Addi needed all of her own kitchen tools.

We have already done some cooking with Addi over the past couple of years, so I knew her passion for time in the kitchen wasn’t going anywhere.  After watching the different episodes of Chopped Junior and MasterChef Junior, we realized Addi was ready to step up her game a bit.

Now, first of all my thoughts went  to purchasing  Addi her very own kitchen prep and storage rolling cart.  I will admit that I spent time shopping for the best one.  I then realized I should probably chat with my daughter about this.  Afterall, this would take up a lot of space in the kitchen, and I had to admit to myself that it is her kitchen and not mine.  So I scaled my gift idea down a bit so that Lauren could keep her kitchen in tact.

Cooking Basket Gift Items ~

These are a win/win…Addi was able to cut food by herself and we felt safe with her doing so!

 One thing Lauren and I noticed, having the tongue out while cooking is a MUST for any great chef! 🤣

Cooking Fun with Grandkids ~

As you can see, we tried a variety of different kitchen gadgets.  This will definitely be a gift that we can add on to in the years to come.  Fostering a love of cooking in kids has so many benefits…to the kids as well as the adults.  The important thing to remember is it’s going to get messy…and that’s ok!  If kids become afraid to mess up they will lose the passion to learn.

In an earlier post, I wrote about a great recipe book software.  You create your own cookbook…family, church, neighborhood.. or whatever you choose.  The first book I created was Pappy on the Penarve…Check out my fun cookbook here!  My intention was to make an “Addi” cookbook next…epic fail!  However, I am still going to make it and include new recipes for her to try plus old ones that she has made with the family.  What fun memories!

Make time to have some cooking fun with the grandkids….you will be glad you did!

Enjoy!

Mimi


Rum and Coke Mini Desserts

As a child, we had dessert every night after dinner.  Some were simple, like Jell-O with whipped cream while others were more intricate desserts.  I loved when mom made Coca Cola cake with chocolate fudgey icing.  It was so delicious!

However, I don’t remember mom adding those cute little rum bottles on top….hmmmm!?!  Well, it may not be a family dessert, but these rum and Coke mini desserts are definitely one to add to your entertaining menu!

I used a variety of glasses to make the presentation more exciting.  Get creative!  When I presented this fancy dessert, it definitely made a great impression.  Seriously, doesn’t this picture make you want to dig in?  If you answered yes, then hold on….because they aren’t even finished yet!

But first, check out some of these fun serving ideas…

This post and its photos may contain affiliate links. As an Amazon associate I earn from qualifying purchases. If you make a purchase through these links, I may receive a small commission at no extra cost to you!

Use some footed dessert bowls like these…

These are so beautiful with the scalloped edges…

Step 1 – Cake Ingredients ~

  • 1 Cup Coca-Cola
  • 1/2 Cup Cooking Oil
  • 1 Stick Butter
  • 3 Tbsp. Cocoa
  • 2 Cup Sugar
  • 2 Cup Flour
  • 1/2 tsp. Salt
  • 2 Eggs
  • 1/2 Cup Buttermilk
  • 1 tsp. Baking Soda
  • 1 tsp. Vanilla

Baking Directions ~

Preheat oven to 350°.  Prepare a 9″ X 13″ cake pan with cooking spray.

Combine sugar, flour and salt in large mixing bowl and set aside.  In a saucepan, mix Coke, cooking oil, butter and cocoa.  Bring this mixture to a boil.  Pour the Coke mixture over the flour mixture and beat well.  Add eggs, buttermilk, baking soda and vanilla and combine thoroughly.

Pour cake mixture into 9 X 13 pan and bake for 20 to 25 minutes.  (Insert a toothpick to check for doneness)

*** TIP ~

Substitute vinegar and milk for buttermilk if you do not have buttermilk on hand.  Put 1/2 Tbsp. white vinegar in measuring cup and then pour 1/2 cup milk on top of it.  Mix and let sit a minute.

*** TIP ~

If you do not want to make the cake from scratch, you can use a chocolate cake mix instead.  Use the following ingredients for this easier method:

  • 1 Box Chocolate Cake Mix
  • 1/2 Cup Vegetable Oil
  • 3 Large Eggs
  • 1 Cup Coke

Mix thoroughly and bake for 25 minutes.  Insert toothpick to check for doneness.

Step 2 – Instructions After Baking ~

Whichever cake method you choose to use, let it cool completely after baking.  Set your desired serving dishes out for easier preparation.  Cut the cake into 1″ cubes and place 4 to 6 cubes into each glass, depending on the size of the serveware you are using.

Step 3 – Cream Cheese Frosting Ingredients ~

  • 8 oz. Cream Cheese – Softened
  • 6 Tbsp. Butter – Softened
  • 3 3/4 Cup Heavy Cream
  • 3 Tbsp. Rum
  • 1 tsp. Vanilla
  • Caramel Syrup
  • Pinch Kosher Salt

Step 4 – Cream Cheese Frosting Directions ~

Beat cream cheese, buter and sugar in Kitchen Aid stand mixer or in large bowl with hand mixer until fluffy.  Add cream, rum, vanilla and salt.  Beat until a stiff peak forms.

Step 5 – Layering Frosting on Rum & Coke Mini Desserts ~

Place a heaping tablespoon or two (depending on size of serving dish) of cream cheese rum frosting on top of chocolate squares.  Repeat with another layer of chocolate squares and frosting.  *If you are making these yummy desserts ahead of time, place in refrigerator at this point.

Step 6 – Final Steps ~

Drizzle caramel syrup over top of each dessert and then top with mini bottle (1.7 ounces) of your favorite rum.  Please note, you may not want to use the entire bottle of rum if the glass is a smaller size (like martini glass pictured in this article).  If the rum is too excessive, it will overpower the delicious flavor of all the ingredients.  Therefore, I chose to keep the lid on the mini bottle and let each person add to their desired taste.

********************************************************************************************************************

*** NOTE ***

If you want to make you Coca Cola cake “family friendly,” top it with this fudgey icing instead:

  • 1 stick butter
  • 2 1/3 Tbsp. cocoa
  • 6 Tbsp. milk
  • 1 tsp. vanilla
  • 3 3/4 cup powdered sugar

In a saucepan, cook butter, cocoa and milk until butter melts.  Add in remaining ingredients and beat until thoroughly mixed.  Spread on cake.

******************************************************************************************************************

Don’t Forget to Save/Pin this Recipe!!!

I kid you not, this rum and Coke mini dessert recipe is one you want to add to your recipe favorites.  In fact, be sure to pin this on your Pinterest board as well for easy access!


« Older posts Newer posts »